.gif)
Note: The overlay areas are colour filled for ease of identification in the Map Window screen-shots. Normally the areas to be plotted would not be filled.
Consider the following scenario; two Areas are overlaid as Area 1 and Area 2 to 5000-os.ecw, as shown below:
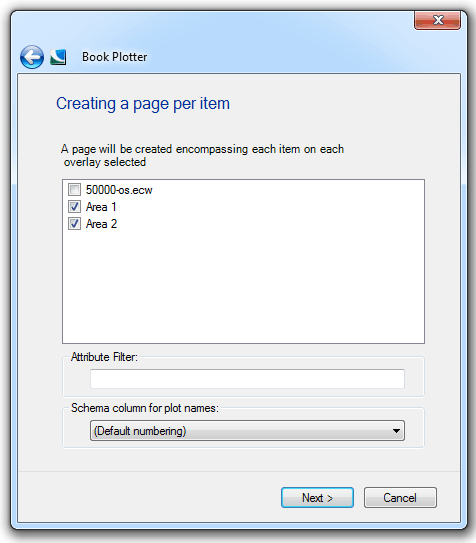
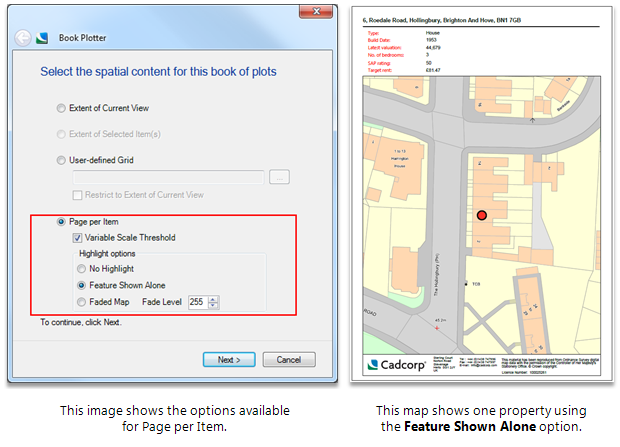
Selecting Area 1 and Area 2 in the Creating a page per item dialog will create plots for the selected overlays:
Click Next.
The Set the format and layout of the plots dialog will be displayed: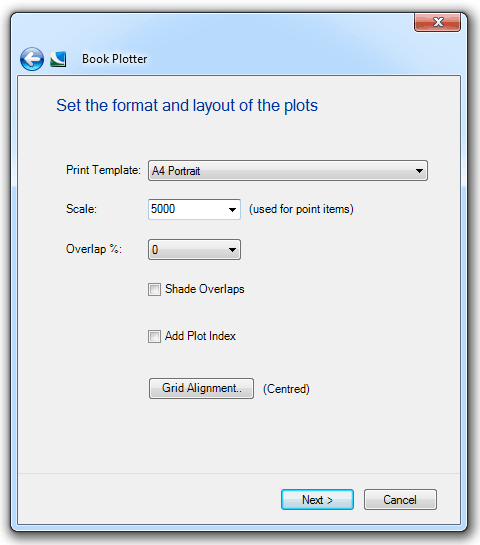
In this example the following options and settings are entered in the Set the format and layout of the plots dialog:
Print Template: A4 Portrait
Scale: 5000
Overlap %:not applicable to Page per Item
Shade Overlapsnot applicable to Page per Item
Add Plot Indexnot applicable to Page per Item
Grid Alignment - Default (Centered)
Click Next.
The Select the output types(s) dialog will be displayed: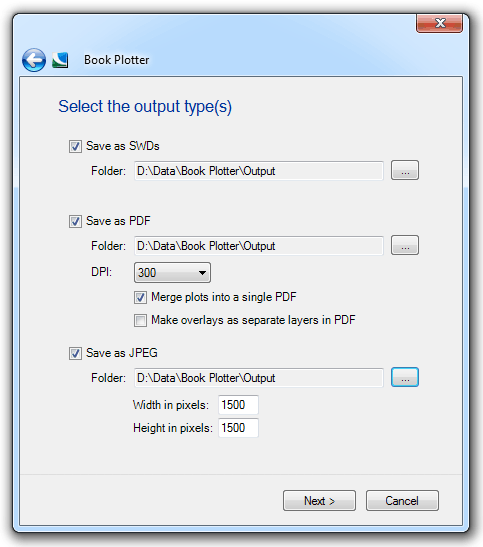
Select the options required in the Select the output types(s) dialog, in this example:
Save As SWDs - selected and destination folder chosen using the ... button
Save as PDF - selected and destination folder chosen using the ... button
DPI: - selected as required from the drop-down box
Merge plots into a single PDF - selected
Make overlays as separate layers in PDF - not selected
Save as JPEG - selected and destination folder chosen using the ... button. The image width and height in pixels are entered, or the default values accepted.
Click Next.
The Make the Book Plots dialog will now be displayed and will state how many sheets will be created.
Click Finish.
The Make the Book Plots dialog will show a green progress bar as the book plots are generated.
The Map Window display will be in the following form:
.gif)
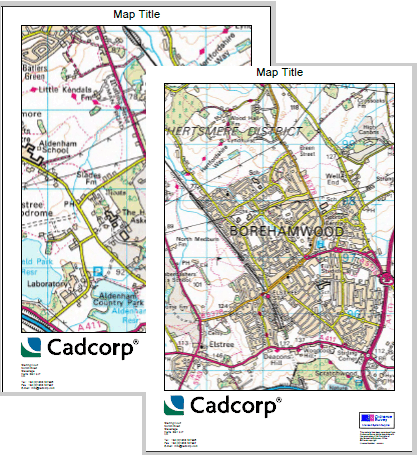
Note: Selecting Save as PDF in the Select the output type(s) dialog and using an A4 portrait template will typically produce the following pdf version:
Selecting only Area 1 in the Creating a page per item dialog, selecting Save as JPEG in the Select the output type(s) dialog and using an A4 landscape template will typically produce the following jpeg version:
Consider a map and an overlay with a number of Polygon Items:

Entering _sy#>_sx#=0 in the Attribute Filter text box, and selecting a Portrait template, will plot only the items with a height greater than their width: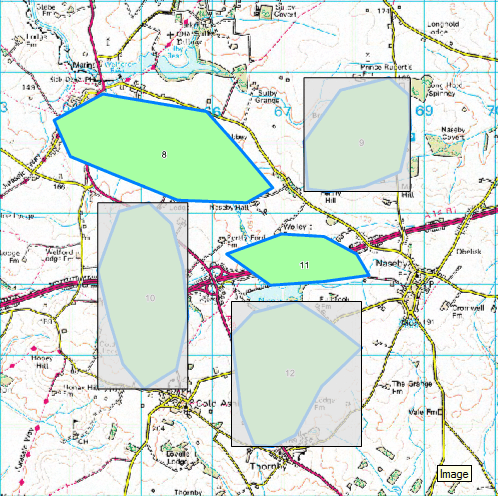
Entering _sy#>_sx#=-1 in the Attribute Filter text box, and selecting a Landscape template, will plot only the items with a width greater than their height: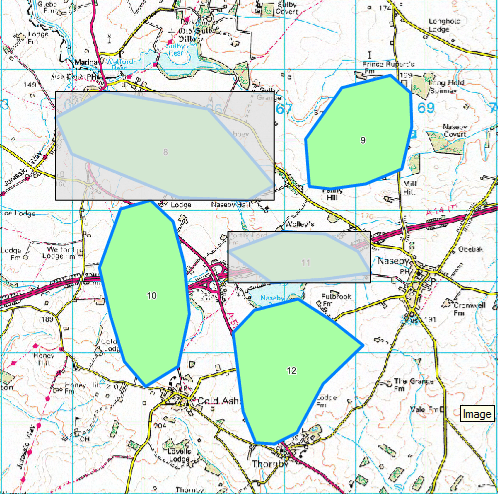
To create plots of all Items two plots must be created, one with each Attribute Filter value.
Consider the following as an example;
You can create more informative maps by including attribute information on your prints.
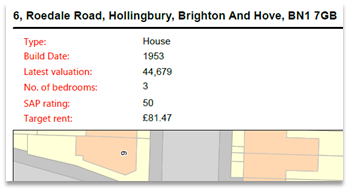
To do this you will need to edit the print template you will use for Book Plotter, go to by going to File>Print Template>Recall Print Template and select the template to edit.
With the print template open go the Create tab and select Point from the Text group. Choose how you want to style the text and enter a description of the attribute in the text box. It is not important what you type in here as this text will not appear on the final print, but it can act as a prompt to remind you of the information this text item will show.
Click OK and place the text item on the print template (in the Map Window). With the item still selected, right click the mouse and select Properties. In the Schema tab you will see a property called Prompt, and next to it you will see the Value property which will be empty. This is where you must type in the schema name of the attribute you want to show on the map, prefixed with ppi: i.e. ppi:Address$ or ppi:TargetRent#:

When you have added all the point text items to your print template go to File>Print Template>Store Print Template to save the new print template.
After storing print templates you need to go to the Named Object Libraries tab, open up your NOL file, copy and paste the new print template from within the (temporary) library to your NOL and click Save. If you do not save you will lose all your changes when you close SIS.
Send comments on this topic.
Click to return to www.cadcorp.com
© Copyright 2000-2017 Computer Aided Development Corporation Limited (Cadcorp).