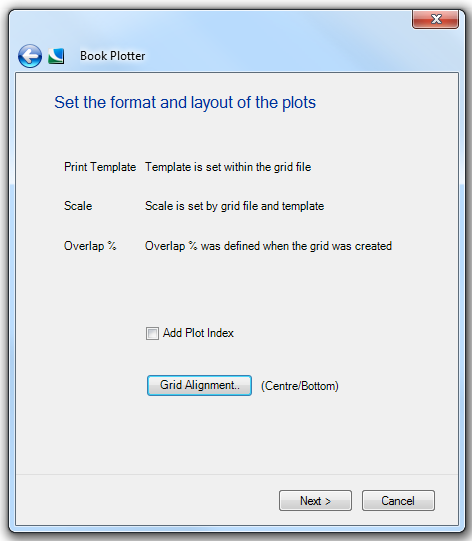
Print Template - Select the required template from the drop-down box.
Scale - You will notice when you choose a User-defined Grid that the Scale option states Scale is set by grid file and template and cannot be changed. The scale of the map on the resulting Book Plotter pages is automatically determined by fitting the content of a cell into the Map Frame on the chosen template.
To achieve a display scale of 1:1250 where the grid cell size is 250m x 150m, this would require a Map Frame item of 200mm x 120mm on the print template. To calculate the required Map Frame size, divide the grid cell size by the required scale of output:
Cell Width ÷ Scale = Map Frame Width
Cell Height ÷ Scale = Map Frame Height
Example:
250m ÷ 1250 = 0.2m (= 200mm)
Overlap % - When an overlap percentage is set, the scale of the image within the Map Frame item on the template is reduced so each page shows the extent of the grid cell plus the margin of overlap.
If you intend specifying an overlap percentage, the calculation above will be slightly different. For example, to achieve a display scale of 1:1250 as above, but with a 5% overlap, the Map Frame item will need to be 10% larger to include the overlap area:
Cell Width ÷ Scale x 110% = Map Frame Width
Cell Height ÷ Scale x 110% = Map Frame Height
Example:
250m ÷ 1250 x 1.1 = 0.22m (= 220mm)
Add Plot Index - Check this tickbox to add a plot index to each page to indicate the position of the current page on the grid. An plot index grid will also be created as a new overlay in your map view in the Map Window which can be used to create an index page and feature gazetteer.
Grid Alignment - Click to display the Grid Alignment dialog to allow you to specify Horizontal Alignment (Centre, Left, Right) default is Centre and Vertical alignment (Middle, Top, Bottom) default is Middle.
Click Next.
The Select the output type(s) dialog will be displayed:
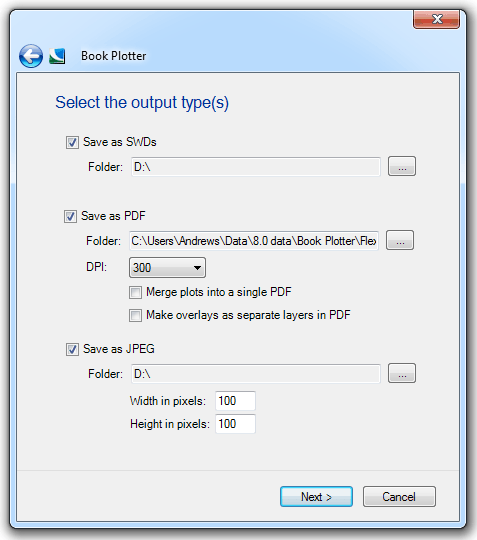
Save as SWDs - If you chose to save the output as SWDs, browse to the folder where you want to store these files. If you are running Windows 7, or later, you will also have the option to create a new folder if required. After setting the destination folder, click OK.
Save as PDF - Similarly, if you chose to save the output as PDF files, you will be prompted to select the destination folder. For PDF documents you can choose the resolution of the exported document in DPI (Dots per inch) in the range 15 to 1200 (the smaller the number the smaller the file size shall be).
Further PDF options available are:
Merge plots into a single PDF - This option produces a single PDF for the grid with all plots being drawn on one PDF document rather than creating an individual document for every plot.
Make overlays as separate layers in PDF - This option allows users of Adobe Reader 6 and above to turn layers on and off.
Save as JPEG - JPEGs can be produced by specifying a destination folder as well as the width and height in pixels that the resultant images shall be. The smaller the number you enter the smaller the file size will be however the resolution of the resultant image will not be as good.
Each JPEG file has an associated JGW file (ASCII file containing information for geocoding image data).
On completion click Next.
The Make the Book Plots dialog will be displayed.