
Creating a Python GisLink Add-In Project
Beginning a Python GisLink Project
Adding a GisLink Program Object
Accessing GisLink Methods and Attributes
Working with the Ribbon Interface
Adding a command to the Map Window Context Menu
As from SIS 8.0, In-Process GisLink applications can be written in the Python programming language.
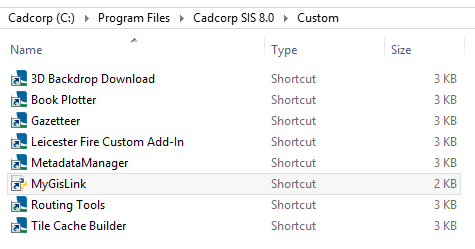
There are two required components to a Python GisLink: A valid Python script using the Cadcorp “gislink” library and a shortcut pointing to the script file in the “Custom” folder of the local application folder, e.g. “C:\Program Files\Cadcorp SIS 8.0\Custom”.
The shortcut allows the script file to be located anywhere, but to maintain simplicity GisLink applications are placed in their own project folder in the “Addins” folder.
e.g. “C:\Program Files\Cadcorp SIS 8.0\Addins”.
Additional files such as icons or config files should also be saved to this folder.
Create a folder in the SIS 8.0 “Addins” folder with the name of your application and inside it create a single “.py” file.
Create a shortcut to this Python file and place it inside the SIS 8.0 “Custom” folder.
A valid Python GisLink script requires several constants and a GisLink class which inherits from “gislink.Program”.
cadcorp_version = '1.0'
cadcorp_vendor = 'Cadcorp'

import  gislink
# os.path is not a pre-requisite library but is used for utility functions
import  os.path

class MyGisLinkApp(gislink.Program):
    def   __init__(self):
        app_name = "My GisLink App"
        super().__init__(name =   app_name)
The Python help() command can be used with GisLink library classes in the SIS 8.0 Developer console to determine which attributes and methods can be called or set.
The list of programming variables used by the SIS API can be accessed by calling “help(gislink)”.
In-Process GisLink applications are loaded to the “Applications” tab of the SIS 8.0 user interface.
The class has a ribbon group created by default (self.application.ribbon_group).
The ribbon group is the object we add individual UI components to. The ribbon group’s label can be changed by setting the “text” attribute on the object.
ribbon_group_text = "Ribbon Group Text"

self.application.ribbon_group.text = ribbon_group_text
Regular buttons, checkboxes, labels, separators and launch buttons can be added to the ribbon group.
To add a regular button with a click handler:
# In the GisLink __init__ function
# Create the Button Object and set a few attributes
        self.btn = gislink.RibbonButton(text="Text",description="Description",help="Help")
        self.btn.always_large_image = False
        self.btn.large_image = True

        # Sets button icon to "MyIcon.ico" file located in the same folder as the Python file
        self.btn.icon = os.path.join(os.path.dirname(os.path.abspath(__file__)), "MyIcon.ico")

	# Add the click handler. The method has been defined below
        self.btn.click.add_handler(self.on_click_do_API_command)

	# Add the button object to the ribbon group
        self.application.ribbon_group.add_control(self.btn)

def on_click_do_API_command(self, event):
		# API methods can be accessed from the event object in a click handler method.
		event.map_manager.DoCommand("AComShowProgramWindow")
 local.png)
A Menu Item can either be directly added to the SIS Map Window context menu or to a pre-existing Menu Item object as a nested sub-menu.
        # Create the parent menu item
        self.parent_menu = gislink.MenuItem("My Context Menu Parent")

        # Add menu item to the context menu
        self.application.context_menu.items.append(self.parent_menu)

        # Create the nested menu item
        self.nested_menu = gislink.MenuItem("My Nested Menu")

        # Add nested menu item to parent menu item, rather than root context menu
        self.parent_menu.items.append(self.nested_menu)
SIS commands fire triggers which can be monitored by GisLink applications, and can be viewed in the Developer Control bar.
To add a trigger to your Python GisLink declare a Trigger Handler to register a function to a trigger. When you are not using the trigger it is important to remove the handler.
      # Inside the GisLink __init__ function
self.application.add_trigger('AComSnapX::End', on_trigger_do_API_command)

    def on_trigger_do_API_command(self, event):
        # Save the SWD
        event.map_manager.SwdSave()

        # Remove the trigger
        self.application.remove_trigger('AComSnapX::End', on_trigger_do_API_command)
It is possible to create custom GUIs for GisLink addins using the Python library Tkinter.
It is recommended to extend the ‘tkinter.Tk’ class, passing a SIS GisLink object to its __init__ method in order to access SIS API commands.
Your extended tkinter.Tk class should have its ‘mainloop’ method called by a GisLink event handler, passing it the GisLink event object.
import  tkinter

...

      # Define GUI launch button (in GisLink class __init__)
        self.btn2 = gislink.RibbonButton(text="GUI Launcher",description="Description",help="Help")

        self.btn2.click.add_handler(self.on_click_launch_gui)

        self.application.ribbon_group.add_control(self.btn2)

      def on_click_launch_gui(self, event):
        # Launch GUI (class code below)
        gui = MyGisLinkGUI(event.map_modeller)
        gui.mainloop()


# Custom GUI class, extends tkinter.Tk
class MyGisLinkGUI(tkinter.Tk):
    def __init__(self, sis):
        super().__init__()
        self.sis = sis

        # Force our GUI to top window
        self.wm_attributes("-topmost", 1)


        # Grab some data from the SIS API
        label_text = "SIS Build Number: " + str(self.sis.GetProperty(2,0,"_BuildNumber&"))


	 # GUI component definition
        self.label = tkinter.Label(self, text=label_text)
        self.label.pack()
It is possible to add your own Python modules to GisLink applications. This can be accomplished in two ways:
      cadcorp_version = '1.0'
      cadcorp_vendor = 'Cadcorp'

      import gislink
      import sys

      sys.path.append("C:\\MyModule")


      import MyModule
Send comments on this topic.
Click to return to www.cadcorp.com
© Copyright 2000-2017 Computer Aided Development Corporation Limited (Cadcorp).