The Applications tab contains the Add-In programs that have been added to your SIS installation. Profiles may be set up so that only the Add-Ins pertinent to a particular Profile are shown.
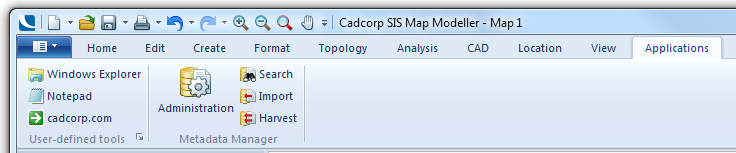
On initial start-up the Applications tab will contain the User-defined tools group:
The above screen shot includes the Cadcorp Metadata Manager which can optionally be included in the SIS installation, see the Installation topic.
By default this tab will include Windows Explorer, Notepad and the link to cadcorp.com.
Further tools can be added to the User-defined tools group. To do this click the small arrow button, which will highlight in yellow, in the bottom right-hand corner of the User-defined tools group:
The Options dialog will be displayed:
If, for example, you want to add Microsoft Word to the group click the Folder icon in the Menu contents bar:

A text bar will be shown in the main pane. Enter Word in this bar (any term can be used here as it is only for your own reference).
In the Command box enter the executable to start the program, i.e. WINWORD.EXE, for Microsoft Word.
Note: Enter the full path of the program to ensure the correct icon for the application is used in the tab, i.e. for Microsoft Word enter C:\Program Files\Microsoft Office\Office14\WINWORD.EXE.
The Arguments box is optional and is the name of the document to open if required.
Note: If a document name entered in the Arguments box contains spaces insert the file name in quotes, i.e. "My New Test Plan.docx". If the path name entered in the Command box contains spaces this does not require quotes.
Initial directory is the location of the document entered in Arguments.
The order that the tools are displayed in the User-defined tools group can altered by clicking the up/down arrows in the Menu contents bar.
To remove any tools from the User-defined tools group, highlight the tool to be removed in the main pane of the Tools tab and click the red cross to delete it from the tab.
Click OK when complete.
Changes made in the Tools tab will be saved in the options database so that they will be remembered when SIS is restarted.
If Microsoft Excel is also added, using the same procedure, the Applications tab would appear as below:

Add-Ins are programs designed to enhance the functionality of SIS. If a number of these Add-Ins are installed it is possible for the Applications tab to become very crowded. One method to prevent this is to create Profiles so that only Add-Ins pertinent to a particular Profile are shown.
Profiles can either be added to an existing SIS installation or, created during the installation procedure.
Create a subfolder (or set of subfolders) in the 'Custom' folder. The Custom folder is typically located in:
C:\Program Files (x86)\Cadcorp SIS 8.0\Custom
Taking as an example a customer with the following User Profiles:
The SIS installation may have the following Add-Ins installed:
In this case create three subfolders within the Custom folder:
Move and copy the shortcuts in the Custom folder as follows:
General users want the Routing Tools Add-In, so leave the Routing Tools shortcut under Custom.
Crime users also want the Routing Tools Add-In, so copy the Routing Tools shortcut to the Crime subfolder. They also want Advanced Boolean and Crime Analysis Suite, so move these two shortcuts to the Crime subfolder.
Housing users also want Routing Tools, so copy the shortcut to the Housing subfolder. This group also needs Housing Toolkit, so move this shortcut to the Housing subfolder.
Reproduction users want Book Plotter and Print Workshop, so move these shortcuts to the Reproduction subfolder.
The following table shows the new shortcut arrangement:
The third column in the above table shows the amendment required for the SIS Icon Shortcut Properties, as follows:
In the SIS Icon Shortcut Properties in the Target text box add (space)--Profile:[subfolder name] to the end of the text and click Apply.
Notes:
--Product:MapModeller --Profile:Housing

Using this example the amended SIS Icon Shortcut Properties Target entry for the Housing users will be:
"C:\Program Files\Cadcorp SIS 8.0\Cadcorp.SIS.Loader.exe" Cadcorp.SIS.exe —Product:MapModeller --Profile:Housing
Where (space)--Profile:Housing has been added.
Starting SIS from this shortcut will now only show the Add-Ins corresponding to the specific User Profile. For example using --Profile:Housing will only show the Routing Tools and Housing Toolkit Add-Ins.
During the SIS installation procedure the Destination Folder and Advanced Options dialog will be displayed:
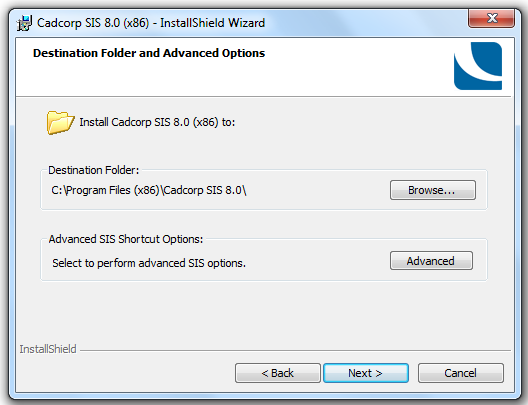
Select the Advanced SIS Shortcut Options - Advanced button.
The Advanced SIS Shortcut Configuration dialog will be displayed:
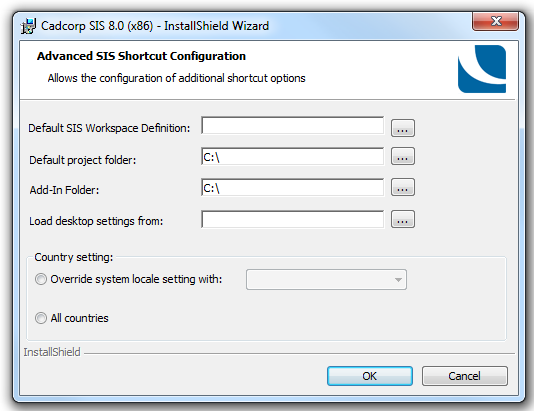
In the Add-In Folder option navigate to the chosen Custom subfolder (i.e. Housing).
Continue with the installation (refer to the Installation section of this online Help for full installation details). On completion of the installation examine the SIS Icon Shortcut Properties, you will see:
"C:\Program Files\Cadcorp SIS 8.0\Cadcorp.SIS.Loader.exe" Cadcorp.SIS.exe --Product:MapModeller
--profileC:\Program Files (x86)\Cadcorp SIS 8.0\Custom\Housing\ --Country:*
Delete the underlined portion of the line and add:
(space)--Profile:Housing
The line should now be:
"C:\Program Files\Cadcorp SIS 8.0\Cadcorp.SIS.Loader.exe" Cadcorp.SIS.exe --Product:MapModeller --Profile:Housing
Starting SIS from this shortcut will now only show the Add-Ins corresponding to the specific User Profile. For example using a shortcut with --Profile:Housing at the end of the target will only show the Routing Tools and Housing Toolkit Add-Ins.
Repeat this procedure for the Crime and Reproduction profiles.
Send comments on this topic.
Click to return to www.cadcorp.com
© Copyright 2000-2017 Computer Aided Development Corporation Limited (Cadcorp).