Your first GisLink application
Right click HelloGisLink (in the Solution Explorer panel) and select Add > Select Class…
In the Name field enter the class HelloWorld – click Add.
Now add some imports to the HelloWorld class:
Imports Cadcorp.SIS.GisLink.Library
Imports Cadcorp.SIS.GisLink.Library.Constants
Imports System.Windows.Forms
Below the imports and before your HelloWorld class add the following attribute (during start up SIS Desktop looks for this attribute to load your Addin.)
<GisLinkProgram("HelloGislink")> _
Now add the following code inside your HelloWorld Class:
Public Shared APP As SisApplication

    Private Shared _sis As Cadcorp.SIS.GisLink.Library.Desktop

    Public Shared Property SIS As Cadcorp.SIS.GisLink.Library.Desktop
        Get
            If _sis Is Nothing Then _sis = APP.TakeoverManager
            Return _sis
        End Get
        Set(ByVal value As Cadcorp.SIS.GisLink.Library.Desktop)
            _sis = value
        End Set

    End Property
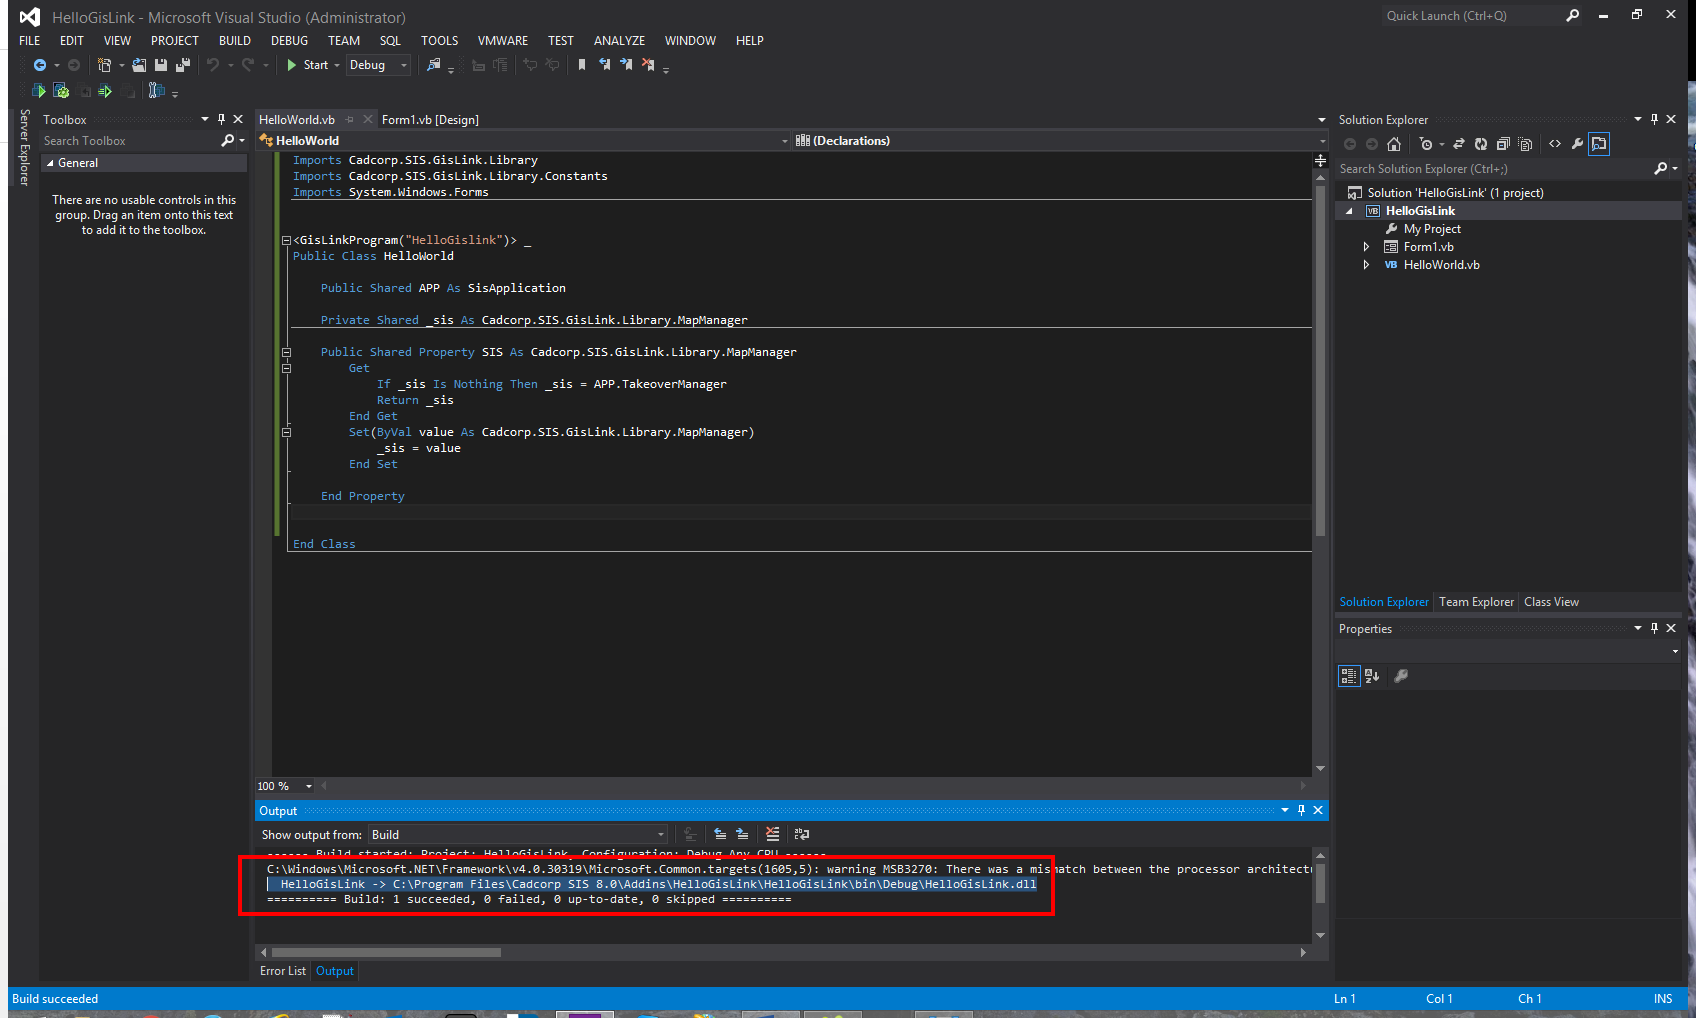
The code will appear as below:
Imports Cadcorp.SIS.GisLink.Library
Imports Cadcorp.SIS.GisLink.Library.Constants
Imports System.Windows.Forms

<GisLinkProgram("HelloGislink")> _
Public Class HelloWorld
    Public Shared APP As SisApplication

    Private Shared _sis As Cadcorp.SIS.GisLink.Library.Desktop

    Public Shared Property SIS As Cadcorp.SIS.GisLink.Library.Desktop
        Get
            If _sis Is Nothing Then _sis = APP.TakeoverManager
            Return _sis
        End Get
        Set(ByVal value As Cadcorp.SIS.GisLink.Library.Desktop)
            _sis = value
        End Set

    End Property

End Class
This code does not execute anything visible but it forms the foundation of your GisLink app.
- Select the Build drop-down menu – Select Build Solution.
- If the build fails, go back and double-check all steps.
- If the build succeeds, find the HelloGislink.dll.
- The General tab screen will show the location of the dll:

- Select HelloGislink.dll
- Right-click and select Create shortcut. Copy this shortcut into the Custom folder located in the SIS installation folder.
- This is the conventional way of managing GisLink applications in SIS Desktop.
