Editing Brushes
Changing the overlay Brush
Each overlay is automatically assigned a brush called the overlay Brush (By Overlay). To change the overlay Brush:
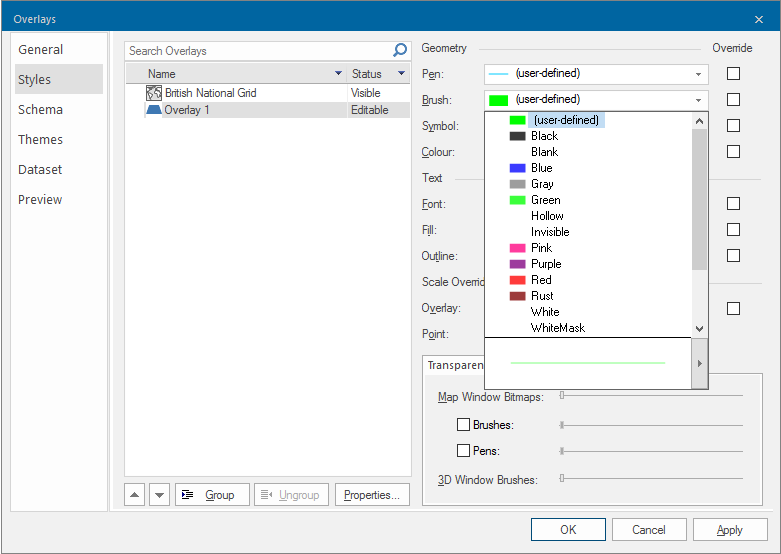
- Open the Overlays dialog and select the Styles tab.
- Select the overlay for which you want to change the Brush settings.
- Double-click on the required Brush in the drop-down list.
- Click OK. This changes all graphics on that overlay which use the (By Overlay) Brush to the Brush you have just chosen.
Forcing the Brush of all graphics on an overlay
- Display the Overlays dialog and select the Styles tab.
- Select the overlay for which you want to change the Brush.
- Choose a Brush from the drop-down list.
- Check the Override tickbox adjacent to the Brush colour drop-down box, then click OK.
Forcing the colour of all Brushes on an overlay
- Display the Overlays dialog and select the Style tab.
- Select the overlay for which you want to force the colour.
- Choose a Brush from the drop-down list.
- Check the Override tickbox adjacent to the Brush colour drop-down box. Choose a Brush colour from the drop-down box. This can be from the basic colours or your previously-defined custom colours. Alternatively you can click on the right-arrow at the bottom of the drop-down list to create a new custom colour. Then click OK.
Changing the Brush of an editable item
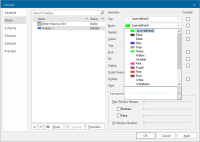
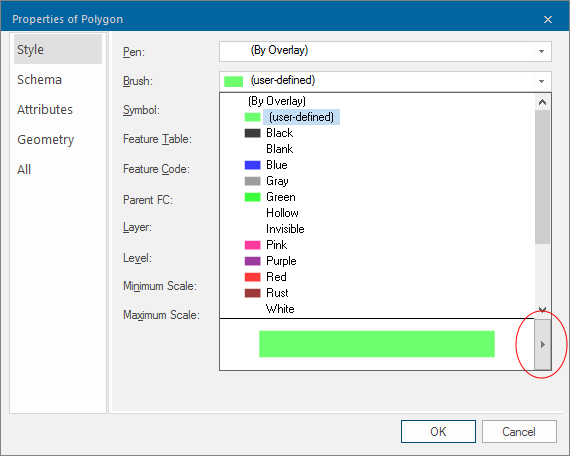
To change or edit the Brush used by an Item, select the Polygon item and select either Properties (Home > Selection) or Properties... in the Map Window. The Properties of Polygon dialog will be displayed:

Select the Style tab.
This contains a Brush drop-down list.
Click this control to see a list of available named Brush objects. You will also see "(By Overlay)" at the top of the list. Choose "(By Overlay)" to make the item fill using its overlay Brush. If the current Brush is user-defined then you will also see "(user-defined)" in the list.
To edit a Brush object, choose one of the Brush objects in the list, including "(user-defined)", and click on the right-arrow button at the bottom of the list.
The Edit Brush dialog is displayed:
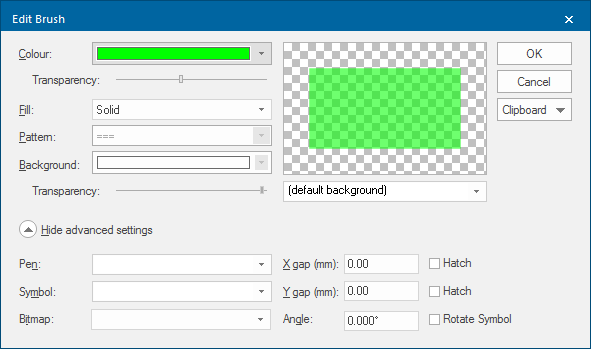
The Brush object can be either Solid or one of the fill patterns (Hollow, Hatch, Pattern). The diagram in the top-right of the Edit Brush screen shows a sample of the fill that will be produced with the current Brush settings.
You can also specify degrees of transparency for foreground colour. Background colour and transparency are available when using Hatch fill. See 'Edit Brush' dialog Parameters for full details of all the available Brush parameters.
Clipboard - Copy & Paste
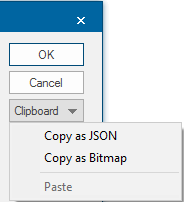
The Edit Brush - Clipboard drop down box allows you to:
- Copy as JSON: this enables you to copy the Brush JSON parameters from the currently selected Polygon item and paste them into second and subsequent Polygon items. If the parameters are to be changed paste the parameters into a JSON editor. Edit the parameters as required, copy the code from the editor and Paste into a selected Polygon item.
- Copy as Bitmap: the image can then be pasted into an image editing application.