Layers
A Notice consists of various Layers.
Each Layer in the Notice is assigned to an Overlay in a SIS Workspace Definition (SWD).
These Overlays contain the data used by Search.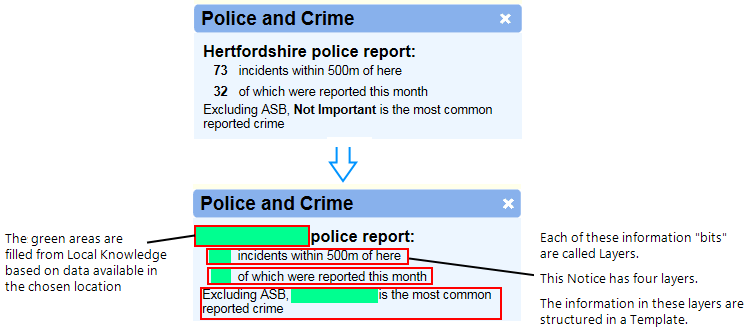
Every Layer in a Notice must be assigned to only one Overlay in the SWD and vice-versa. The structure of each layer is defined by a Template. ![]() Related Topics
Related Topics
Adding a Layer
- To add a Layer, select Notice Board from the main menu and press Edit.
- Click [+] against any Column to see available Notices.
- Click [+] again to see all available Layers assigned to a Notice.

- Click Add Layer. A new blank entry will be added to the bottom of the existing Layers list.
- Click [+] again to rename the Layer or assign templates from the drop-down menus.

If 'No Template’ is selected, nothing is displayed on the Notice even if data is found at the location.
Only one Layer can be assigned to an Overlay at a time. If an Overlay contains data that needs to be referenced by different Layer Templates, ensure you replicate the overlay within the Local Knowledge SWD.
Removing Layers
Click Remove located below the Layer (when not expanded)
Click Yes to confirm removal.
Arranging Layers
It is easy to change the order of Layers within the Notice; use the Move Up and Move Down buttons.
Layers will be displayed in the order they are listed in the Notices window. Bear this in mind when creating Templates to create a seamless link between layers.