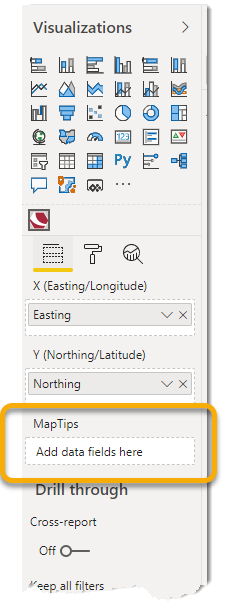
Map Tip Settings
- Display selected fields in a MapTip as the user hovers the cursor over the map. To add a Map Tip, click and hold on the FIELD which holds the attribute to be displayed.
- Now simply drag the field into the text box for Map Tips. You can drag multiple Fields into the Map Tips text box.
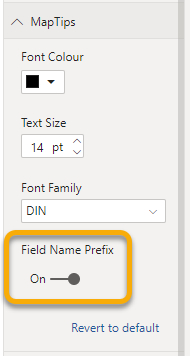
- Map Tip Options- Prefix: Under MapTips, the user can choose to display the Field Name Prefix. This adds the field name in front of each MapTip entry for clarity.

- To enable prefix display, toggle the Field Name Prefix to On.
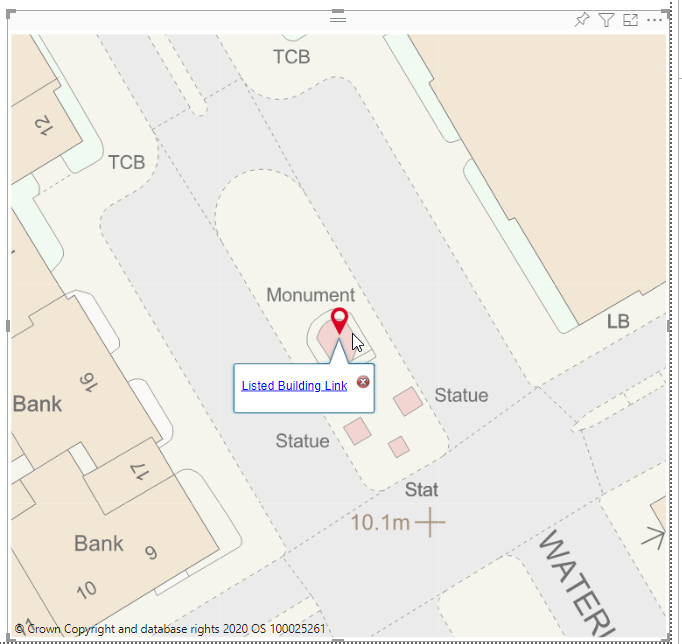
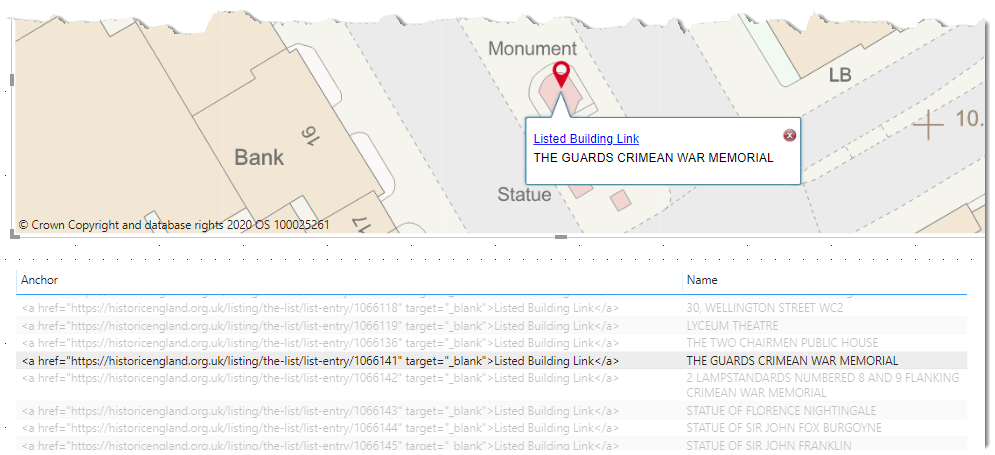
- Map Tip Options- Hyperlinks: Hyperlinks can be displayed as part of the MapTip. To do this, choose a field which includes a fully structured HTML anchor. For e.g;
-
This displays the Maptip with the hyperlink specified above:
-
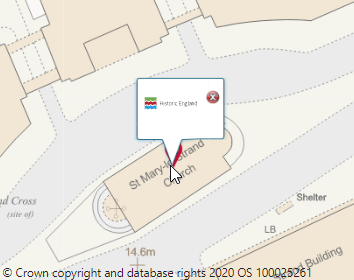
To add hyperlinks with images:
- In this example the image used is a Scaled Vector Graphic (svg) but other popular image formats (like png) can also be used.
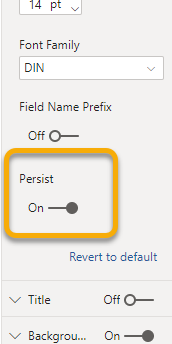
- Map Tip Options- Persist Enable this option to continue displaying the MapTip even after the user has moved the cursor away from the pin.
Note: To change the order in which they are displayed, we recommend removing all Fields and adding them back in the order you wish them to appear.
<a href="https://historicengland.org.uk/listing/the-list/
list-entry/1266307" target="_blank">Listed Building Link</a>
Note: We recommend setting the target to _blank as the hyperlink is opened in a new tab when clicked.
<a href="https://historicengland.org.uk/listing/
the-list/list-entry/1193778">
<img src=" https://historicengland.org.uk/public/src/images/logo.svg"
width="60" height="30" target="_BLANK"></a>
TIP: See also Formatting Data in Excel