Creating a template SWD using Python
You can script simple, repetitive tasks using the Cadcorp SIS Desktop programming interface and Python Developer bar (PySIS).
Here we show how to incrementally:
- Design the process
- Import it into Cadcorp SIS Desktop and finally
- Execute the command.
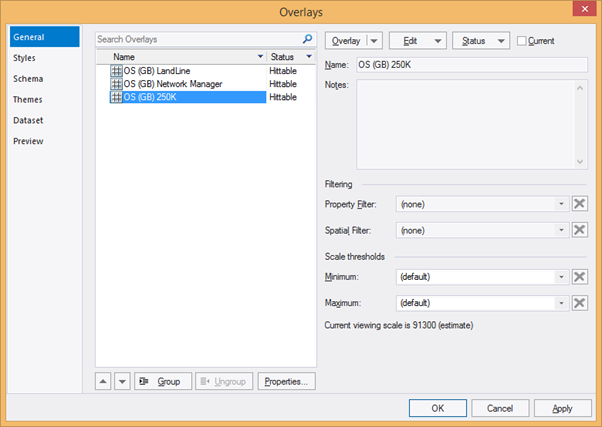
In this scenario there are three base map overlays covering different scales of mapping; these are used in many SWD projects in the same way.
A Python script file is a simple text file (saved with the extension “.py”) and can be created with any text editing software.
The layout of most PySIS scripts will follow the same basic layout:
          # First import the SIS module.
from cadcorp import sis
          # Always put your code inside a function.
def CHANGE_THIS_FUNCTION_NAME():
# Put your SIS programming commands here: sis.Prompt("This is a test command.")
The first step is to automate adding the overlays and then later work out which properties are needed to configure them.
The three overlays in this scenario are Cadcorp Index Datasets.
TIP: See Overlay Methods for the commands to add overlays.
Here the required command is CreateIndexOverlay but for other file formats or database connections an alternative command from the group should be used.
When using CreateIndexOverlay, there are four key pieces of information to add:
- pos - The position in the overlay list to create the overlay.
- tilename - The filepath and filename of a single tile from the dataset.
- namer - The naming convention to match the file names with.
- flags - The options you would like the overlay to be added with.
(We will ignore this field in the above example).
These fields correspond to the options on Cadcorp SIS Desktop software when you add an Index dataset.
The options available in the menu are not exactly the same as the programming command. For example tilename is the path of a single file rather than all files with a specific suffix.
TIP: Look up the namer in the Index Dataset Naming Conventions  topic of SIS Desktop online help. (opens in a new window)
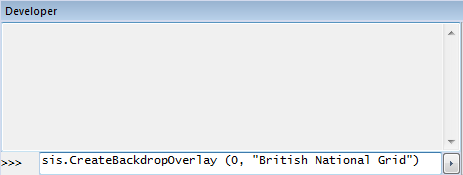
Use the SIS Developer Control Bar to test SIS programming commands. This is a quick and versatile way of checking API commands:
The Python script will now look like this:
from cadcorp import sis
def add_basemaps():sis.CreateIndexOverlay(0, "C:\\data\\basemapping\\250k\\ST.tif", "AOsRoutePlannerNamer", 0) sis.CreateIndexOverlay(0, "C:\\data\\basemapping\\50k\\sx88.tif", "AOsLandrangerNamer", 0) sis.CreateIndexOverlay(0, "C:\\data\\basemapping\\streetView\\SS8886SE.png", "ALandLine1250Namer", 0)
The namers are chosen based on the size of the grid item and their scale.
The script now needs to modify the name of the overlays from the defaults and to set scale thresholding. This is done by editing overlay Properties using the SetStr, SetInt, SetFlt or SetProperty methods.
TIP: See also Properties in the SIS Main help. (opens in new window)
Overlays are targeted for changes based on their index number. In this script, CreateIndexOverlay was adding the overlays at index 0 so the same number can be used for setting the Properties.
Overlay properties are listed in the SIS Main help, see Dataset and Overlay Properties.
Or by checking the overlay properties in SIS desktop products.
In this case, we will change three properties for each overlay, “_name$”, “_scalemin#” and “_scalemax#”.
from cadcorp import sis
def add_basemaps():
# Adding the 250K Layer
sis.CreateIndexOverlay(0, "C:\\data\\basemapping\\250k\\ST.tif", "AOsRoutePlannerNamer", 0)
sis.SetStr(sis.SIS_OT_OVERLAY, 0, "_name$", "OS 250k")
sis.SetFlt(sis.SIS_OT_OVERLAY, 0, "_scalemin#",50000)
sis.SetFlt(sis.SIS_OT_OVERLAY, 0, "_scalemax#",250000)
# 50K Layer
sis.CreateIndexOverlay(0, "C:\\data\\basemapping\\50k\\sx88.tiff", "AOsLandrangerNamer", 0)
sis.SetStr(sis.SIS_OT_OVERLAY, 0, "_name$", "OS 50k")
sis.SetFlt(sis.SIS_OT_OVERLAY, 0, "_scalemin#", 15000)
sis.SetFlt(sis.SIS_OT_OVERLAY, 0, "_scalemax#", 50000)
# Street View Layer
sis.CreateIndexOverlay(0, "C:\\data\\basemapping\\StreetView\\SS8886SE.png", "ALandLine1250Namer", 0)
sis.SetStr(sis.SIS_OT_OVERLAY, 0, "_name$", "OS StreetView")
sis.SetFlt(sis.SIS_OT_OVERLAY, 0, "_scalemin#", 1250)
sis.SetFlt(sis.SIS_OT_OVERLAY, 0, "_scalemax#", 15000)
You can include frequently used scripts in the Desktop startup. This means the functions in these scripts are available immediately through the Python Command Line.
To add scripts:
- Open SIS Desktop.
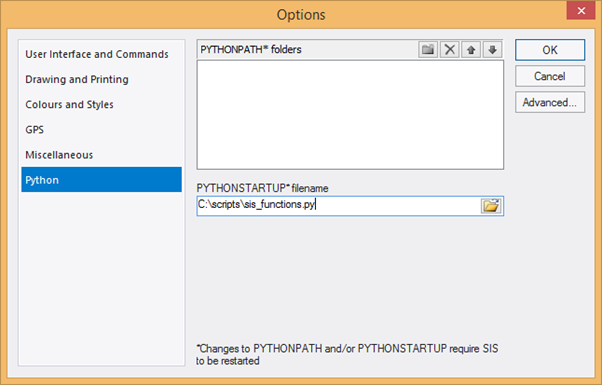
- Navigate to File > Options and select Python.
- Save the Python script and add the file name to the PYTHONSTARTUP or PYTHONPATH section.
- Restart SIS Desktop.
The script should be loaded into the SIS engine now. The function can be executed by typing it into the SIS Developer Control Bar:

The programming window on the right of the control bar verifies the commands have run successfully.
If the command is unsuccessful, you will see an error message.
The window is disabled by default; to enable it click the small box with the horizontal arrow in the bottom right corner of the control bar.
from cadcorp import sis
def add_basemaps():
# Adding the 250K Layer sis.CreateIndexOverlay(0, "C:\\data\\basemapping\\250k\\ST.tif", "AOsRoutePlannerNamer", 0) sis.SetStr(sis.SIS_OT_OVERLAY, 0, "_name$", "OS 250k") sis.SetFlt(sis.SIS_OT_OVERLAY, 0, "_scalemin#", 50000.0) sis.SetFlt(sis.SIS_OT_OVERLAY, 0, "_scalemax#", 250000.0)
# 50K Layer
sis.CreateIndexOverlay(0, "C:\\data\\basemapping\\50k\\sx88.tiff", "AOsLandrangerNamer", 0)
sis.SetStr(sis.SIS_OT_OVERLAY, 0, "_name$", "OS 50k")
sis.SetFlt(sis.SIS_OT_OVERLAY, 0, "_scalemin#", 15000.0)
sis.SetFlt(sis.SIS_OT_OVERLAY, 0, "_scalemax#", 50000.0)
# Street View Layer
sis.CreateIndexOverlay(0, "C:\\data\\basemapping\\StreetView\\SS8886SE.png", "ALandLine1250Namer", 0)
sis.SetStr(sis.SIS_OT_OVERLAY, 0, "_name$", "OS StreetView")
sis.SetFlt(sis.SIS_OT_OVERLAY, 0, "_scalemin#", 1250.0)
sis.SetFlt(sis.SIS_OT_OVERLAY, 0, "_scalemax#", 15000.0)