Export to Server (Oracle GeoRaster)
Use File > Export options to export SIS data to Oracle 10g (or later) GeoRaster database.
Note: Ensure the target database has been correctly set up before exporting data to it.
.png)
| Option | Description | |
| User | The Oracle user name. | |
| Password | The password for the Oracle user name. | |
| Server |
The Oracle server to use. This name is sometimes referred to as the 'Net Service Name' or 'Host String'. |
|
| Save password in UI settings database (encrypted) | Check this tickbox if Cadcorp SIS Desktop should store the password in the UI settings database. The password will be stored in encrypted form for security. | |
Click Next.
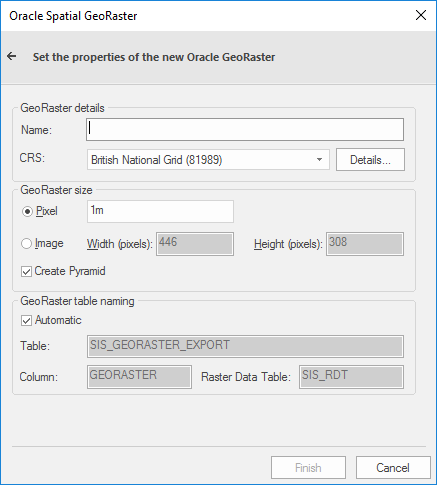
The Oracle Spatial GeoRaster dialog will be displayed:
| Option | Description | |
| Name |
The name for the spatial layer being created in Oracle. |
|
| CRS |
Cadcorp SIS Desktop will automatically detect the coordinate system of the overlay being exported. |
|
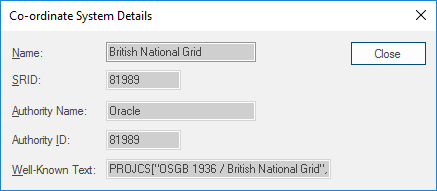
| Details |
Click to display the Co-ordinate System Details dialog:
|
|
| Pixel | Pixel size in image. | |
| Name |
The name for the spatial layer being created in Oracle. |
|
| Image - Width: | Size of image width in pixels. | |
| Image - Height | Size of image height in pixels. | |
| Create Pyramid | Check this tickbox if you wish to create a pyramid data structure. We recommend the ticked (default) setting. | |
| Automatic |
Check this tickbox for Cadcorp SIS Desktop to provide a name. |
|
| Table | Name if Automatic is not selected. | |
| Column | Name if Automatic is not selected. | |
| Raster Data Table: | Name if Automatic is not selected. | |
Click Finish.
TIP: See also Exporting to Oracle for more information.