Print prints the view in the current window to a selected printer. This command prints exactly what appears on the screen.
TIP: To include other useful information in your print (e.g., notes, a grid, a north point) you can use Print Templates.
Click File on the Ribbon and select Print (Keyboard shortcut: Ctrl +P).
Choose your print preferences (Crop, Stretch or Fit on screen).
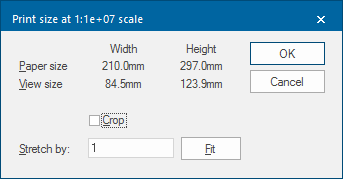
This window displays the Paper size (width and height) and the View size (width and height).
- Paper size is the size of the paper chosen in the Print Setup.
- View size is the size of either the SWD window or the print template.
If the Paper size (width and height) is not the same as the View size (width and height), it is likely the paper chosen is not the same size or orientation as the SWD or print template.
Ensure the Paper size is slightly larger than the View size.
To change any of the above (or the scale of the print):
- Fit the view to the paper - Click the
 button to scale the view up or down so that selected graphics fill the available paper size. Only choose this option if scale is not important.
 - Crop the view - enable the
 tickbox to maintain the desired scale (map scale). However only the part which fits on the paper isprinted (the centre of the view being centred on the paper).
 - Press Cancel. This allows you to go back to Print Setup where you can choose a different size or orientation of paper or change the scale of the map.
- Choose a different scale for the print.
Print scale can be worked out by dividing map scale by the Stretch by factor. Input a Stretch by factor to give you the scale you want.
For example, if the area you had chosen was too large to print at 1:1250 you could set a Stretch factor of 0.625, to give a print scale of 1:2000 (the map scale of 1:1250 divided by 0.625 is 2000). At 1:2000 the view fits the paper.
When you have decided how to fit the map view on the paper, click OK.
You will now be taken to further print options. Select the options you require and click Print.
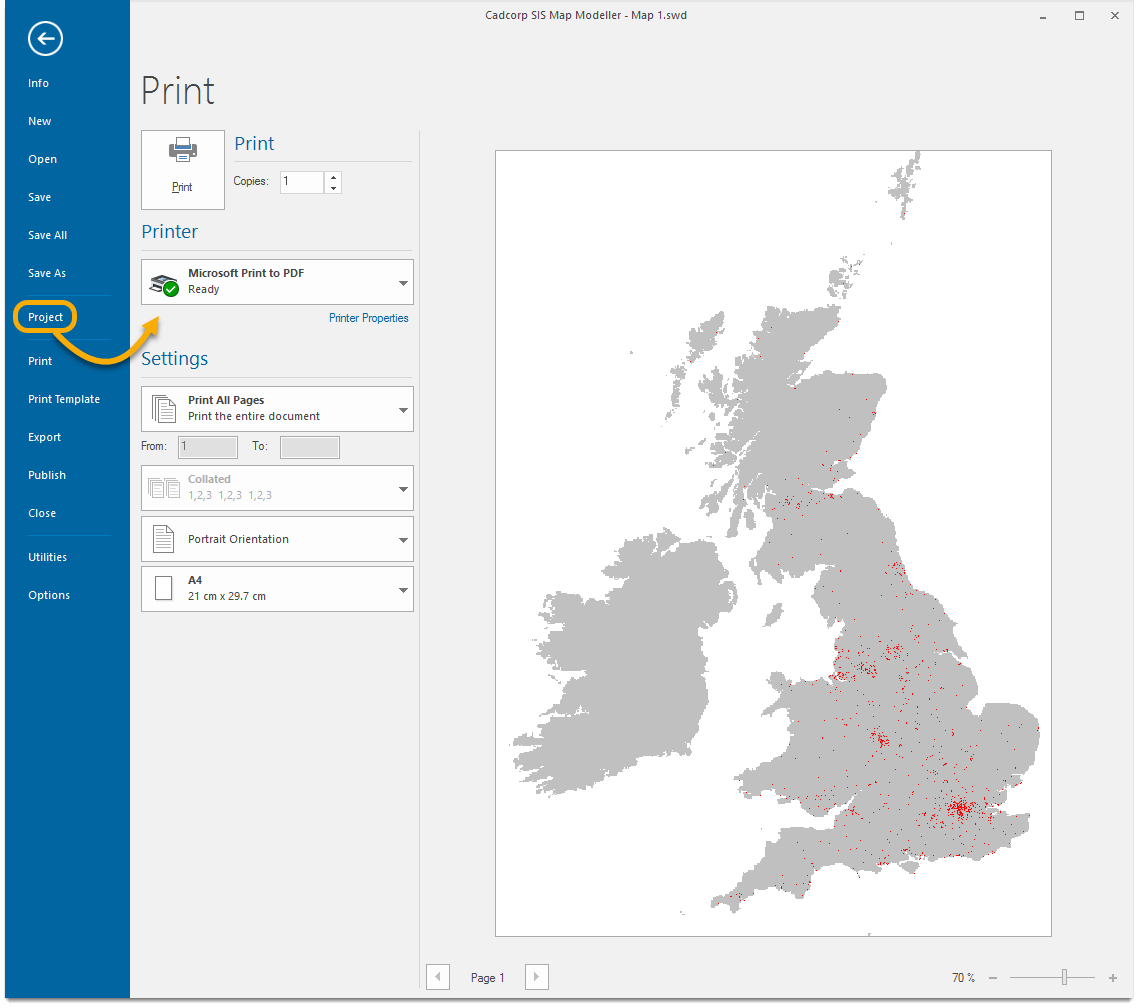
You may already be familiar with these as they are similar to Microsoft Office’s Print menu.
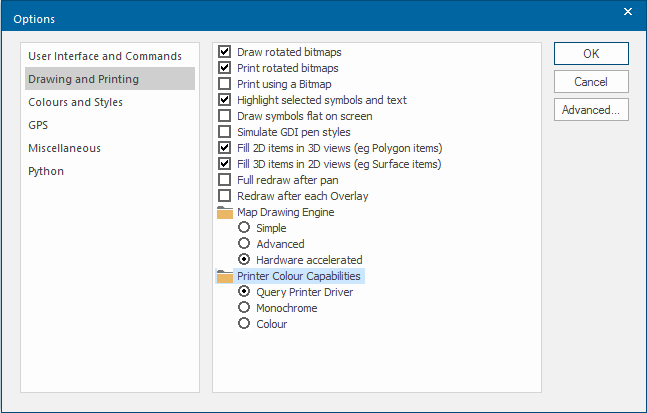
Forcing monochrome or colour printing:
To force monochrome or colour printing, use the Printer Colour Capabilities options on the Drawing and Printing tab of the Options dialog: