Installing the Universal Gazetteer
Simply place the UniversalGazetteer32.dll or UniversalGazetteer64.dll file into the Plugins folder within the Cadcorp SIS 9.0 installation folder.
Setting up the source MS Access Database
- If your gazetteer data is stored in a Microsoft Access database you may be able to rename your search columns to FIELD1, FIELD2, EASTING and NORTHING and rename the table to ENTRIES. A better solution is to create a query which presents the data in the correct form without modifying the underlying table.
- If your gazetteer data is stored in another database (eg Microsoft SQL Server or Oracle) link your Access database to this external data.
- Now construct a query to present the data with the correct column names.
Linking to an External Database
- Create a new blank database in Microsoft Access.
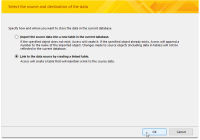
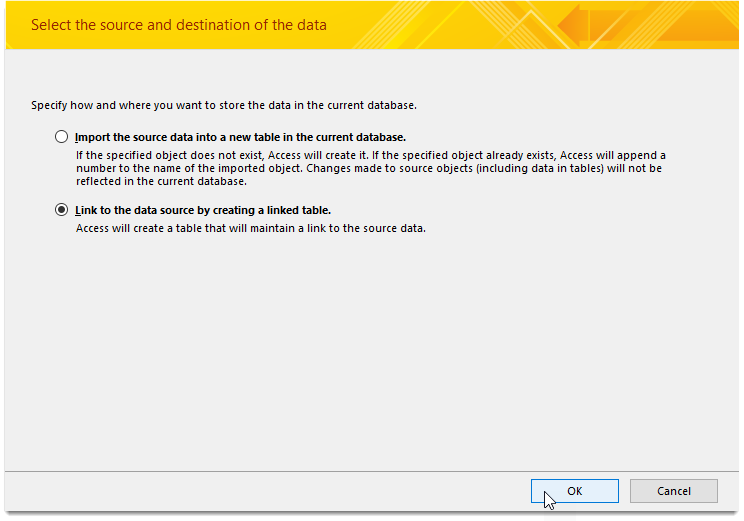
- Select External Data > ODBC File to open the wizard.
- Select Link to the Data Source by creating a linked table.
- Follow the wizard to create a DSN and connect to the database.
- Look at Microsoft Access documentation to help with step-by-step instructions.
- You can also link to other Access databases or use an ODBC connection to link to databases like Oracle.
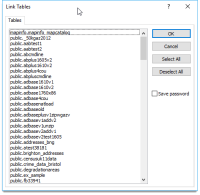
- Having connected to the external database, choose the source table from the “Link Tables” dialog:
The steps above relate to MS Access 2016. Please see relevant documentation or contact your IT department if using earlier versions.

Creating a Query
Once our source database table is linked, we can create a Query that will present the Table and Field names that we need to the Universal Gazetteer.
- Select Create > Query Design and select your database table (if more than one is available).
- Click Add. This opens a separate query tab.
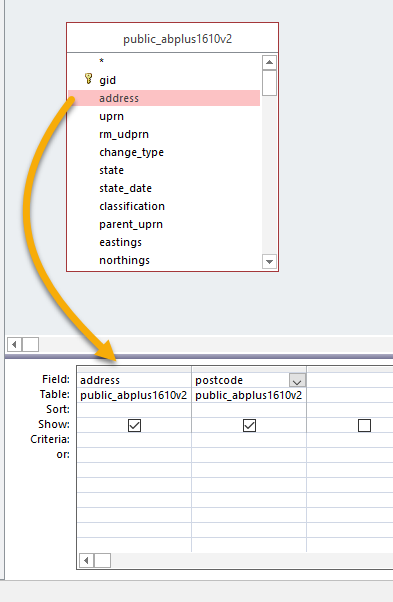
- Let’s assume our source table has an “Address” and a “Postcode” field which we wish to use as the “Field1” and “Field2” search fields. To do this we would double-click the “Address” field entry in our Source Table window to use this as the first field in our query:
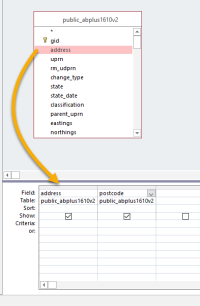
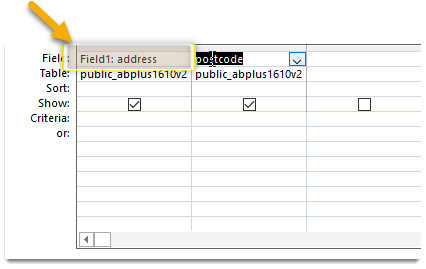
- Next because the Universal Gazetteer requires a “Field1” column, we will create an ‘alias’ for the “Address” field, so that it’s presented to our Universal Gazetteer as “Field1”. To do this we prefix the “Address” text with “Field1:” like this
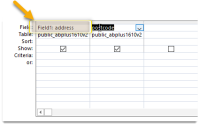
- Alias’ your “Postcode” column to “Field2:” in the same way.
- Since the source table in this example already has “EASTING” and “NORTHING” fields, you don’t need to create aliases for these.

However if these fields were named something else (“OriginX” and “OriginY” for example), simply rename them to “Easting” and “Northing” respectively. - Save and close the Query tab. Because the Universal Gazetteer expects to see an “Entries” Table in the database it uses, simply save the query as “Entries”:
Our “Entries” query will appear as an “Entries” table to our Universal Gazetteer.