Grouping overlays
To streamline working with a large number of overlays, you can group them into logical units. Overlay grouping/ungrouping can be carried out from any Overlays dialog tab except Preview.
1. Display the Overlays dialog.
2. Highlight the Overlays to be grouped and click the Group button.
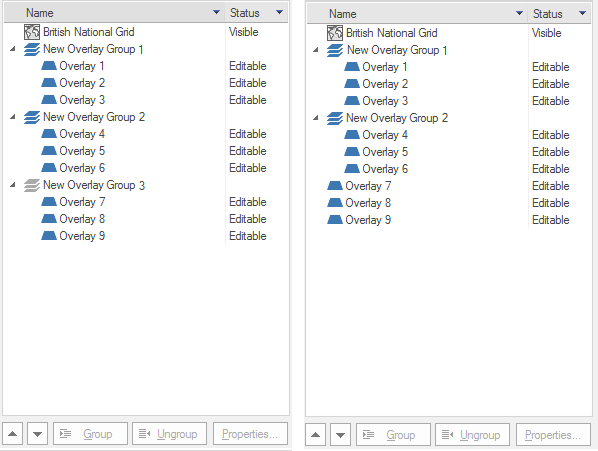
3. Repeat for other overlays as required. The following example shows Overlay 1 through to Overlay 9 placed into three overlay groups each containing three overlays.
Note: Overlays can only be selected from consecutive positions in the list. If necessary use the  Promote and
  Demote buttons to arrange the required overlays in consecutive order before grouping.

4. Overlays can be re-ordered within their groups by using the Overlays dialog Promote and Demote buttons. If the overlay reaches the top or bottom of a group pressing the Promote/Demote button will move the overlay to the next group.
Ungrouping overlays
An overlay group can be ungrouped and returned to its individual component overlays from the Maps Control Bar. Simply select the Overlay group, right-click and select Ungroup.
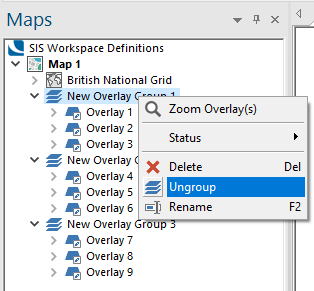
Another way to ungroup overlays is to select the title of the overlay group and clicking the  button.png) Ungroup button.
Ungroup button.
This example shows Overlay 7, Overlay 8 and Overlay 9 being ungrouped from New Overlay Group 3.
Note: Any dataset that creates multiple overlays (eg mixed layer Ordnance Survey MasterMap) will automatically create a New Overlay Group.
Making Overlay Groups Visible/Invisible
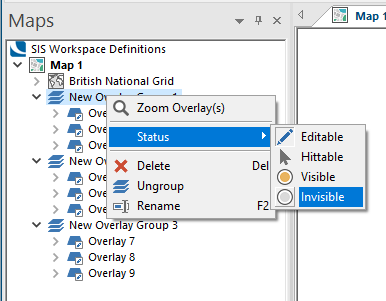
Overlay Groups can be turned visible or invisible from the Maps Control Bar.
- Select the overlay group and click the right mouse button.
- Click Status from the local menu and select Visible or Invisible as required.
Overlay Groups Status
Overlay Groups can also be made Editable or Hittable from the Maps Control Bar in the same way as individual overlays. ![]() Related Topics
Related Topics
Unlike individual overlays, the Overlay Group status CANNOT be changed from the Overlays dialog and must be changed in the Maps Control Bar.