Pan and Zoom
Cadcorp SIS Desktop has many different ways to pan and zoom inside the the Map Window. ![]() Related Topics
Related Topics
Use any one of these commands (In, Out, Drag, Roamer Mode) and the mouse to change the view.
You cannot run these commands at the same time as other commands which use the mouse, e.g.LineString.
To change the view while using another command, use one of these:
- Middle mouse button: This lets you pan the view in the same way as using Drag.
- Mouse wheel: Spinning the mouse wheel, where available, zooms the Map Window in or out, depending on the direction of the spin.
- '+' and '*' Numeric Keypad Keys: the '+' and '*' keys zoom in and out respectively. Note that '*' is used instead of '-' because '-' is required for typing co-ordinates into the Position Bar.
- Cursor, Home, End, Page Up and Page Down Keys keys pan the Map Window
- Recentre (Home > Pan) pans a Map Window using a position snapped in any Map Window, e.g. in a Key Map.
Using the window's scroll bars
Each map window has slider bars for panning the view horizontally (East/West if the map has not been rotated), and vertically (North/South if the map has not been rotated).
Using the cursor keys
Pressing the cursor keys shifts the view in the direction of the arrow. If you have a full numeric pad the PgUp, PgDn, Home and End keys can be used to pan north-east, south-east, north-west and south-west (make sure you are operating with NumLock off):
The default scrolling step in all directions is 8 pixels. You can change this by holding down the Shift and/or Ctrl keys in combination with the scrolling keys as follows:
| Shift |
1 pixel |
| Ctrl |
64 pixels |
| Shift + Ctrl |
half window height and/or width |
* and + Keys
Use the multiplication key (*) on the numeric pad to zoom out, and the plus key (+) to zoom in, doubling or halving the area of map displayed. These functions work only on the numeric pad. The * and + keys on the main area of the keyboard do not work in this way.
Panning and zooming in multiple windows
When working with multiple windows you can zoom or pan in each single window independently
TIP: Ensure you have selected the window before panning or zooming.
In each of the windows (except the current window) an outline is drawn to show the extents of the current window (as long as the current window’s extents lie within that window):
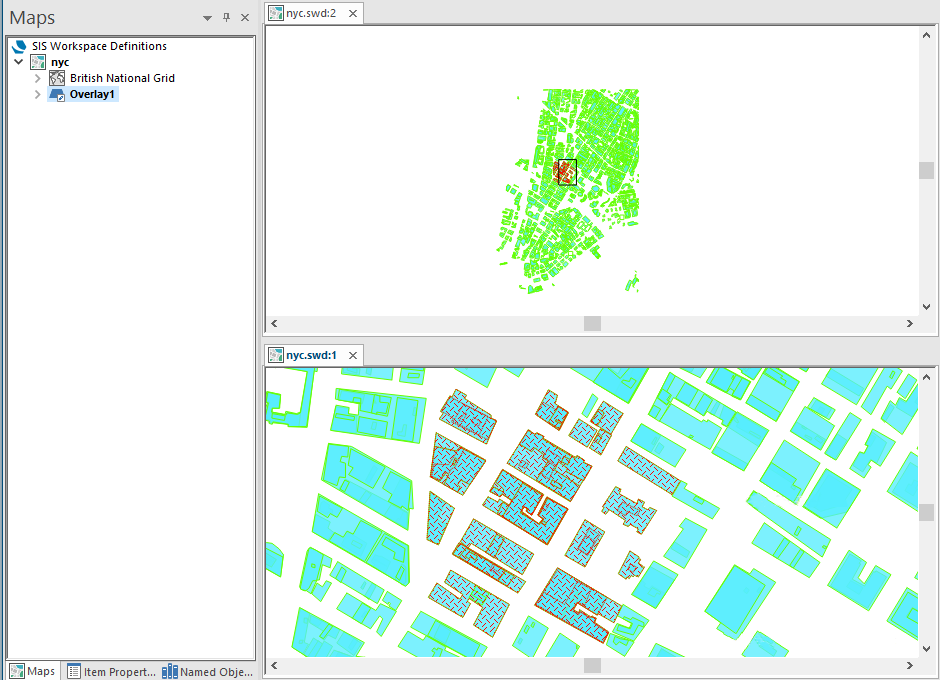
The outline will normally be a rectangle (as shown above) but it could be a distorted quadrilateral if the view Coordinate Reference Systems are different (or if the current window is 3D.
Using one window as an aid to panning/zooming in another window
You can use one window as a reference view for another when panning or zooming.
For example:
Window 1 displays a large part of a residential area at small scale while Window 2 is zoomed in to look at just a few of the houses.
To change the view in Window 2 to look at a few houses in a different part of the same residential area:
- Click anywhere in Window 2 to make it the current window (the pan and zoom functions operate on the current window).
- Choose Snap (Home > Pan)
- In Window 1 click on the house you wish to pan to be displayed in Window 2.
- Click in the centre of Window 2 to place the house at the centre of the view.
- This technique can also be used with other Zoom commands; when you have different SWD files on screen, use one as a reference view for the other.
TIP: Recentre (Home > Pan) allows you to specify the centre of one map window by clicking in another map window.