Configuring IIS on Windows Server 2019
Windows Server 2019 (and Windows 10) use IIS 10 which requires a slightly different setup to IIS 8 that was used in Windows 8.1 and Server 2012.
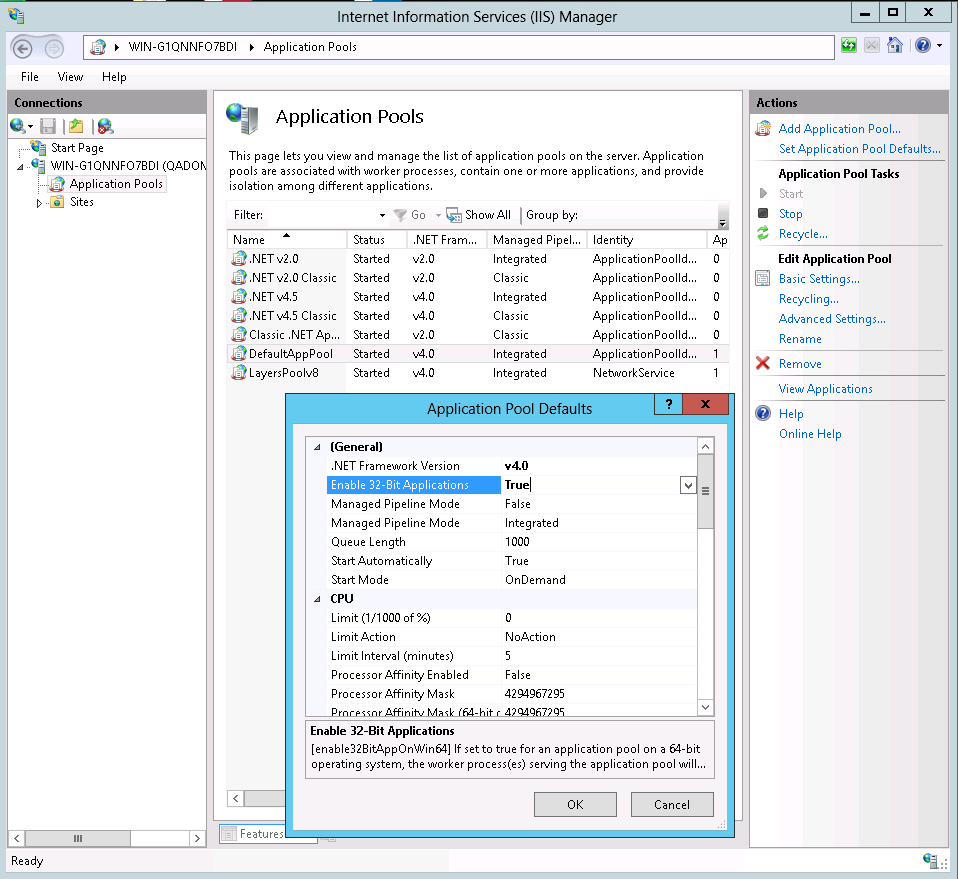
If installing a 64-bit version of Cadcorp SIS WebMap set the Enable 32-Bit Applications option to True (in Application Pool Defaults).
- Enable IIS.
- Open Server Manager > Dashboard from the Server Manager button.
- Select IIS from left hand side of the Dashboard.
- The Server Manager ▶ IIS > Servers will be displayed:

- Scroll down to ROLES AND FEATURES and click on TASKS.
- Select Add Roles and Features to open the Wizard.
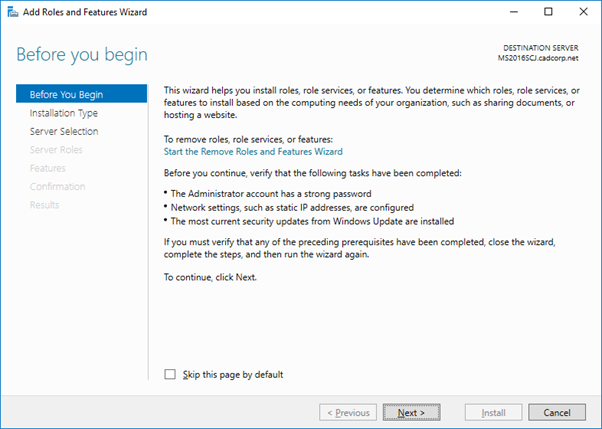
Note: If you do not want to see this page in future check the Skip this page by default tickbox.
- Click Next to Select installation.
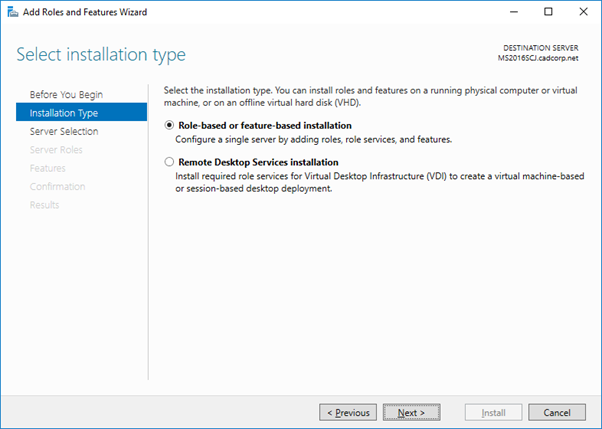
- Select Role-based or feature-based installation or Remote Desktop Services installation as required. (These instructions are for Role-based installation).
- Click Next to move to the Select destination server dialog.
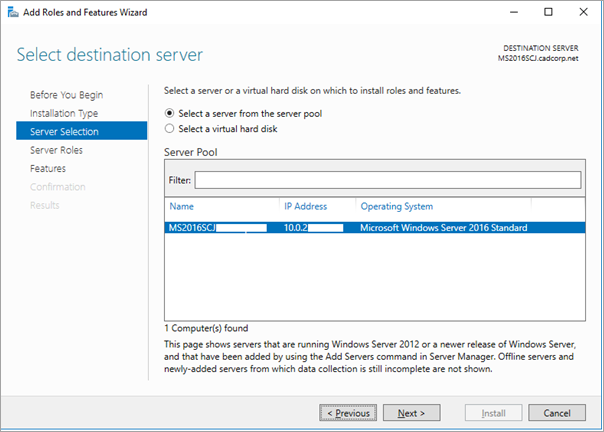
- Select the server in the list that corresponds to the server that will run Cadcorp SIS WebMap.
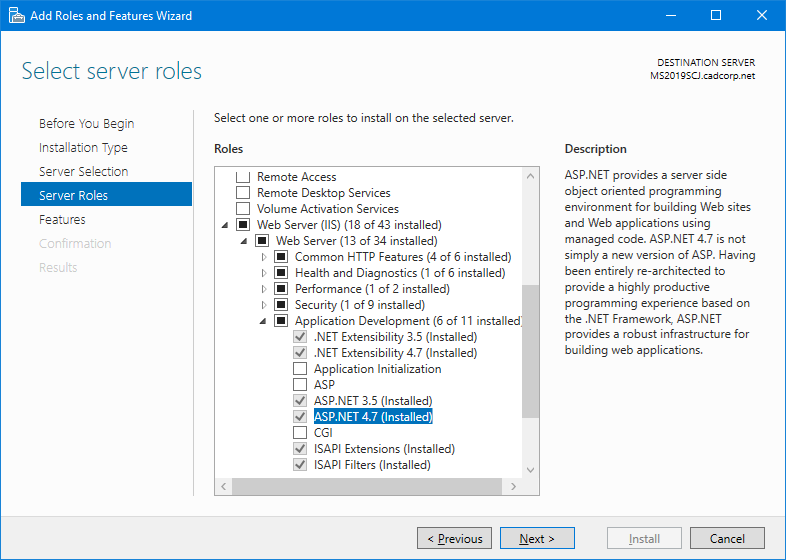
- Click Next to move to the Select server roles dialog.
- Select Web Server (IIS) from the list to expand the option. Now select ASP.NET 4.7 installed. {Web Server (IIS) > Web Server > Application Development}
- Also select Static Content (Installed) - {Web Server (IIS) > Web Server > Common HTTP Features }
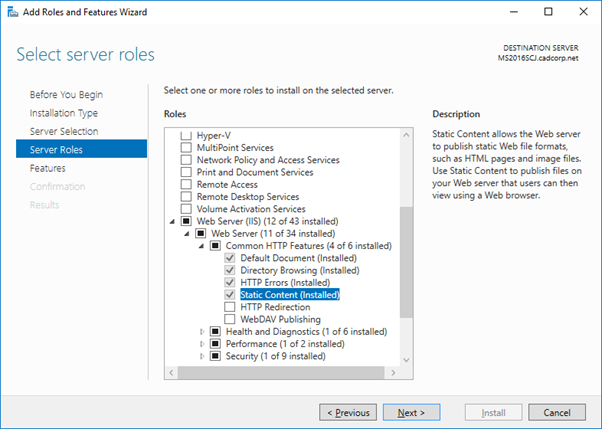
- Click Next to move to the Features dialog.
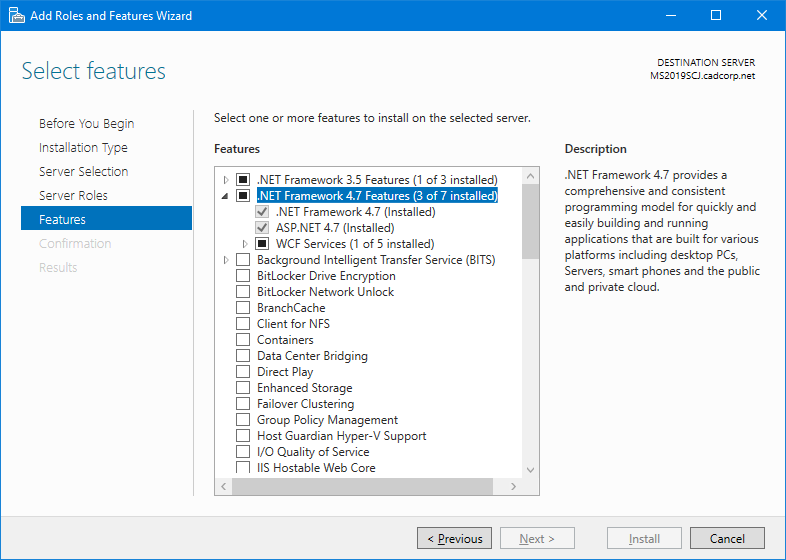
- Select .NET Framework 4.7 Features > ASP.NET 4.7
- Click Next. to move to the Confirm installation selections dialog.
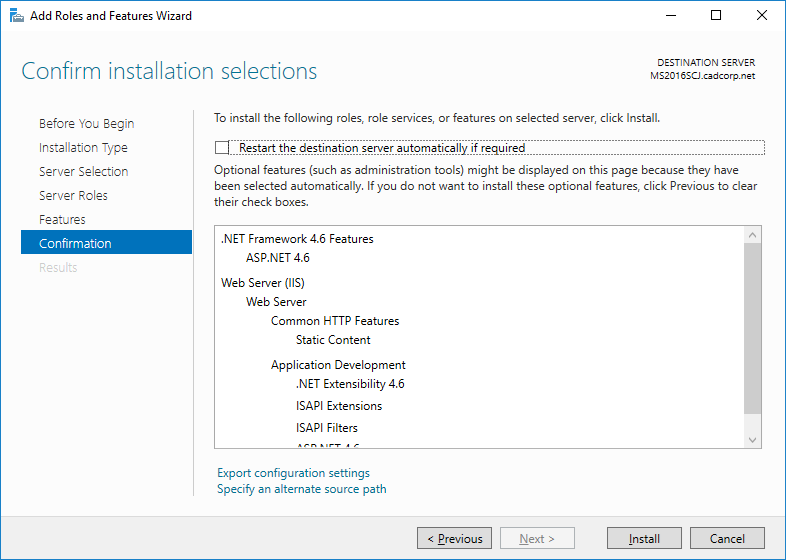
Click Install.
Note: If you installed from a DVD, insert the disc in your DVD drive. If you installed from an ISO image, find this in Windows Server 2019, right-click and select Mount.
Open Windows PowerShell as administrator, and type the following (replacing [DriveLetter] with the drive containing your installation DVD/mounted ISO image):
Enable .NET Framework 4.6
dism /online /enable-feature /featurename:NetFX4 /all /LimitAccess /Source:[DriveLetter]:\sources\sxs
Note: If you see a "Source files not found" message ensure the /Source path in the command exists and points to the \sources\sxs folder in your installation media.
After successfully running the above command, you should be able to return to the Add Roles Features Wizard. If the yellow bar is still visible, press Previous and then Next again to refresh the dialog.
Press Install.
 Back to IIS Configuration