Setting up Active Directory in Azure
Connect to Microsoft Azure Portal at https://portal.azure.com 
Select Azure Active Directory.
Select App registrations > New Registration.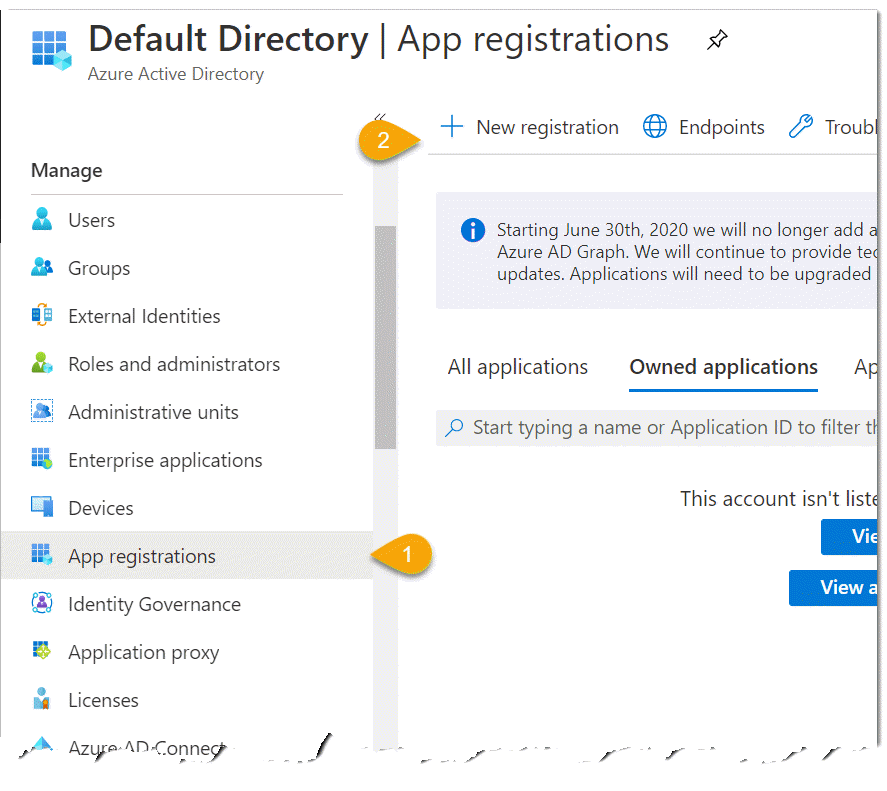
You will now see options to Register an Application. Select the relevant choices, assign a name (e.g. WebMap 9) and click Register.
The next screen displays details of the successfully registered application. 
Remember to make a note of the Application (client) ID and the Directory (tenant) ID. You will need add these to edit the web.config later.
How to set up a Redirect URI
While still inside the registered application screen, click on Add a Redirect URI.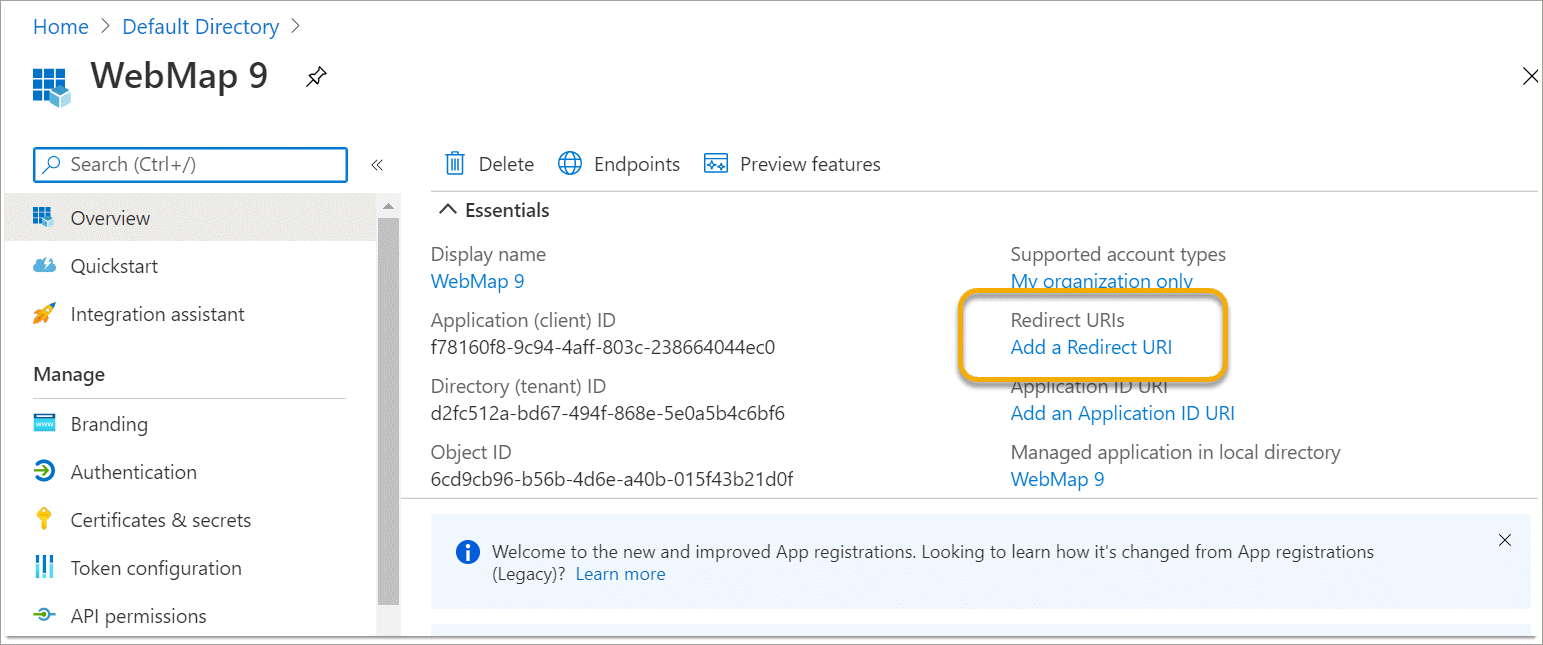
Select + Add a platform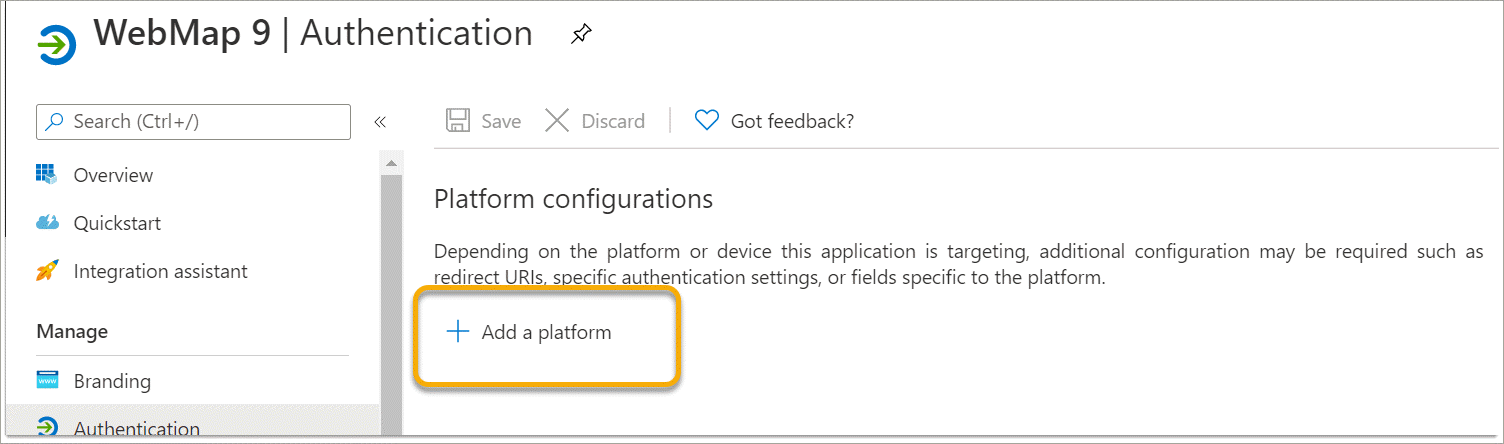
Pick Web from the platform options.
Enter the Server and web address for WebMap 9. 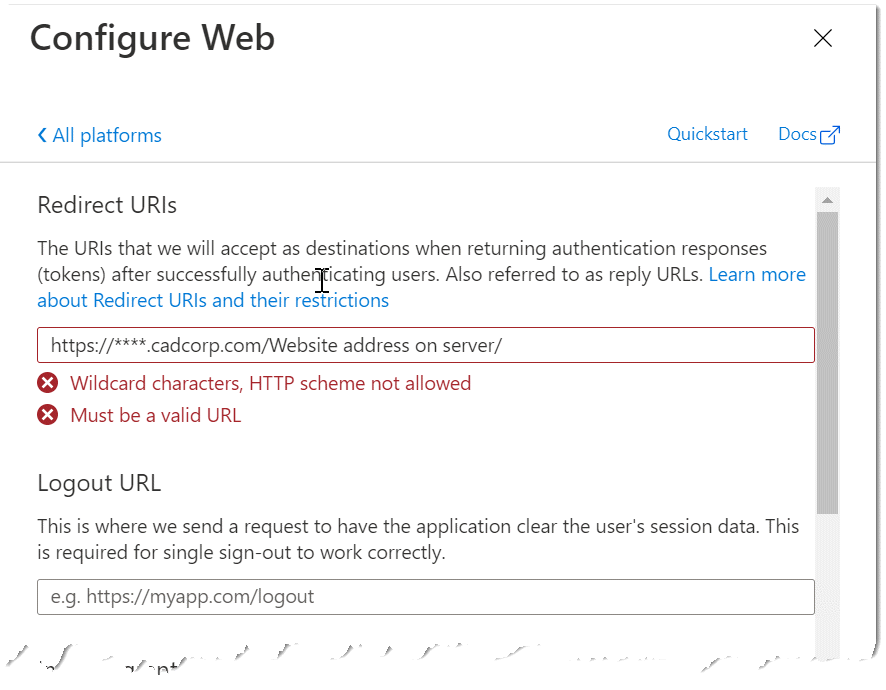
Remember to enable Access tokens and ID tokens. Press Configure.
Branding
Select Branding and upload a new logo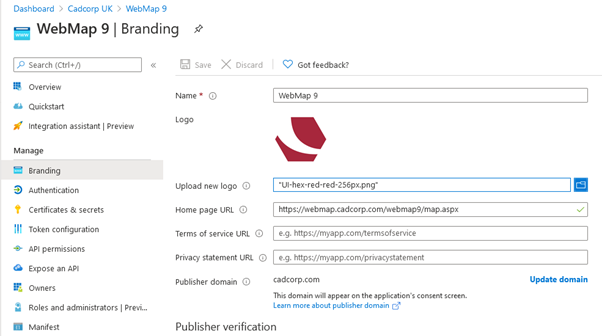
Fill in all other URLs if relevant to your organisation.
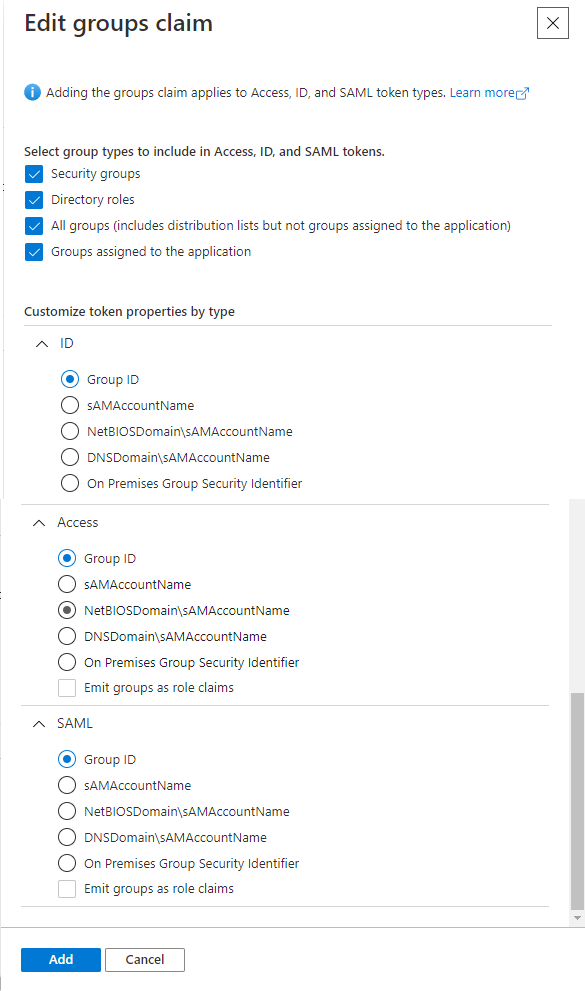
Token Configuration
Access tokens can be used in Azure Active Directory to identify all granted permissions to WebMap.
The token configuration is different depending on how the groups have been created and will be used.
1. Groups which are created by an on-premise Active Directory instance and synchronised or migrated to Azure Active Directory must use the sAMMAccounName type.
Select “Token configuration” and click + Add group claim.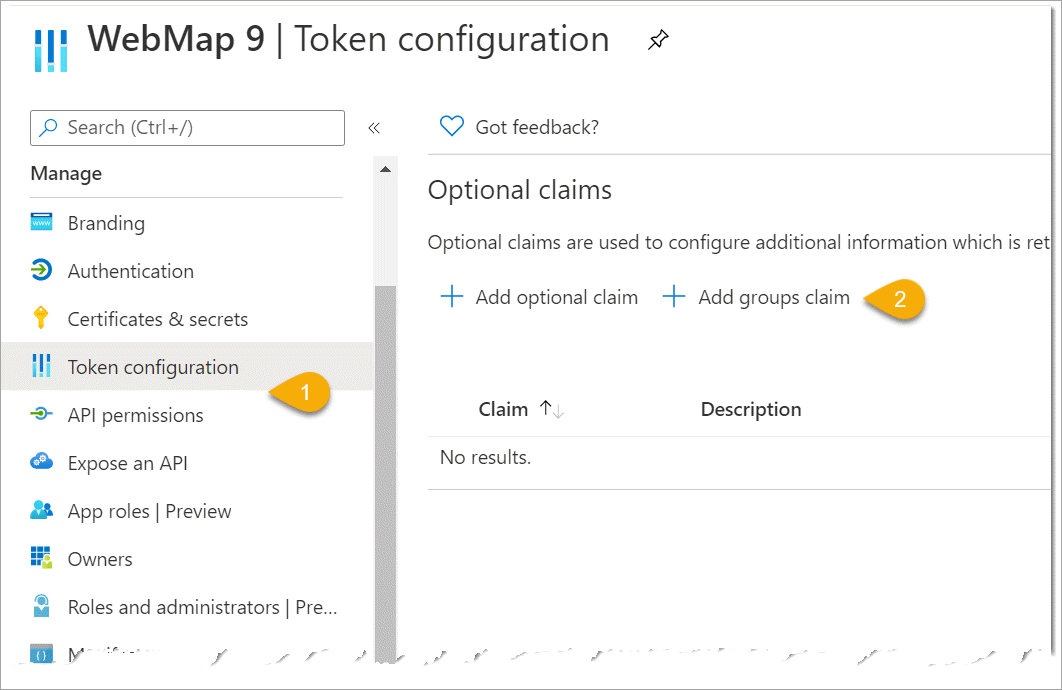
Enable all 4 options (Security groups, Directory roles, All groups and Groups assigned.)
-
ID = sAMAAccountName
-
Access = sAMAAccountName
-
SAML = sAMAAccountName
Click Add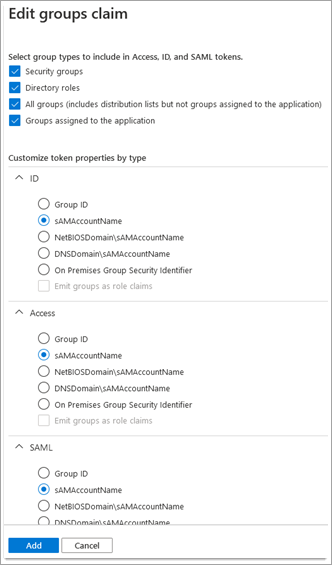
2. Groups which are created and used within the Azure Active Directory environment must use the Group ID type.
Enable all 4 options (Security groups, Directory roles, All groups and Groups assigned.)
-
ID = Group ID
-
Access = Group ID
-
SAML = Group ID
Click Add