Comma Separated File
A Comma Separated File is a delimited text file, which uses a comma to separate values. SIS Desktop 9.1 can export from the Table Window to this format.
To open a read-only CSV file select Add Overlay > Databases > View Points > Comma Separated File and click Next. Use the file browser to navigate to the location of the required Locate an *.asc, *.csv, *.tab or *.txt file and click Next.
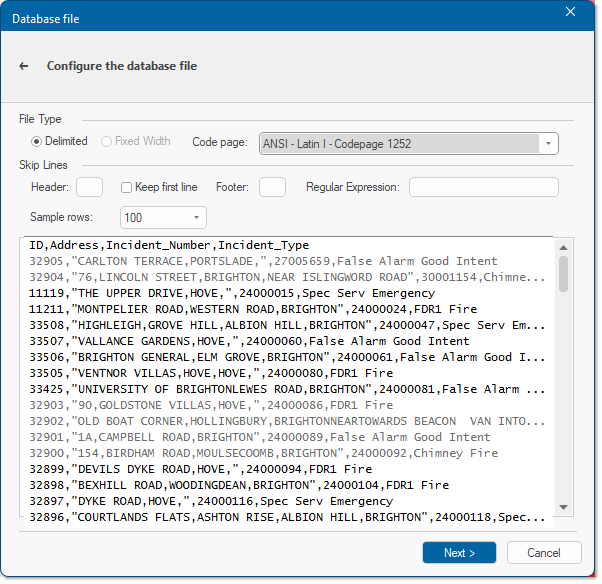
This opens the Database file window:
|
Option |
Description |
|
| Delimited/Fixed Width/Code page | Select the file type (Delimited or Fixed Width) and then select the Code page used when the file was created or saved. SIS Desktop 9.1 automatically detects these settings. | |
| Skip Lines | These options allow you to select lines that will be skipped for added feedback: - Header: Enter the number of header lines to skip. - Keep first line: Use in conjunction with Header to keep the first line when skipping a number of subsequent lines. - Footer: Enter the number of footer lines to skip. - Regular Expression: Use an expression to skip lines. For example entering 329 will skip lines 32900 to 32905. (See image above) |
|
| Sample Rows | Number of rows that can be seen in the preview pane. Use the drop-down menu to select this number. | |
Click Next to see all File format options.
SIS Desktop will automatically detect the Field delimiter and Text Qualifiers for the selected file; if not select the appropriate options. Enable the tickbox to use values in the first row as field names rather than data values.
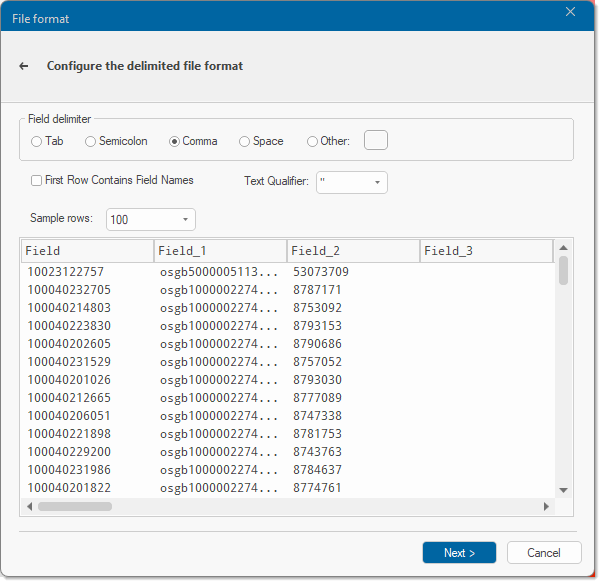
Click Next to display the Database columns dialog:
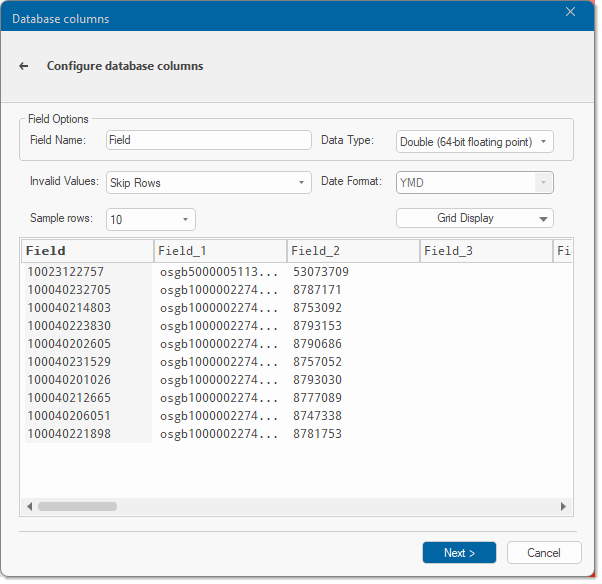
Select any column to edit field options like name, data type or the date format. You also have different options to address any invalid values (skip the row or set to null or zero). Set the number of sample rows and grid display. Click Next to open the Recordset options.
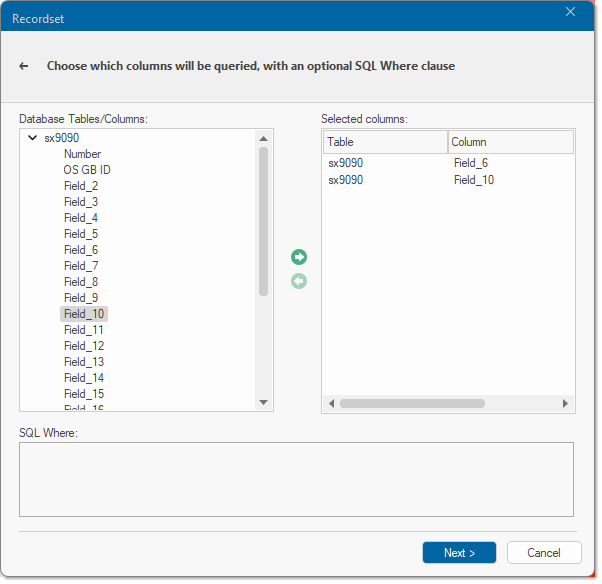
Select the table you want to add. You can add all the columns in a table by clicking the Add arrow. You cal also add specific columns by expanding the table and selecting individual columns. Click the Remove arrow to deselect tables/columns.
The SQL Where is unavailable as SQL cannot be applied to flat files such as CSV or other text file. Click Next to open the View Points window.
Note: X and Y Fields must be set; all other fields are optional.
Point Configuration
X Field/Y Field: Use the drop-down boxes to select the column to use for X / Y values.
XY Units Linear: X/Y values use Linear units. This will usually be the case in Orthogonal coordinate reference systems, for example OS National Grid. Linear units include meters, kilometers, miles, yards and more. Select the unit from the drop-down box.
XY Units Angular: X/Y values use Angular units and are used in conjunction with Latitude/Longitude coordinate reference systems. Angular units include radians, DMS, gradians and more. Select the unit from the drop-down box.
The value in the drop-down determines the format SIS Desktop expects from the datasource. SIS Desktop will then convert and display the points in degrees.
When selecting DMS be aware that SIS Desktop uses a comma as a separator within its coordinates i.e. x,y,z. If your datasource format is DD,MM,SS.S only the DD part will be used, therefore you need to replace the comma with another character (for e.g. double-quotes) to get DMS.
Create 'Empty' Items for unusable coordinates Enable this option to leave the X and Y Fields undefined.
Optional Configuration
ID FieldL: If one of the columns contains unique positive integer values, you can use that column for the _id& property. This can help when writing GISLink customisations or SIS ActiveX applications to coordinate SIS items and other database data.
Z Field: The column to use for Z values, or height above sea-level. If you leave this field empty, then 2D points will be created.
Z Units (linear): The units of the Z coordinates in the database.
Overlay Configuration
Name: Enter a custom name to override the overlay name.
Theme: Allows you to select a Default theme.
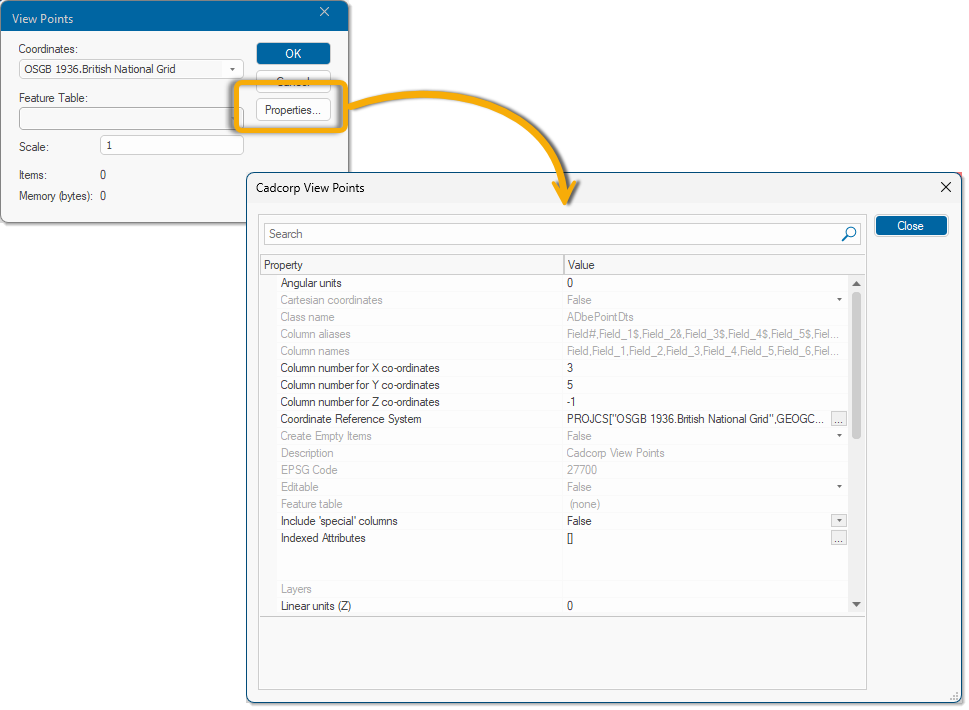
More Properties... Click to modify the Coordinate system and Scale. The Feature Table cannot be selected for non-editable files and is greyed out. The Properties... button opens the Cadcorp View Points dialog, which displays all properties of the overlay about to be created.
Click Finish on the main dialog to create a View Points database table for a CSV file. Points .