Working with Tile Sets
Tile Sets are created and managed within the Tile Cache Web Service.
Click Tile Sets.
On the relevant map, click Add to create a new tile set.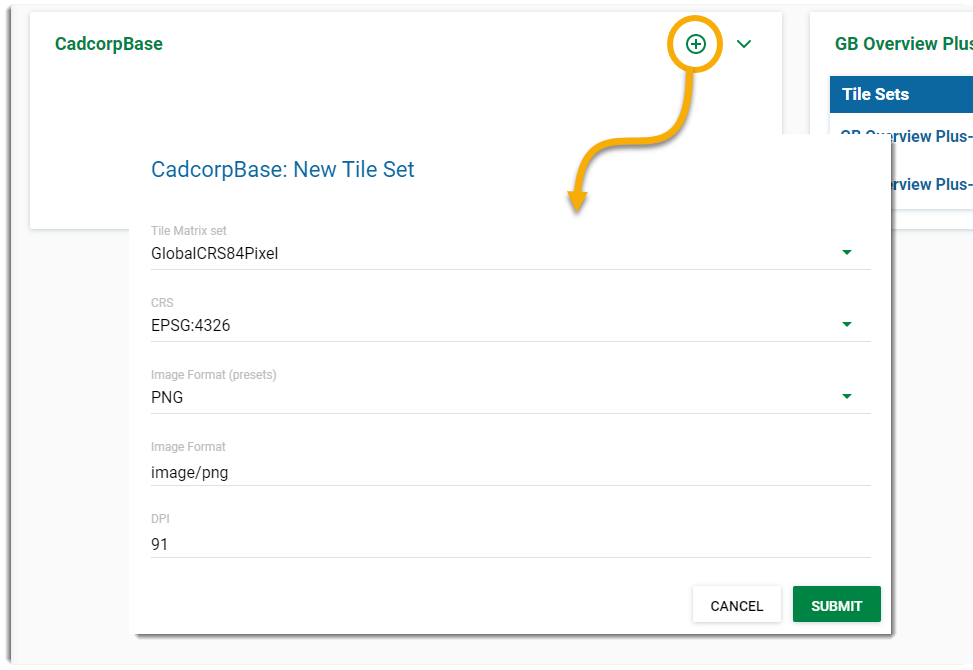
You can see this screen only if you have enabled Tile Services for the Map.
| Field | Description |
|
Tile Matrix Set |
Select the required Tile Matrix Set from the drop-down list. In a tiled map layer, the representation of the space is constrained by a discrete set of parameters. A tile matrix set defines these parameters. Courtesy:GeoTools |
|
CRS |
Select the Co-ordinate Reference System from the drop-down list. |
|
Image Format (presets) |
Commonly used image formats are available in the drop-down. This is purely a guide; select one to pre-populate the image format field below. |
|
Image Format |
This field allows you to customise your image parameters. E.g. image/gif. See here for guidance |
|
DPI |
Accept the DPI shown or change as required. |

Inside a Tile Set click the Create Tiles icon.![]()
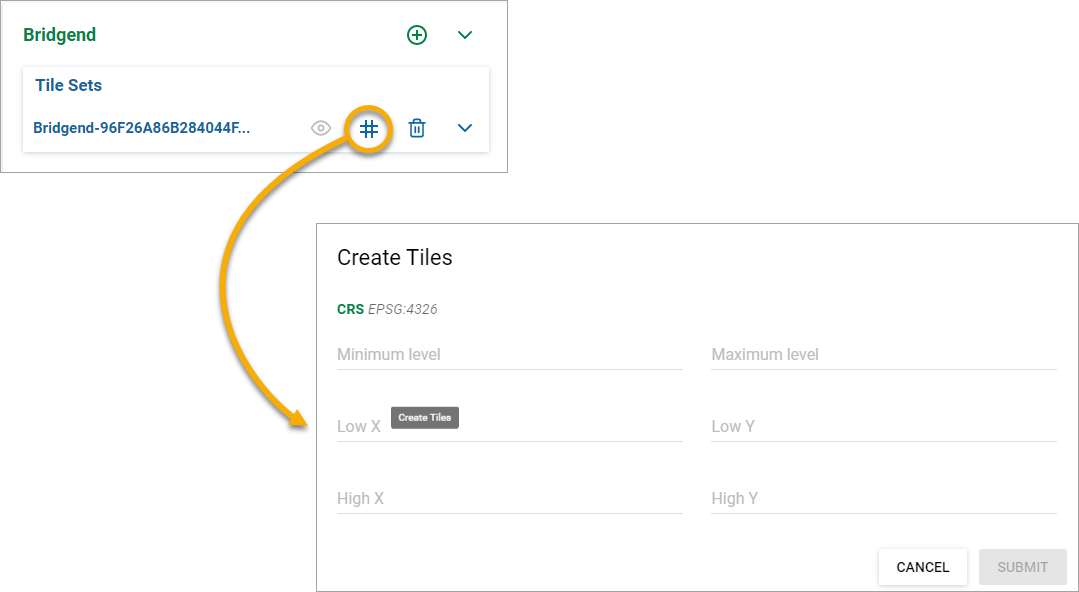
You can customise specific areas on the map to use for your Tile Cache. To do this, use either the Zoom Level options or the bounding box edges.
| Field | Description |
|
Minimum and Maximum Level |
Enter Minimum and Maximum zoom levels for the tile creation calculation. |
|
Low X and Y |
Lowest left and right edges of a bounding box. This is usually easting and northing values. Enter the relevant coordinates. |
|
High X and Y |
Highest left and right edges of a bounding box. |
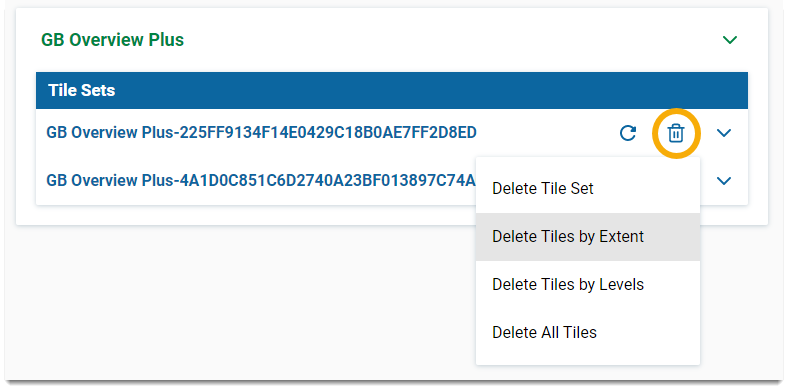
You have various options when deleting Tile Sets.
Click Delete![]() and select the option that is suitable for your requirement.
and select the option that is suitable for your requirement.
| Option | Description |
|
Delete Tile Set |
Deletes the entire Tile Set |
|
Delete Tiles By Extent |
Delete Tiles by Low and High X or Y. |
|
Delete Tiles by Levels |
Delete Tiles upto specified Zoom Levels |
|
Delete All Tiles |
Deletes all tiles but leaves the tile set intact. |