Getting started using Microsoft Visual C#
Note: This section assumes a simple knowledge of Visual C#, the Microsoft Foundation Classes and C#. For more help, see relevant documentation.
SISCONST.VS
The ActiveX Control constants available to Visual C# are contained in an automatically generated C/C# header file with the .VS extension.
The SISCONST.VS file is created as follows:
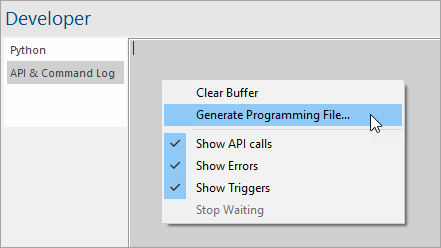
- Run a Cadcorp SIS application that can be customised using GisLink and select the Developer Control Bar.
- Select the Generate Programming File command (right-button) in the Developer Control Bar.
- The Generate Programming File dialog will be displayed:
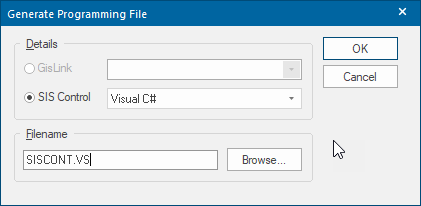
- Check the SIS Control radio button and choose Visual C# from the drop-down list.
- Fill in the Filename: field (either by typing a filename or choosing one using the Browse button). The file will typically be called SISCONST.VS but you can choose any name.
- Press the OK button to automatically generate the file.
Adding the ActiveX Control to a Visual C++ Project
- In Microsoft Visual Studio select Create a new Project.
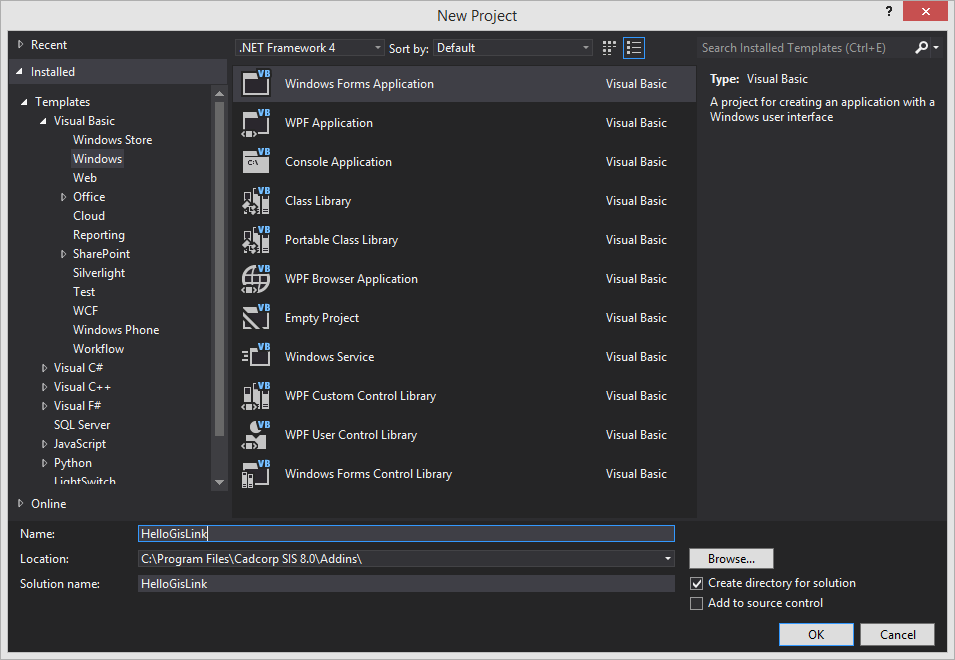
- Now select Windows Forms App > C# and click Next.

-
Name the Project “SISControlTest”.

- Click Next and select .NET 8.0 for the framework.
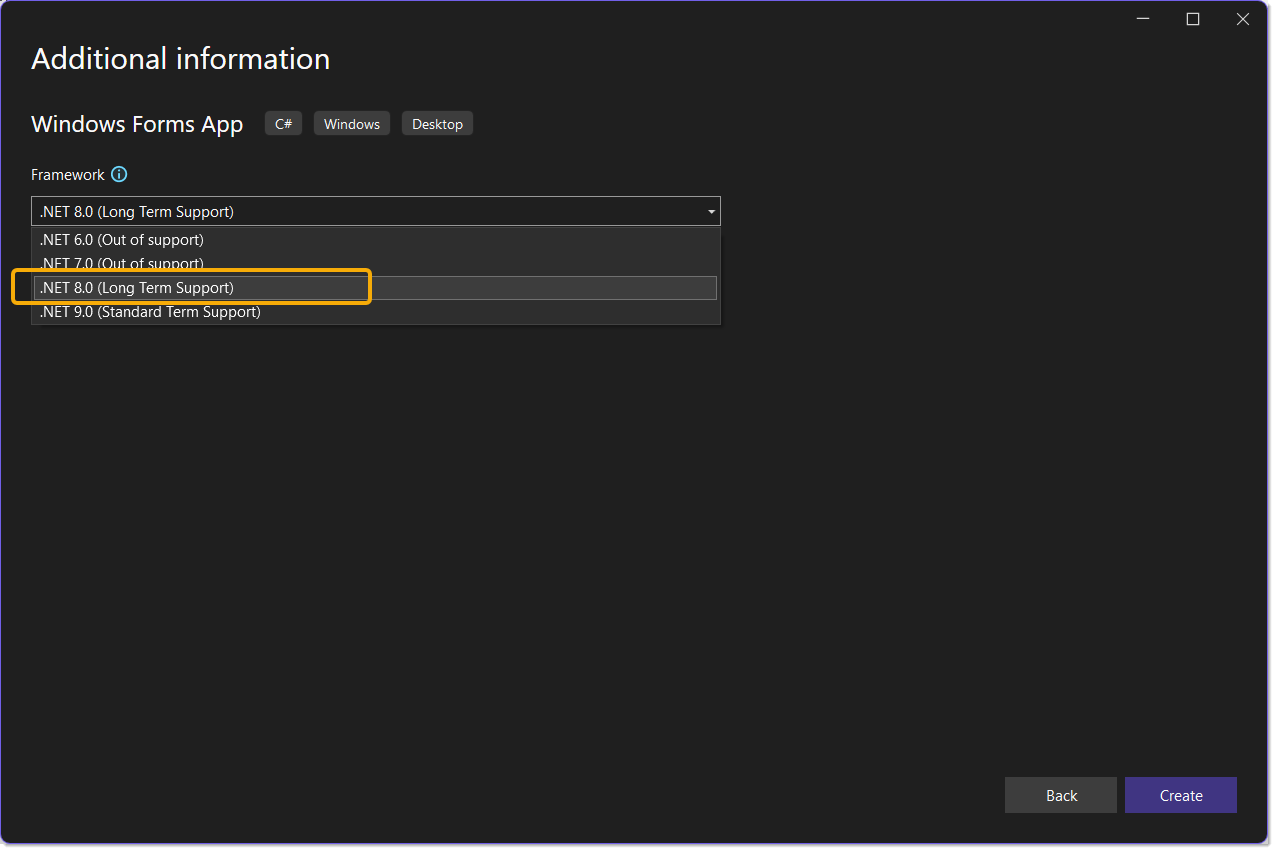
- Click Create to set up the form.
- Now click on Project > Add Project Reference > COM select SIS Control 9.1 and click OK.
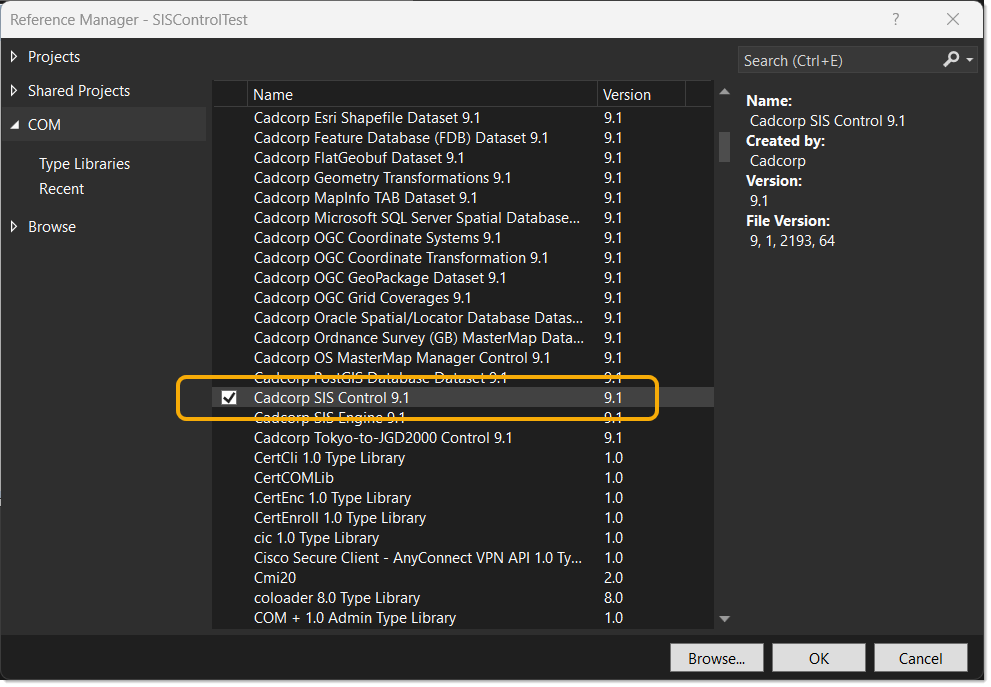
- NOTE: If you cannot locate this file, select Browse > Program Files > Cadcorp SIS Desktop > SISControl.ocx
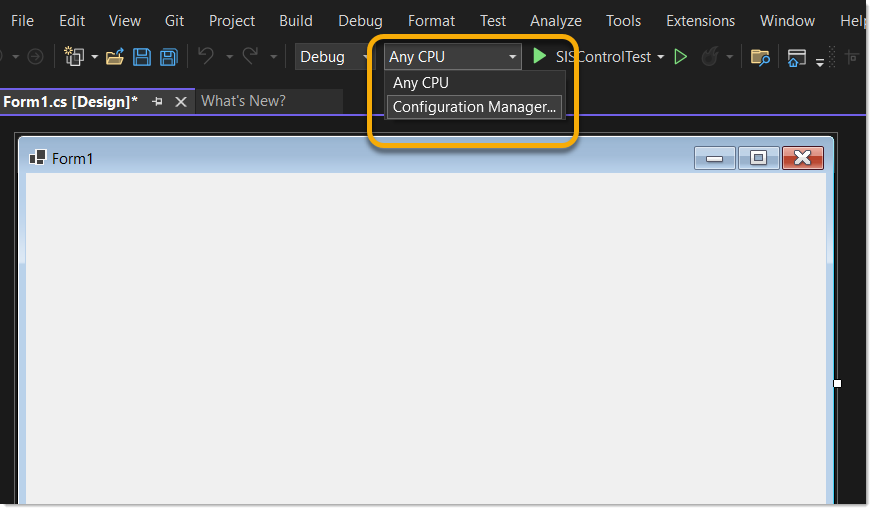
- Select Any CPU > Configuration Manager.
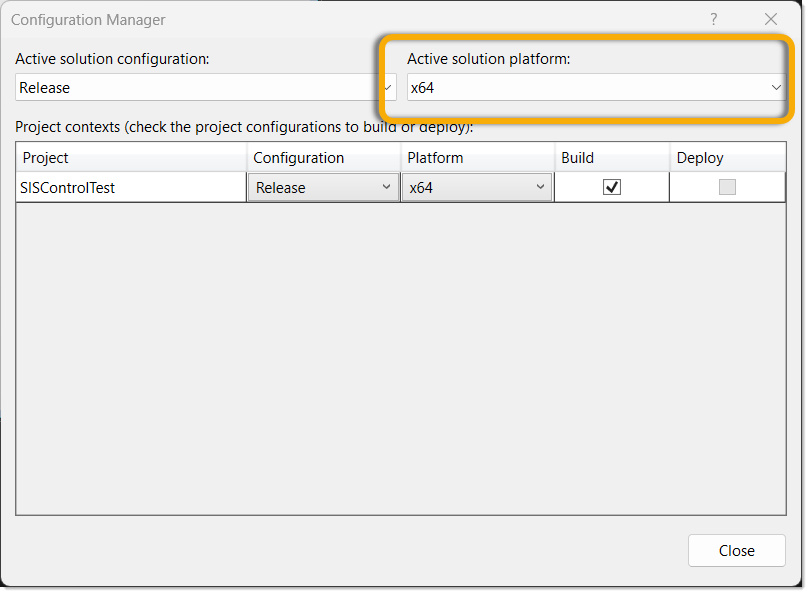
- Select Active solution platform > New > x64 Ensure both Debug and Release are set to x64.
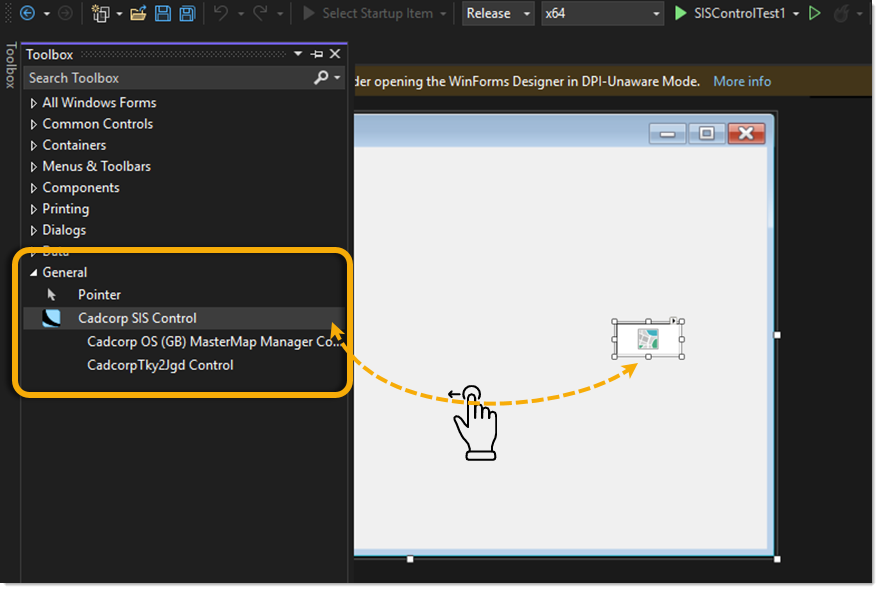
- Open View > Toolbox (or press Ctrl + Alt + X).
- Locate “Cadcorp SIS Control” under the General tab. Drag and drop Cadcorp SIS Control onto the Form.
-
Double click anywhere on the white space within the Form to open “Form1.cs” with some code on it. Add this code snippet within the “private void Form1_Load” method:
CopyaxSis1.LicenceKey = "<your_key_here>";
axSis1.LicenceSuffix = "<your_suffix>";
axSis1.SetStr(SisLib.Constants.SIS_OT_SYSTEM, 0, "_SentinelRMSServerList$", "<server_address");
axSis1.Level = SisLib.Constants.SIS_LEVEL_MODELLER;
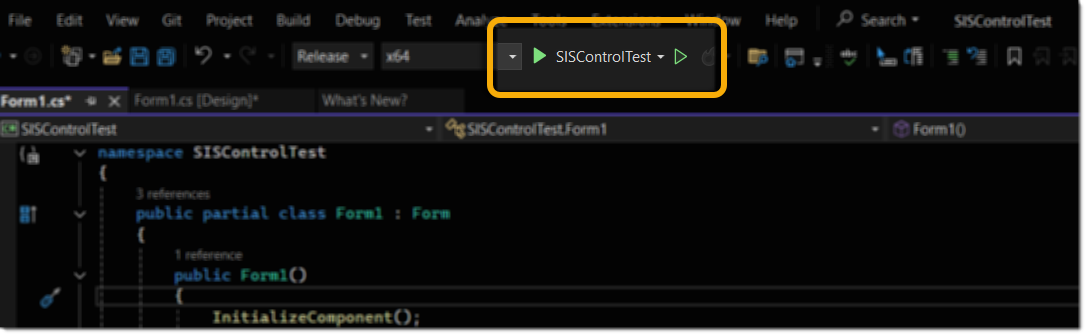
- Press Run/Build or the green play button.
-
You will see a blank screen with co-ordinates and a view which can be controlled using the scrollbars or the scroll button.
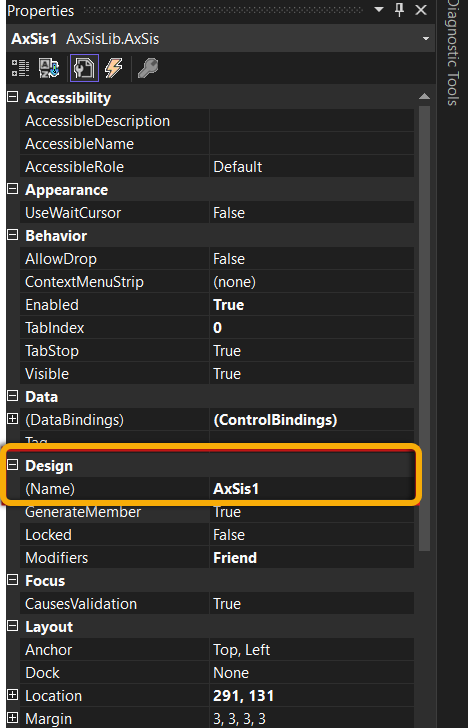
TIP: “axSis1” is the default name for the ActiveX Control used in this example. Ensure you check the properties of SISControl in the form to confirm the name you have used.