Multi-level Pens
A Multi-level Pen is any Pen object defined on more than one level (any levels between 0 and 63). Each level can have a different style, thickness, etc.
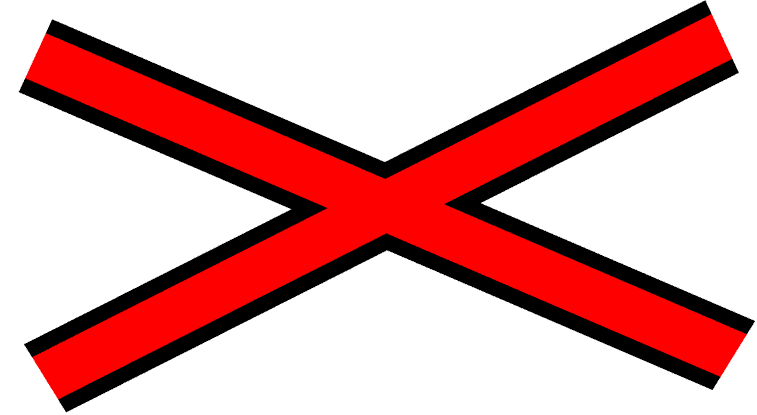
Multi-level Pens are useful in depicting major roads as drawn in a road atlas. The convention for this is to depict it as a thick red line bordered in black. This may be thought of as a very thick black line, with a thinner red line running along the centre.
To create it level 0 is given a width of 2 mm, coloured black with level 1 set to 1mm and coloured red. This would display as a 1mm red line, bordered by a 0.5mm black line on each side.
Because the wide black line is drawn first (level 0), followed by the thinner red line (level 1), junctions will automatically display correctly.
The JSON for each of these pens is:
{"Pen":[{"Pen":{"Colour":{"RGBA":[0,0,0,0]},"Width":200,"LineCap":"Round","LineJoin":"Round"}},
{"Pen":{"Colour":{"RGBA":[255,0,0,0]},"Width":100,"LineCap":"Round","LineJoin":"Round"}}]}
See also Multi-level Pens for more examples.
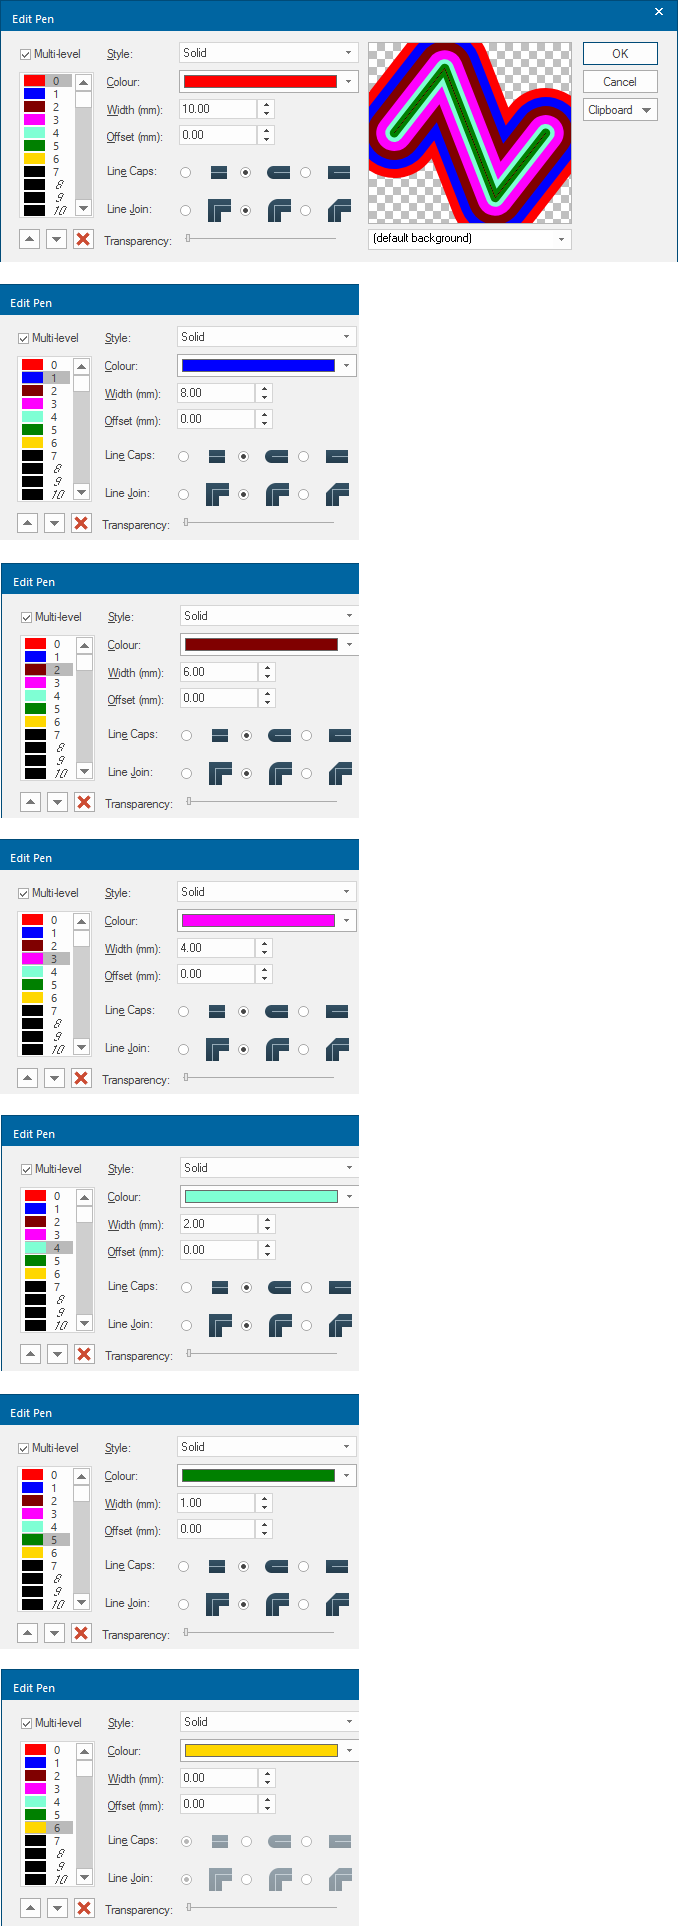
The following is an example of a seven level (levels 0 to 6) pen:
This level pen can be created in the Edit Pen dialog with different colours and line widths as shown:
Using the Clipboard - Copy to JSON function and pasting the code into a JSON editor:
{
   "Pen":[
      {
         "Pen":{
            "Colour":{
               "RGBA":[
                  255,
                  0,
                  0,
                  121
               ]
            },
            "Width":1000,
            "LineCap":"Round",
            "LineJoin":"Round"
         }
      },
      {
         "Pen":{
            "Colour":{
               "RGBA":[
                  0,
                  0,
                  205,
                  121
               ]
            },
            "Width":800,
            "LineCap":"Round",
            "LineJoin":"Round"
         }
      },
      {
         "Pen":{
            "Colour":{
               "RGBA":[
                  128,
                  0,
                  0,
                  121
               ]
            },
            "Width":600,
            "LineCap":"Round",
            "LineJoin":"Round"
         }
      },
      {
         "Pen":{
            "Colour":{
               "RGBA":[
                  255,
                  0,
                  255,
                  121
               ]
            },
            "Width":400,
            "LineCap":"Round",
            "LineJoin":"Round"
         }
      },
      {
         "Pen":{
            "Colour":{
               "RGBA":[
                  135,
                  206,
                  235,
                  121
               ]
            },
            "Width":200,
            "LineCap":"Round",
            "LineJoin":"Round"
         }
      },
      {
         "Pen":{
            "Colour":{
               "RGBA":[
                  0,
                  100,
                  0,
                  121
               ]
            },
            "Width":100,
            "LineCap":"Round",
            "LineJoin":"Round"
         }
      },
      {
         "Pen":{
            "Colour":{
               "RGBA":[
                  255,
                  255,
                  0,
                  121
               ]
            }
         }
      }
   ]
}
JSON for a multi-level pen can also be written and pasted into the Edit Pen dialog using the Clipboard - Paste option.
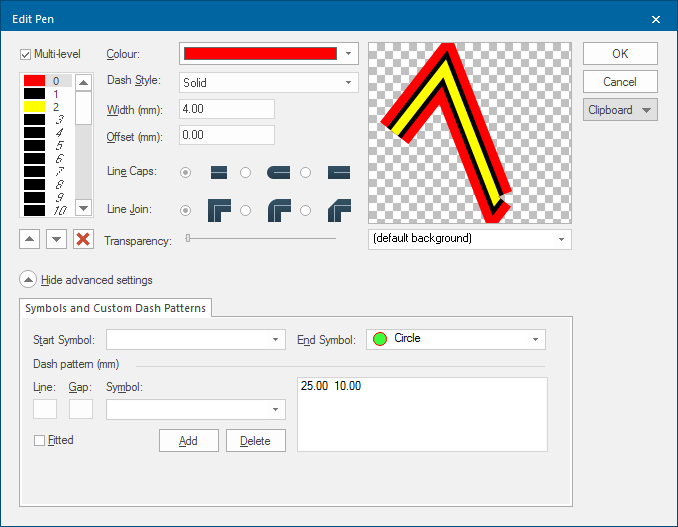
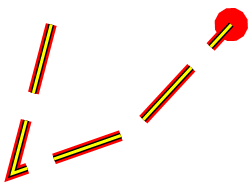
The following Edit Pen dialog settings would create a three level Pen that will produce the LineString shown below the dialog.
The End Symbol for level 0 Pen is set to Circle:
The JSON for this multi-level Pen is as follows:
{"Pen":[
{"Pen":{"Colour":{"RGBA":[255,0,0,0]},"Width":400,"Symbols":{"End":"Circle"},"Patterns":{"Fitted":false,"Repeats":[{"Line":2500,"Gap":1000}]}}},
{"Pen":{"Colour":{"RGBA":[0,0,0,0]},"Width":200,"Patterns":{"Fitted":false,"Repeats":[{"Line":2500,"Gap":1000}]}}},
{"Pen":{"Colour":{"RGBA":[255,255,0,0]},"Width":100,"Patterns":{"Fitted":false,"Repeats":[{"Line":2500,"Gap":1000}]}}}]}
Note: The JSON can be copied using Clipboard - Copy as JSON and edited in Notepad or a JSON editor, see Clipboard - Cut & Paste.
Modifying the above multi-level pen
Take the above multi-level pen and remove the end symbol in Level 0, remove the dash patterns from all levels, increase the Width of the line in all levels. The modified multi-level pen would now produce the following LineString.
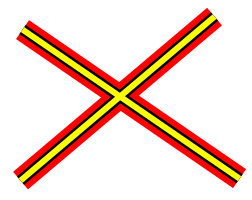
Where these LineString Items cross they will appear as:
The JSON would now be as follows:
{"Pen":
[{"Pen":{"Colour":{"RGBA":[255,0,0,0]},"Width":800}},
{"Pen":{"Colour":{"RGBA":[0,0,0,0]},"Width":400}},
{"Pen":{"Colour":{"RGBA":[255,255,0,0]},"Width":200}}]}
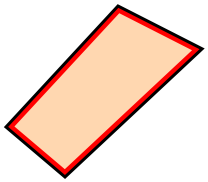
This example shows how you can create and generate a style for Land Registry Inspire Polygons.
The style will have a black line to define the edge of the Polygon and a red line to define the inside:
Select Overlays [Home-Map] or press F2 to display the Overlays dialog.
In the Overlays dialog Styles tab select the Pen drop-down arrow. Click the right arrow at the bottom of the Pen drop-down to display the Edit Pen dialog.
Check the Multi-level tickbox.
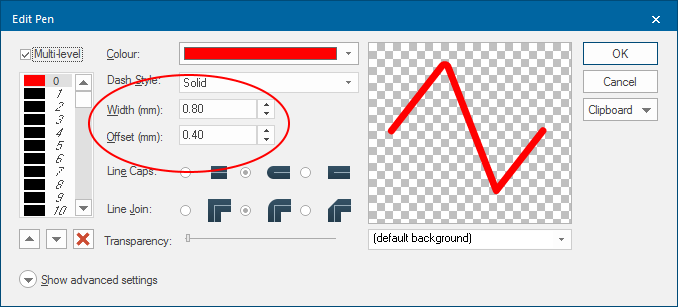
For Level 0 enter a width of 0.8 and an offset of 0.4 (half the width) to enable the style to appear inside the edge of the Polygon.
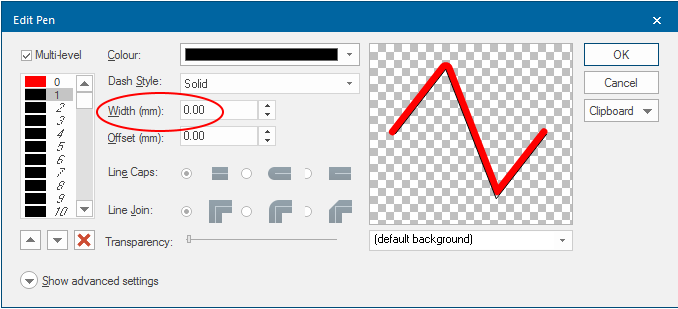
For Level 1 just select the default black line, with zero width.
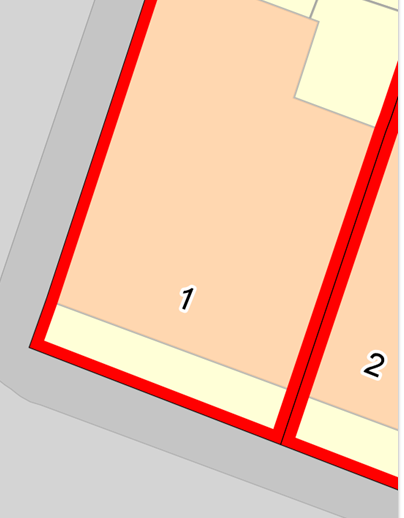
When you click OK and return to the map you will see the lines similar to the following:
Note: You may need to set the scale override for the overlay to see the styling.
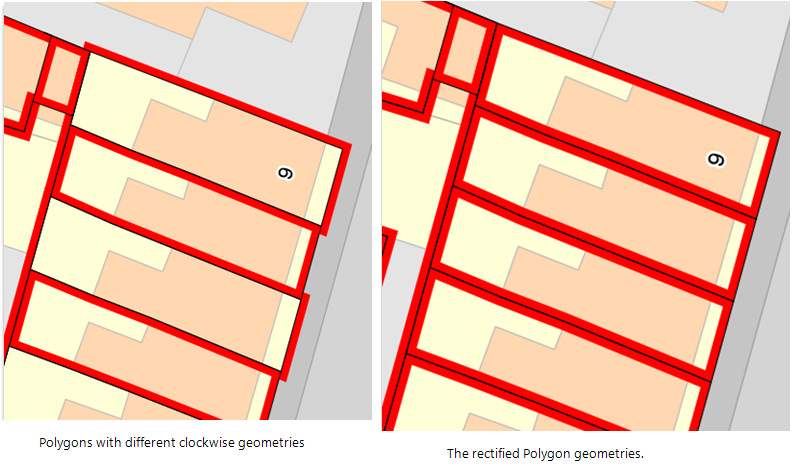
When you offset your styling you may find that it appears on the outside of the Polygon rather than the inside (left image below). This occurs when features were captured in both clockwise and anti-clockwise directions.
For a small number of Items you can rectify this by selecting the affected Items and clicking on Reverse [Edit > Geometry]. If there are too many features to rectify manually, use an expression to select them all.
Clockwise (_bClockwise&) is a system property in SIS Desktop 9.1 which informs you of the clockwise (or anti-clockwise) geometry of an Item.
Select Find (Home > Selection) or Ctrl+F in the Map Window to display the Find dialog.
Select the Expression tab and enter the expression:
_bClockwise&=True
Click OK.
All Items with the _bClockwise& property set to True will be selected.
With the Items still selected click on Reverse [Edit-Geometry].
