ODBC Data Source
Location: Overlay Types dialog > Databases tab > Cadcorp View Geometry > ODBC Data Source
Connects to an ODBC Data Source.
The ODBC Data Sources dialog will be displayed:
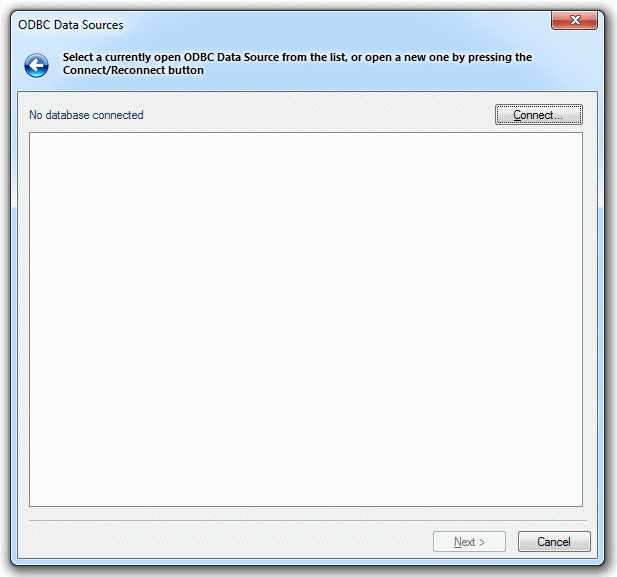
Select a current ODBC data source from list (if displayed) or click Connect...
The Select Data Source dialog will be displayed, this dialog has two tabs:
File Data Source
The Select Data Source -File Data Source dialog is:
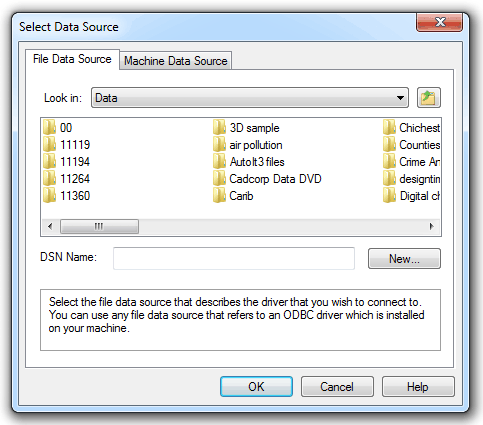
Select the file data source that describes the driver that you wish to connect to. You can use any file data source that refers to an ODBC driver which is installed on your machine.
Alternatively click New... to add a new file data source.
The first screen of the Create New Data Source dialog will be displayed:
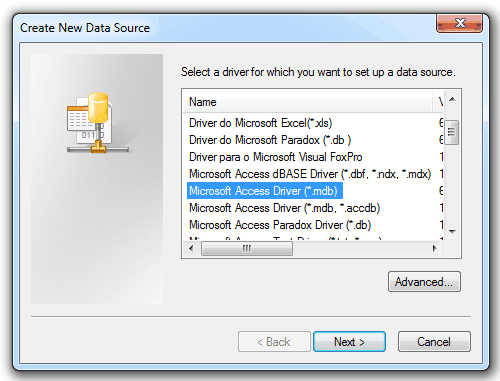
Either select a driver from the list or click Advanced... to display the Advanced File DSN Creation Settings dialog:
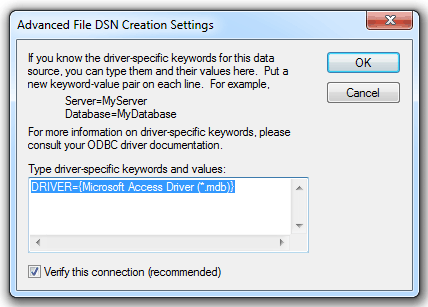
Enter the driver-specific keywords for this data, if known. For further information consult your ODBC driver documentation.
Click OK to return to the Create New Data Source dialog, and click Next.
The second screen of the Create New Data Source dialog will be displayed:
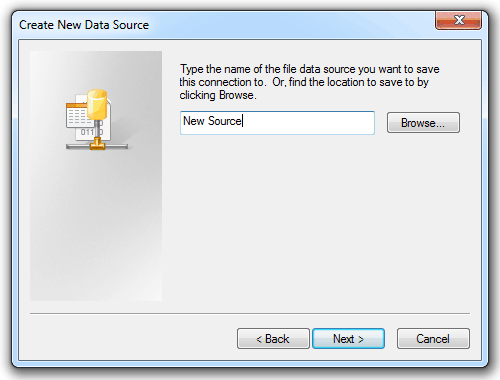
Enter the name of the file data source you want to save this connection to (in this example the filename "New Source" is entered) or use the Browse button to find the file location and click Next.
The third screen of the Create New Data Source dialog will be displayed:
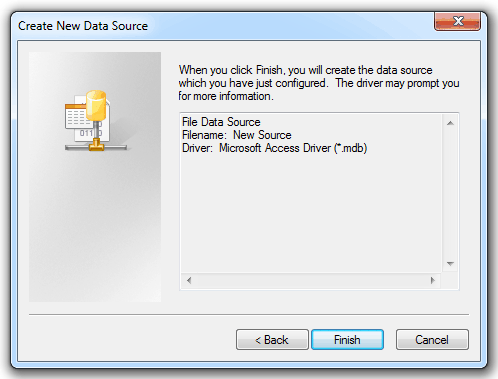
Click Finish.
At this point the setup procedure and displays will vary depending upon the driver selected. It is recommended that your refer to your database administrator for details of the particular setup method.
An example setup is shown at the end of this topic.
Machine Data Source
The Select Data Source -Machine Data Source dialog is:
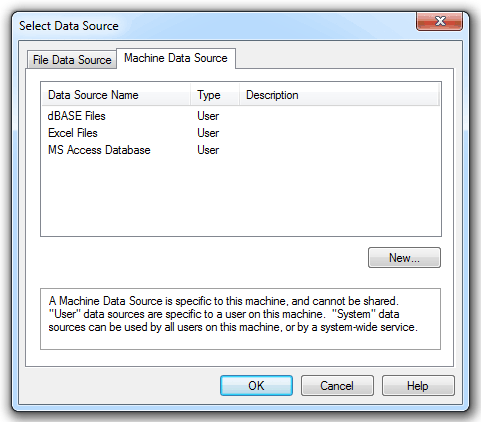
A Machine Data Source is specific to this machine, and cannot be shared.
Click New...
The first screen Create New Data Source dialog will be displayed:
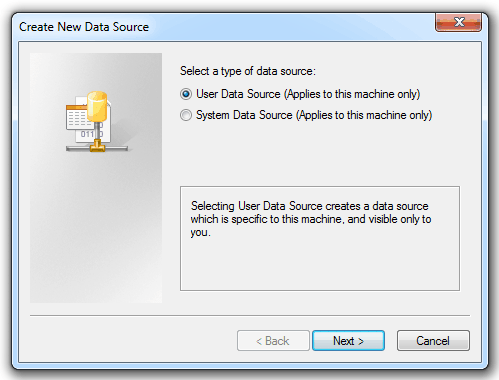
Select the type of data source:
- User Data Source (Applies to this machine only) - Selecting User Data Source creates a data source which is specific to this machine, and visible only to you.
- System Data Source (Applies to this machine only) - Selecting System Data Source creates a data source which is specific to this machine, and usable by any user who logs onto this machine.
Click Next.
The second screen of the Create New Data Source dialog will be displayed:
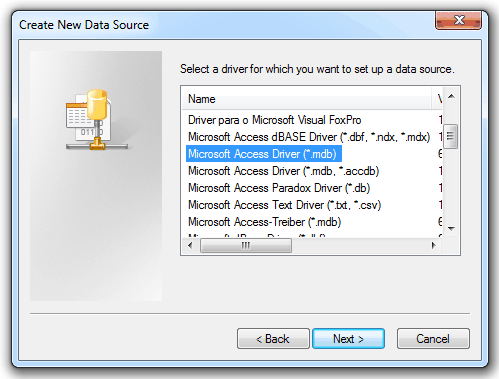
Select the required driver and click Next.
The third screen of the Create New Data Source dialog will be displayed:
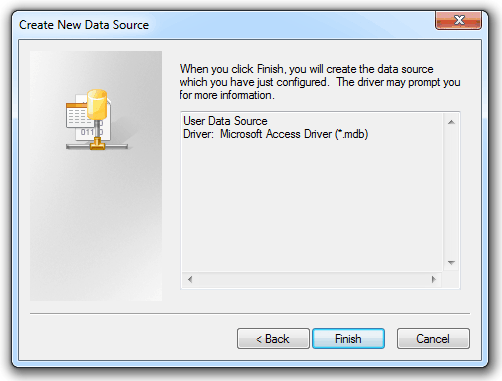
Click Finish.
At this point the setup procedure and displays will vary depending upon the driver selected. It is recommended that your refer to your database administrator for details of the particular setup method.
As an example consider the ODBC Microsoft Access Setup:
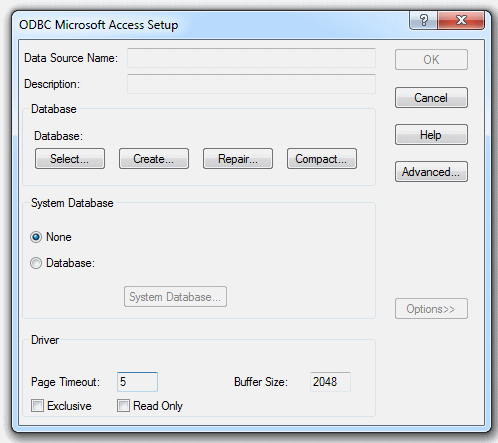
Data Source Name
Identifies the data source name, such as Payroll or Personnel, and specified the default data directory in which the ODBC driver searches for data files.
Description
An optional description of the data source; for example, "Hire date, salary history, and current employees' reviews".
Database
Select... - click to open the Select Database dialog to select a specific Access database.
Create... - click to open the NewDatabase dialog to create an Access database.
Repair... - click to open the Repair Database dialog to repair a damaged Access database.
Compact... - click to open the Database to Compact From dialog to reduce wasted space in an existing Access database.
System Database
None - if no system database will be used, select this option to log in as the Admin (Default User) user for a specific Access database.
Database - select to use a system database. Then click the System Database... button to open the Select System Database dialog box, where you can select the system (workgroup) database you want to use.
Driver
Page Timeout - The period of time, in tenths of a second, that an unused page remains in the buffer. The default value is 5 seconds and must always be greater than 0.
Buffer Size - The size of the internal buffer, in kilobytes, used by Microsoft Access to transfer data to and from the disk. The default is 2048 KB (displayed as 2048). Enter any integer value divisible by 256.
Exclusive - When selected, the database opens in Exclusive mode, which limits access to one user at a time and improves performance. When cleared, the database opens in Shared mode and can be accessed simultaneously by multiple users.
Read Only - Select to make the database read-only to prohibit any updates.