Offset Fence
Offset Fence selects items that fully lie within a certain distance from a temporarily constructed LineString (which may be a multi-segment LineString item).
Select Home > Selection > Fence.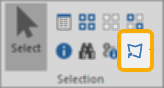
Example:
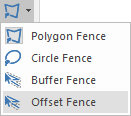
- Select Offset Fence.
- This opens the Distance to offset by dialog:
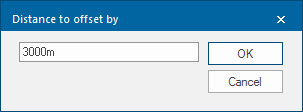
- Enter an offset (e.g 3000m). All items which fall within this distance either side of the fence line are selected.
- A positive value generates an offset to the left of the fence you define, so only items to the left of the fence are selected.
- A negative value generates an offset to the right and ensures that only items which fall within the offset distance to the right of the fence are selected. (Left and right are when looking along the original LineString item in the direction in which it was drawn.)
- Click onto an existing piece of geometry 9either a LineString or Polygon item) to start the fence.
- In this example we will trace the blue Polygon in the centre of the green Polygons:
- Click the first point followed by subsequent points on the path:
When clicking points, try the following key combinations for a wider range of offset options.
- Shift + snap : to draw to the snap point even if it is not on the graphics (this is called jumping). Use this if you are not tracing existing graphics.
- Ctrl + snap: to trace to the end of the LineString on which you snap, rather than to the snapped position.
- Shift + Backspace: to go back to the last vertex point on the traced data, even if you jumped over it.
Press Enter to finish defining the path or Ctrl + Enter to close by drawing to the first point snapped.
Press Escape to quit the command.
Note: The colour of the fence can be changed if required by creating a *Drag pen. See Selecting Graphics - Drag pen colour for a description of this function.