Publish
Select Publish from the drop-down menu to view the print dialog. With WebMap's intuitive Publish wizard, it is easy to print PDFs of whole maps or sections of maps seen on the screen.
The Publish window shows a preview of the map and on the right, the templates that are available to you. Remember to set up the map ready for Publishing by selecting the appropriate layers and any styling and base mapping required.
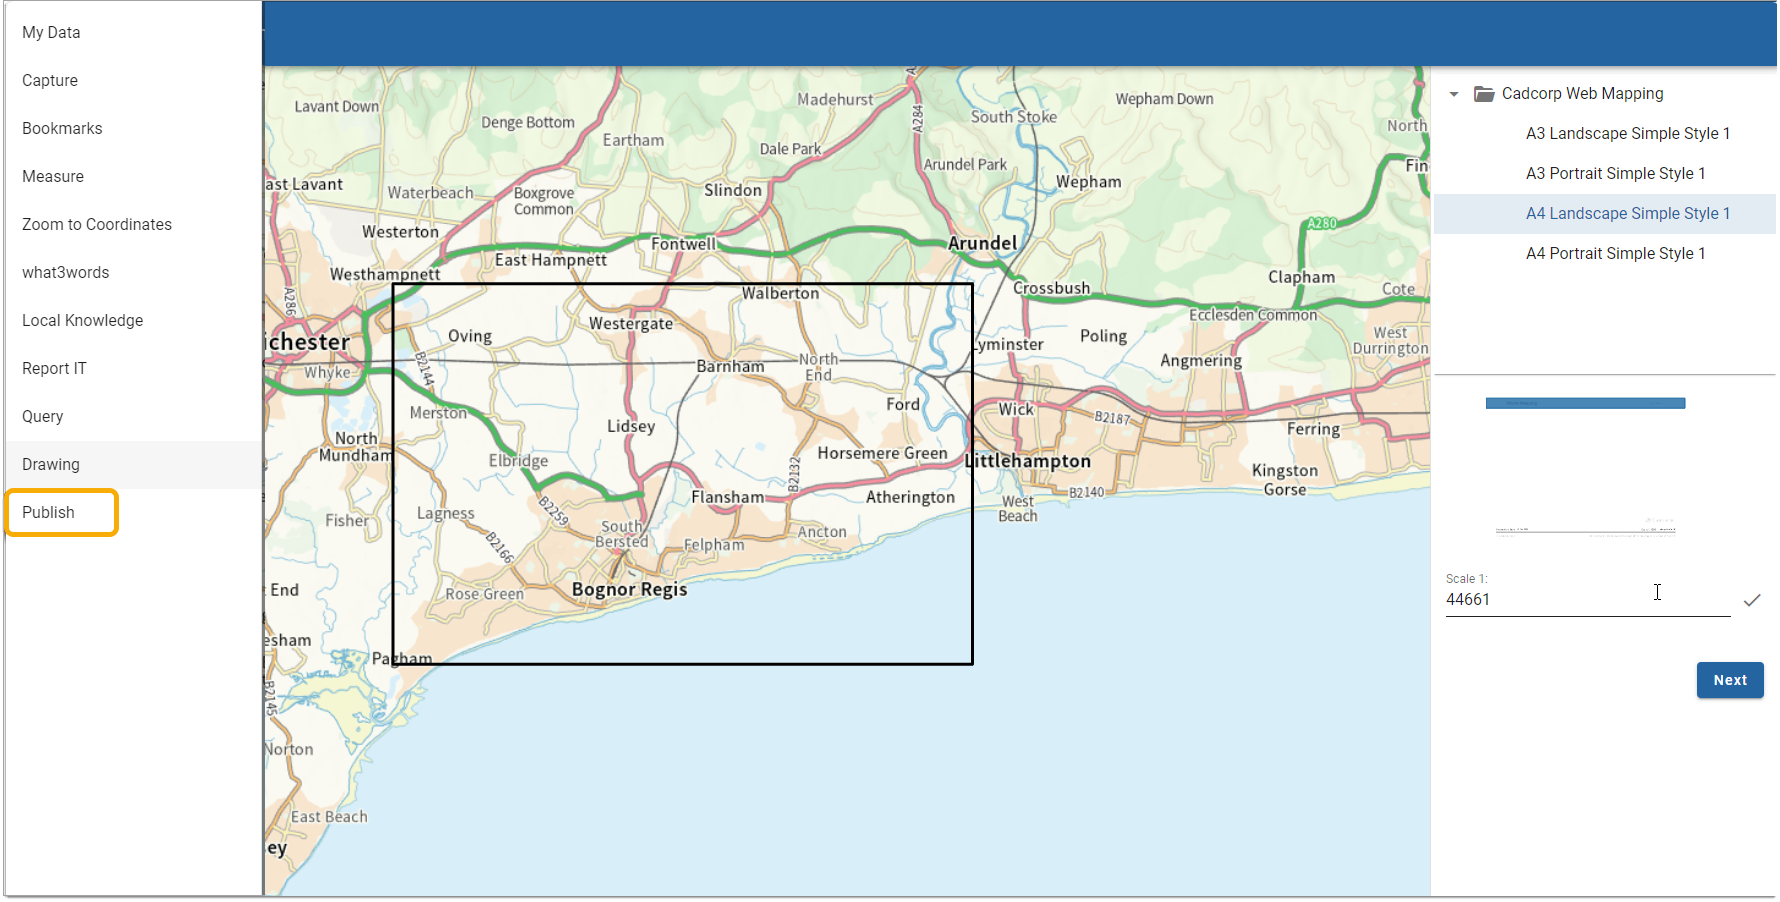
- Select a Print Template.
- Click & drag the rectangle in the map to place the content in the frame.
- Set the scale if required and tick to apply the scale. For example, 1:1250 is MasterMap level and 1:5000 is town level. ( The size of the preview rectangle on the Map should change with every edit). Press Next.
- The next page contains optional text fields which you can edit to be included in the PDF (e.g. Title, Author or Description). Click the cross ‘X’ if you do not wish to add any information.
- Press Enter to position text across multiple lines.

- Click Update to preview the changes.
- Enable Include legend to add the legend to the published PDF. This information is included from the Overlay theme in the SWD. Click & drag the rectangle in the map to place the legend anywhere in the frame. Remember to press Update to confirm the legend location.
- Click Create to create the PDF.
- Click Download
 to see the PDF.
 - The published map opens in a new browser. You can download a copy or print a paper copy.
- At any point in the Publishing process, you can return to the Map by using the dropdown icon at the top and clicking Return To Map.

Note: If a Search by Area boundary has been created on the map, this boundary will be visible in the print preview. It will also be included in the print output if printed from inside the search results window.