Turnout Model using the V2 Valkyrie Modeller
A turnout model simulates the turnout of appliances (based at a set of stations) in response to an appliance request set’s demands.
Output is written to a new table in the database which can then be analysed with analysis tools.  Related Topics
Click  on the toolbar.
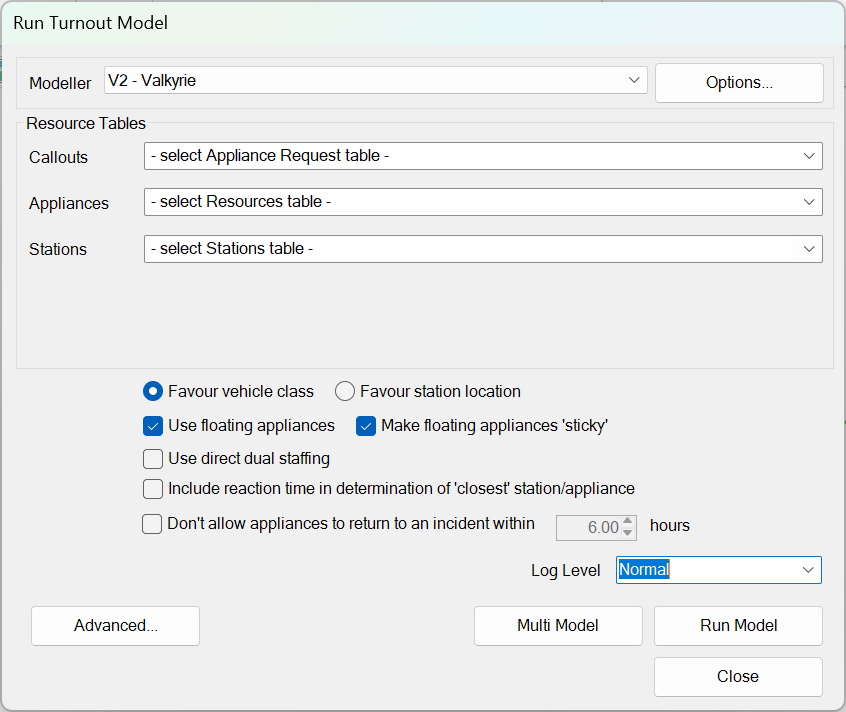
Select V2 from the drop-down menu. V2 is is the newer Valkyrie modeller and gives users a faster modelling experience, with greater compatibility with cloud hosted databases.
Click Options for more customised and precise modelling choices.
A note on the new Valkyrie modeller
As well as providing faster results, the V2 Valkyrie modeller uses the Multi-modeller interface to run multiple scenario models.
Here are some of the benefits of the V2 modeller:
-
Modelling speed has been dramatically increased (the actual amount depends on the specifications of the hardware WLM is running on).
-
Results can be previewed before saving anything back to the database.
-
Results are saved back to the database as a single task, avoiding timeout limits on cloud hosted databases.
-
New logging levels allow the user to see exactly why a decision was made during the modelling process.
-
Multi-modeller allows the user to run multiple variations of a callout/base/appliances combination to give greater insight into the best combination of resources.
After you have chosen your modeller, select the relevant Appliance Request table (Callouts), the Resources table (Appliances) and the Stations table (Stations) from the drop-down lists.
Each of the three drop-down lists shows the table names for the relevant type (and associated comment in brackets.)
- Favour vehicle class and Favour station location
- Floating Appliances
- Use direct Dual Staffing
- Include reaction time in determination of 'closest' station/appliance
- Don't allow appliances to return to an incident
- Log Level
- Understanding the Modelling Results
- Advanced Turnout Options
- Run Model
- Save a Model
Favour vehicle class and Favour station location
This gives the turnout model a bias – either by:
- Vehicle class (where a specific incident demands a certain vehicle class, i.e. a specialised vehicle).
- Proximity (the nearest station location appliance) or
For example in Favour vehicle class, all stations with this particular vehicle class appliance are shown as nearer to the incident irrespective pf physical proximity.
Other stations with different vehicle class appliances may be available closer to the incident but because of Vehicle Class bias, they may be disregarded.

Floating Appliances
‘Floating appliances' are appliances that have no home base assigned to them, or the assigned home base is not in the Base/Station set. The options should work as follows:
Use floating appliances – Enable this option to use floating appliances in the modelling process.
Make floating appliances ‘sticky’ – defines how floating appliances are used. When enabled, the floating appliance will remain at the first base/station it is used at. If not selected, the appliance will remain floating throughout the modelling process, allowing it to be consumed from multiple bases.
Use direct Dual Staffing
Direct dual staffing allows dual staffing appliances to be directly mapped to other appliances. This differs from the original dual staffing, which mapped an appliance class instead of an actual appliance.
Mapping an appliance class to a dual staffed appliance could result in an appliances from further away bases/stations being used for the staffing. This may not be realistic in real life scenarios, where dual staffed appliances are usually handled by the staff of a specific appliance and base/station.
The direct dual staffing option requires that focused maps are setup within the database.
Include reaction time in determination of 'closest' station/appliance
Selects the nearest on the basis of the total route cost + reaction time (+ staff system).
For example in an incident X where
- Station A is 5 minutes away and appliance at A has a reaction time of 3 minutes
- Station B is 6 minutes away and appliance at B has a reaction time of 1 minute
If reaction time is not specified, the appliance at A is assigned to X. However if reaction time is enabled as a choice, the appliance at B is assigned to X.
Consider the following scenarios:
- With Include reaction time selected: If an appliance is prioritised to Fires within 10 minutes but the appliance has a reaction time of 2 minutes, the prioritisation will only be applied if the travel time was 8 minutes or less.
- Without Include reaction time selected: If an appliance is prioritised to Fires within 10 minutes and the appliance has a reaction time of 2 minutes, the prioritisation will still consider fires up to 10 minutes travel away. This means it can assign an appliance which will actually be in attendance within 12 minutes.
Note: This option is available for Turnout models only, i.e. not for Predict models.
The set up for this model is very similar to Predict Demand in Setting up the prediction model. The differences are:
- Output is sent to a table in the database rather than Excel
- There is no option to seed appliances.
Don't allow appliances to return to an incident
Use this option to prevent the model sending the same appliance back to an incident within a specified amount of time (it is advisable to wait until a different appliance is free to do the callout).
This helps to prevent an appliance becoming its own relief crew.
Log Level
The V2 modeller can log how a model was produced during the process. These logs are then saved as part of the model for later reference.
Logging is available in three different levels. Select the one you need from the drop-down menu.
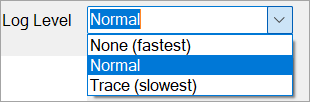
- None – This option will produce no logs. Whilst not being very informative, it does speed up the modelling process significantly (as no data is being written to the log) and can reduce the amount of data that is finally saved back to the database. Use this mode when you are confident the modeller is working as expected.
- Normal – This option will produce a basic high-level log, giving information on errors and which appliance was selected for each callout. It is the default option as it provides the perfect balance between speed, log size and log quality.
- Trace – Trace level logging logs every decision that was made during the modelling process. Because of this, the logs can grow very large with bigger datasets (we recommend using it only with datasets that have 10,000 or fewer callouts). Use this mode to find out why a specific appliance was selected.
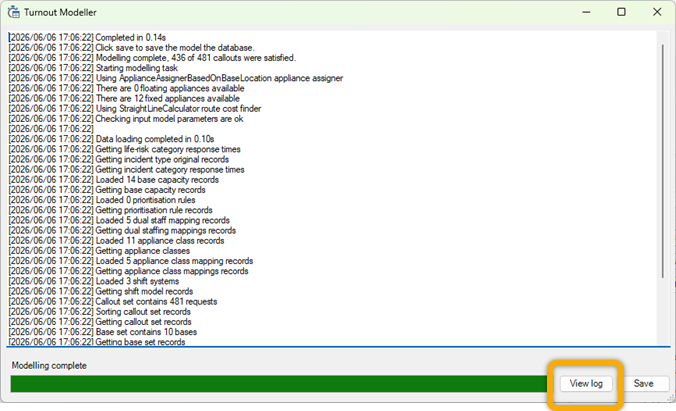
Logs can be viewed after modelling by clicking the ‘View log’ button.
The log entries are displayed in a format of log date/time, log level, and then the log message.
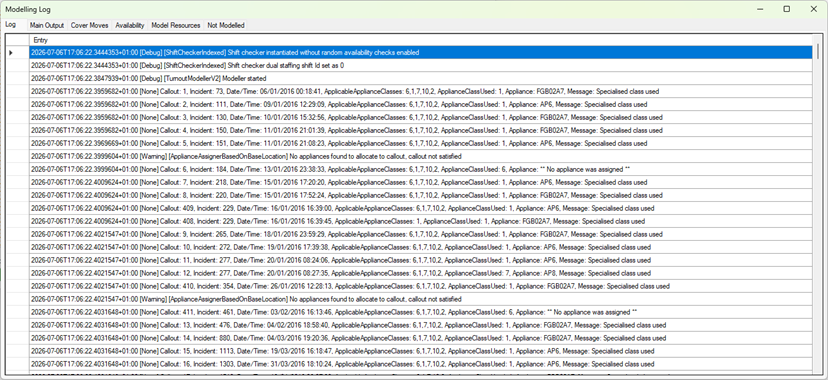
Understanding the Modelling Results
| Field | Description |
| Logs | If logging was enabled, this table show the log output messages. When saving, records in this tab will be saved into a table prefixed with tblML_. |
| Main Output |
Contains the actual modelled data. When saving, data from this tab is saved into a table prefixed with tblMO_. |
| Cover Moves | Not currently supported |
| Availability | If random availability is enabled, this tab will show the results of a random availability test, which once computed for a specific appliance/time, it reused throughout the modelling process. Records from this tab are stored in a table prefixed with tblMA_. |
| Model Resources | Lists all the appliances contained within the appliance set along with their base ID, shift pattern, if the appliance was used, and how many times it was used. It can be useful to look at this data to make sure most appliances are being used, as this can be a good indicator of a successful modelling task. If an appliance was marked as a floating appliance, it will be indicated in the Base ID column. Records from this tab are partially saved into a table prefixed with tblMR_. |
| Not Modelled |
Lists all records that failed to model. Records from this tab are saved into a table prefixed with tblMN_. |
Advanced Turnout Options
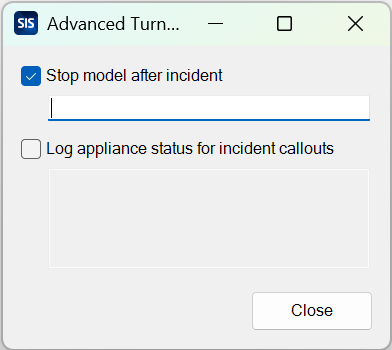
"Stop model after incident" : Use this option to define a stop point in the data. For example if you specify an incident number in the value field, the model will stop after this particular incident has been processed.
"Log appliance status for incident callouts" The option to log to the audit file the status of all appliances at the time of callout for the incidents listed.
Run model
Running a model requires the user to select a callout, appliance and station set. All other options are optional. The usual sequence of events is as follows:
- Select V2 – Valkyrie from the modeller drop down box.
- Set any options, such as the routing method, by using the Options button.
- Select the callout set on the Turnout form.
- Select the appliances set.
- Select the Stations set.
- Select the preferred modelling mode (Favour vehicle class or Favour station location). Most users will use the Favour station location mode.
- Select the floating appliances options as required.
- Select to include a reaction time when determining the closest station/appliance.
- Select if to block appliance returning to an incident for a specific amount of time.
- Select the required log level from the dropdown.
- Press the Run Model button to start the modelling process.
Click the Run Model button to view the progress of the modelling task.
The model generates a set of outcomes, the structure of which is compatible with Callouts in the Historic Data.
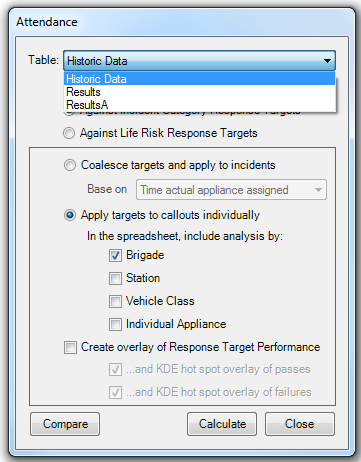
This means the simulated turnouts can be analysed exactly like Historic Data for performance to be assessed.
Saving A Model
After running a model (and preferably after checking the results seem correct/as expected), save the model by clicking the ‘Save’ button.
Enter a name for the model- the data is then saved into the various tables with the specific prefix + this model name (i.e tblMO_ModelName).