Using the MasterMap to DXF Exporter
The MasterMap to DXF Exporter control is located on the SIS Applications tab:
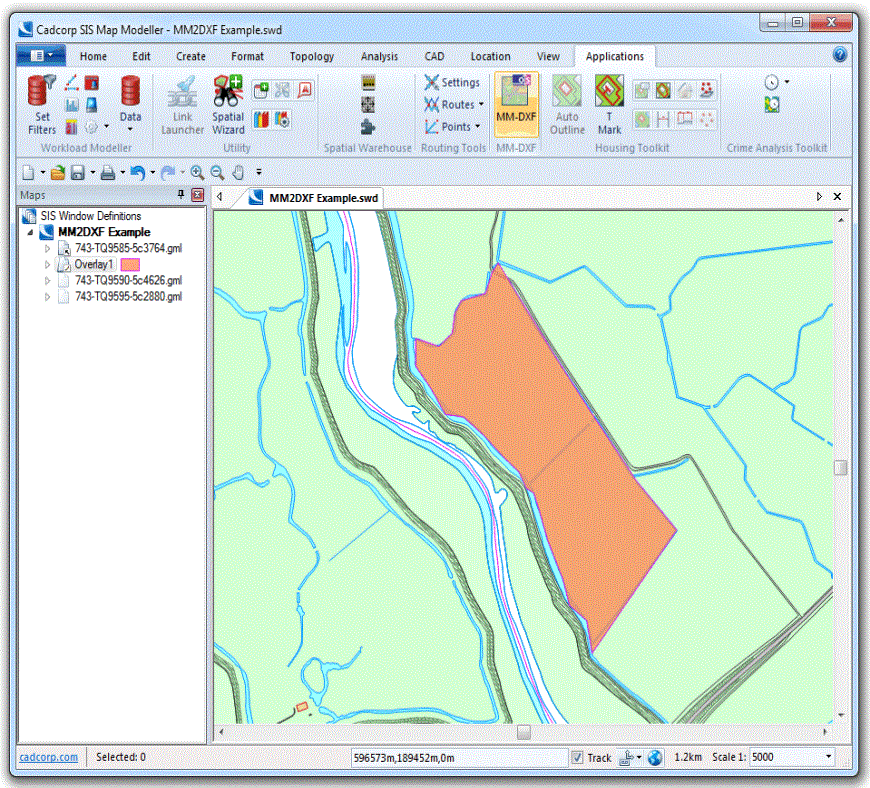
With the MasterMap overlay to be exported displayed in the Map Window (see example shown above) select the MM-DXF button in the Applications tab.
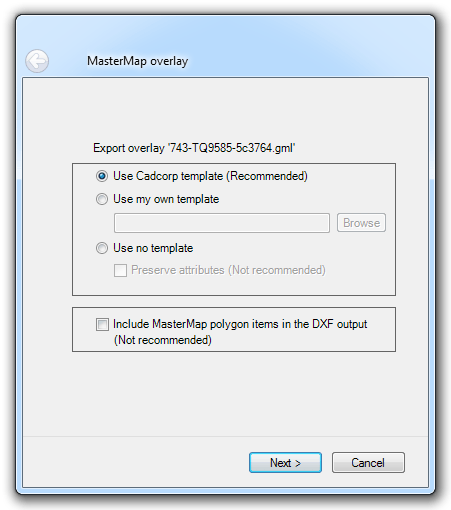
The first dialog to be displayed is the MasterMap overlay dialog:
Note: All the MasterMap to DXF Exporter dialogs are resizeable horizontally and vertically so you can easily view comments and long file path names.
The following options are available from this dialog:
|
Use Cadcorp template (Recommended)
|
This option will use the supplied template file, Cadcorp_ACAD-MM_Template.dxf, located in C:\Program Files (x86)\Cadcorp SIS 8.0\Addins\MasterMap to DXF folder. See Templates for further details. |
|
Use my own template
|
If you have created your own template you can select it using this option. Click Browse to navigate to the required template. |
|
Use no template
|
This option does not apply a template, the exported DXF will maintain the layers as set in SIS. Preserve attributes (Not recommended) Normally the MasterMap overlay would be exported without attribute data, this is because there can be vast amounts of attribute data which means the DXF files can be enormous. Also generally none of the MasterMap attributes are of interest to anyone using the DXF data. However, if you do require the attribute data to be exported check this tickbox. |
|
Include MasterMap polygon items in the |
MasterMap polygons are not necessary to produce a DXF file and can cause unwanted colour-fill in the exported DXF, therefore the default setting for this option is OFF. However, the option to include is provided for backward compatibility. |
Click Next.
The Tiling scheme dialog will be displayed:
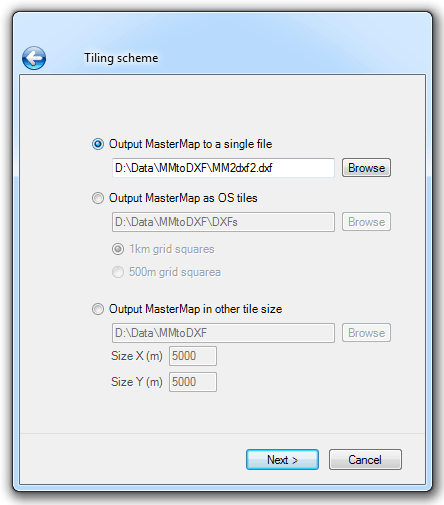
The following options are available from this dialog:
|
Output MasterMap to a single file
|
This option will export the MasterMap to a single DXF file. Click Browse to navigate to the required location and enter the filename. |
|
Output MasterMap as OS tiles
|
This option will export the MasterMap to individual tiles. The number of tiles to be created will be displayed on the Select the output format dialog before you commit to proceeding with the export. The tile size can be 1km or 500m grid squares. Click Browse to navigate to the folder to hold the individual tile files. |
|
Output MasterMap in other tile sizes
|
This option will export the MasterMap to individual tiles in your specified X and Y sizes. Click Browse to navigate to the folder to hold the individual tile files. |
Click Next.
The Additional overlays dialog will be displayed:

The following options are available from this dialog:
|
Export just the MasterMap overlay |
This option will export only the MasterMap overlay. |
|
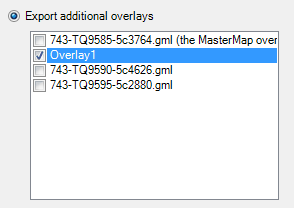
Export additional overlays |
This option will export any ticked overlays to the same folder as the MasterMap.
The additional overlays do not use a template. All items in these overlays will be assigned to 0 and the styling of items is retained from the items’ styles in Cadcorp SIS. Unlike MasterMap overlays the additional overlays are exported complete with attributes. |
Click Next.
The Select the output format dialog will be displayed:
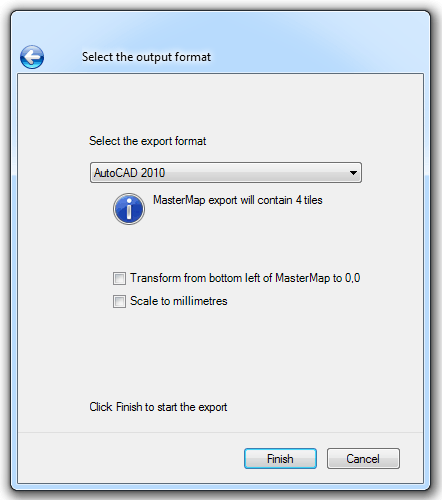
If either of the output to tile options has been selected in the Tiling scheme dialog the number of tiles that will be created is shown on this dialog. This gives you the opportunity to step back through the dialogs, using the back Arrow button at the top of each dialog, to make any required changes to tile sizes.
Select the required export format from the drop-down box:
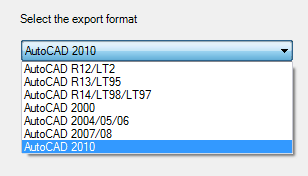
When you are satisfied with the number of tiles and the output format check the following tickbox(es) if required:
|
Transform from bottom left of MasterMap to 0.0
|
This will change the lower left coordinate of the lower left tile (in the case of multiple tiles) to 0,0 for use in a local coordinate system. Multiple tiles will be referenced off the lower left tile. |
|
Scale to millimetres
|
This will scale the drawing by a factor of 1000. This relies on the data in SIS being scaled to metres and the drawing in AutoCAD to be scaled in millimetres. |
click Finish.
If you are exporting to tiles a progress message will be displayed:
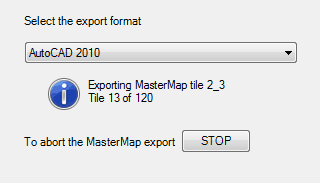
If you wish to cancel the export, perhaps because there are too many tiles, click STOP. The process will stop and you can cancel or step back through the dialogs to make any required changes.
Note: The total number of tiles exported will be less than the number shown in the dialog if some tiles contain no data.
Send comments on this topic.
