Installing Cadcorp GeognoSIS
Cadcorp GeognoSIS is available as 32-bit (x86) and 64-bit (x64). Check if CadcorpSIS Desktop matches your GeognoSIS architecture (both should be 32-bit or both 64-bit versions).
- Ensure CadcorpSIS Desktop is closed.
- Select the right installation file for GeognoSIS 9 (32-bit or 64-bit) and click your right mouse button to Run as administrator.
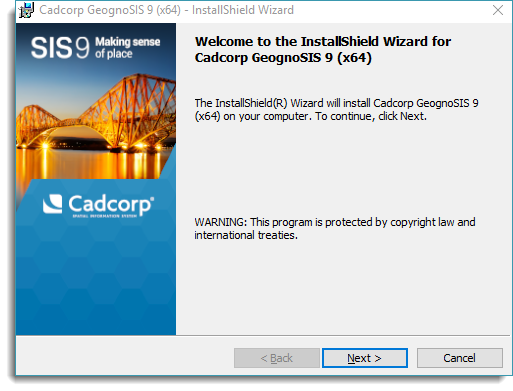
- The InstallShield Wizard will now guide you through the installation process. Click Next to begin.
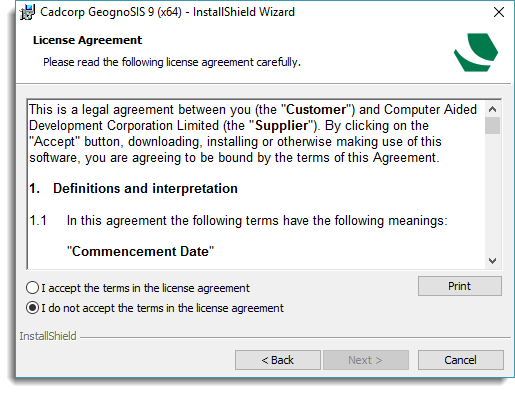
- Take a moment to read through your Licence Agreement and click Agree when ready to proceed with installation.
- Personalise your copy of GeognoSIS by entering relevant customer information (a user name and an organisation name). You can also choose the type of licence to be used: Standalone (see 6.) or Network (see 7.)
- Next select who to install the application for (anyone who uses the machine or just a particular user).

TIP: We recommend installing GeognoSIS for Anyone who uses the machine.
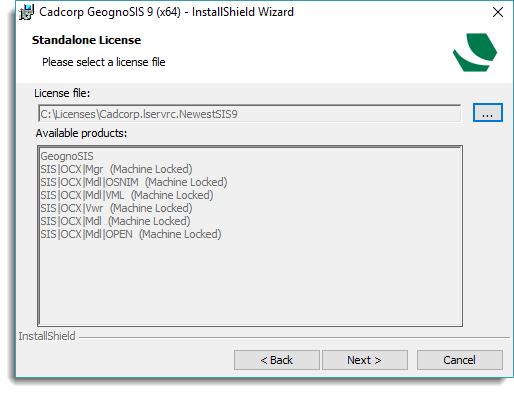
- The Licence File dialog will be displayed. Click the ... button to browse to the location of your standalone licence file. All your licensed products are displayed in the main pane. Click Next.
- If choosing Network Licence, remember to enter the
- address of the Network Licence Server
- the port number which this client will use to communicate with the network license server (Default port is 5093) and
- the server timeout interval (in seconds) for all direct application/licence server communication.
See also Network Licences for more information.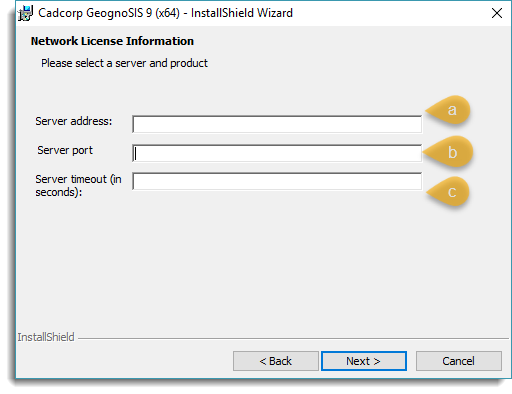
Note: If server port and server timeout locations are left blank they will revert to their defaults (5093 and 30 seconds respectively).
- Once the licence file has been recognized you can begin configuring the GeognoSIS Admin service. This creates the management instance of GeognoSIS which is required for running the web-based GeognoSIS Manager interface.
- Specify a free port number and an admin password. Click Next.
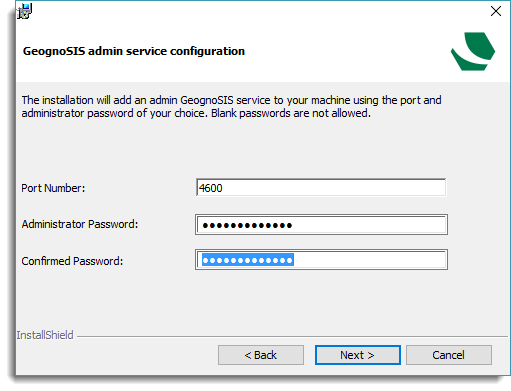
This is the main Admin instance; you cannot use this for any other applications.
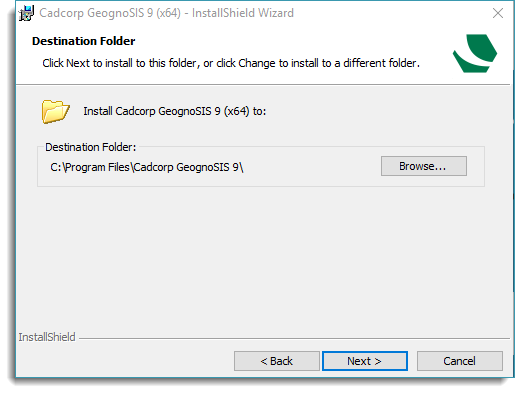
- Cadcorp GeognoSIS installation will now begin. The default destination folder is C:\Program Files\GeognoSIS 9. Use the Browse button to change the destination if needed.
- Now choose your setup type: Cadcorp GeognoSIS Only (or) Cadcorp GeognoSIS with Oracle Instant Client (This installs a lightweight connector to connect with Oracle Databases. Only install this if you will be using Oracle data layers in your mapping)

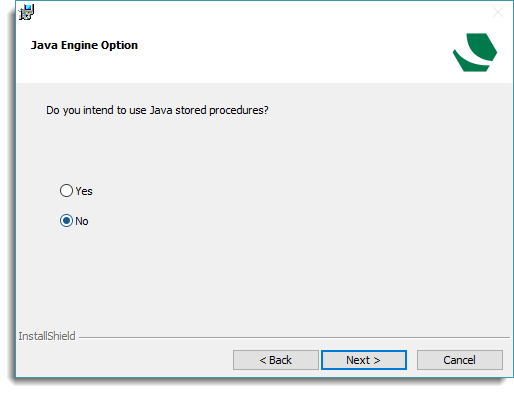
- Your next option is for Java-stored procedures. These are database-side connectivity routines (JDBC).
- Choose either Yes/No. SIS WebMap 9 does not use any Java stored procedures so if you use our WebMap product extensively we recommend you leave it on NO.
- Finally click Install if you are happy with these settings.

-
Once successfully installed the wizard will display the URL to access Cadcorp GeognoSIS.
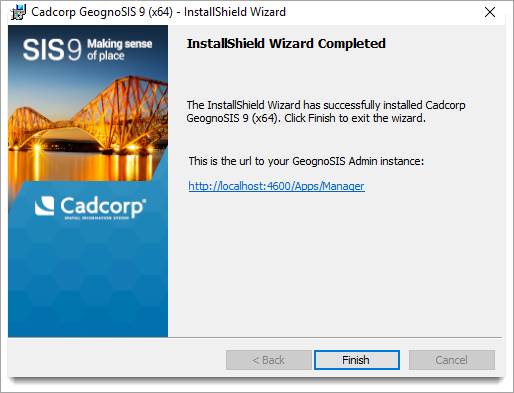
Remember to make a note of this URL before clicking Finish.