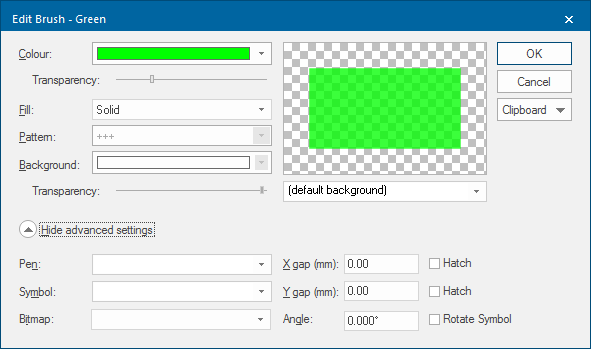
'Edit Brush' dialog Parameters
This page explains the parameters available in the Edit Brush dialog:
| Option | Description | |
|
Colour |
This is the main colour for the brush; use the drop-down arrow to pick from standard Windows colours. Use More Colours to define additional colours. |
|
|
Transparency (top slider) |
Use this slider to adjust brush opacity. A numeric transparency value can also be entered in the Brush transparency parameter in the Brush attributes in the All tab of the Properties of Polygon dialog. (0 is fully opaque and 255 is completely transparent) The following example shows a fully opaque black Brush set by the RGBA parameter of 0 (shown in red): {"Brush":{"Style":"Solid","Colour":{"RGBA":0,0,0,0]},"BackgroundColour": The equivalent Brush set to fully transparent would be: {"Brush":{"Style":"Hatched","Pattern":"-","Colour":{"RGBA":[0,0,0,255]}, "BackgroundColour": {"RGBA": [255,255,255,0]}}} Note: The second instance of RGBA values are arbitrary in this instance as they apply to background colour settings, i.e. brushes using a Hatch pattern. |
|
|
Fill |
Select from five possible Brush styles. |
|
|
Solid |
This produces a Brush where the item to be filled is completely filled with the chosen colour. Use the top Transparency slider to set the degree of transparency for this colour if required. |
|
|
Hollow |
This produces a hollow completely transparent Brush. This style is useful when you want to change the spacing or angle of hatch lines or use bitmaps or Symbols to fill the item. |
|
|
Hatch |
This produces a Brush consisting of a hatch pattern selected from the Pattern drop-down options: The colour of these hatching lines will be as set using the Colour setting, and the background will be as set using the Background setting. This background colour may be adjusted between fully opaque and fully transparent by moving the Transparency slider. Note: Hatching is a fill style generated by Windows, and is a cosmetic setting. The spacing of the hatching lines cannot be varied, and will remain the same number of pixels wide on the screen, irrespective of how closely you zoom in. To obtain accurately placed hatching patterns, use the Advanced Settings controls at the bottom of the Edit Brush dialog. |
|
|
Pattern |
This is used in conjunction with the Bitmap, which is repeated to fill the brush. |
|
|
Background |
Choose a background colour if the Hatch pattern is to be superimposed over a colour. Move the top and bottom Transparency sliders to adjust the transparency of the foreground and background colours. |
|
|
Transparency (bottom slider) |
The bottom Transparency slider provides adjustment of the Brush background between fully opaque (0) and fully transparent (255) (when Fill is set to Hatch). The transparency value is displayed when the slider control is selected and moved. A numeric transparency value can also be entered in the Brush transparency parameter in the Brush attributes in the All tab of the Properties of Polygon dialog. The following example shows a black Brush with a background set to fully opaque by the RGBA parameter of 0 (shown in red): {"Brush":{"Style":"Hatched","Pattern":"-","Colour":{"RGBA":[0,0,0,0]}, The equivalent Brush background set to fully transparent would be: {"Brush":{"Style":"Hatched","Pattern":"-","Colour":{"RGBA":[0,0,0,0]}, "BackgroundColour":{"RGBA":[255,255,0,255]}}} (default background) The (default background) drop-down allows you see how the brush will appear against a range of backgrounds, 1:250 000 Scale Raster and OS StreetView® are shown below as examples:
|
|
|
Advanced Settings |
The advanced settings can be shown or hidden by toggling the up/down arrow |
|
|
Pen |
The Pen to use for hatch lines drawn by Cadcorp SIS Desktop. |
|
|
Symbol |
An optional symbol to draw at each (X,Y) point. You should select a NOL symbol whose name is alphanumeric. |
|
|
Bitmap |
||
|
X gap (mm) / Y gap (mm) |
These are the horizontal and vertical spacings before a pattern is repeated. The values given refer to millimetres on the print and fall between the 0 to 500 range. |
|
|
Hatch |
Check the Hatch tickboxes to determine whether the hatch lines should be drawn. This option is useful for advanced hatching with a definite spacing and angle. The hatching option in non-advanced brushes is fast, but can be unpredictable with different printers etc. |
|
|
Angle |
The angle for symbols and advanced hatch lines. |
|
|
Rotate Symbol |
Check the Rotate Symbol tickbox to rotate the points where the symbols will be drawn. You can also specify if the symbols are to be rotated. |
|
|
Clipboard |
The Clipboard drop down options allows the parameters of one Brush to be copied and pasted into another. |
|
.png)
When creating new Brushes (and Pens), they may not appear when you apply them to your data. This may be because the scale of your map is inappropriate for the fill settings of your new Brush. Simply alter your dataset scale (using the Overlays dialog, Dataset tab) for the new Brush style to be visible.
Remember the dataset scale should be the same as the printing or viewing scale if the graphics are to be displayed as they were created.
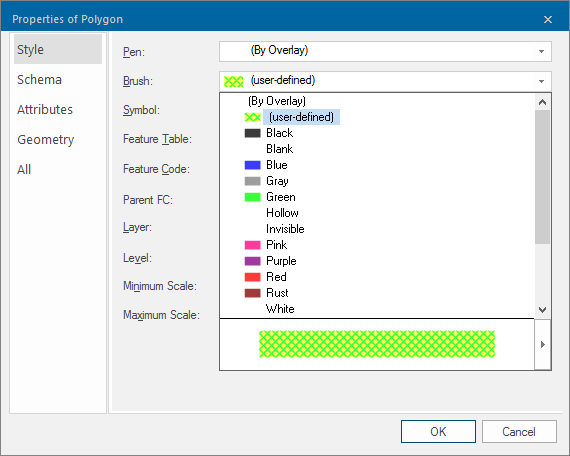
Any changes made to the entries in the Edit Brush screen will cause the Brush to be renamed to (user-defined) in the Brush drop down list: