Grab Handle operations on Items
Grab Handle operations on Polygons
Many LineString item editing operations in SIS Desktop do not require menu commands; you can simply use grab handles.
Note: When a LineString has a large number of vertices (e.g. a freehand LineString item created using Freehand (Create > Advanced) fewer and fewer vertices are displayed as you progressively zoom out. However, pressing the Tab key still steps to the next existing vertex, Shift+Tab to the previous vertex (even if the vertex is not visible on screen).
The first LineString item shows five vertices.
The second LineString item shows a new vertex created by holding the Ctrl key down and clicking the cursor on the LineString item at the required position.
The third LineString item has the new vertex deleted by pressing the Backspace key.
Grab Handle operations on Polygons
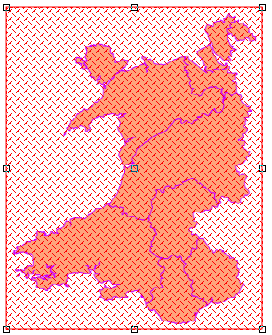
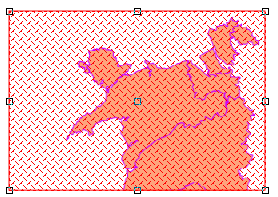
Polygon items are edited in a similar way to LineString items. Each loop of the Polygon item is treated as if it were a LineString item so you get grab handles at each vertex. You can move individual vertices and insert and delete vertices using the Control and Backspace keys respectively.
The first Polygon shows five vertices.
The second Polygon shows a new vertex created by holding the CTRL key down and clicking the cursor on the Polygon item outline at the required position.
The third Polygon shows the new vertex deleted, achieved by clicking on the vertices to be deleted and pressing the Backspace key.
Grab Handle operations on Bitmaps
SIS Desktop shows nine grab handles arranged in a grid over the Bitmap item. You can stretch the Bitmap item by dragging these handles.
Alternatively you can crop the Bitmap item by dragging the handles with the CTRL key pressed.
These methods are also available with Grid items.
Note: The status of the bitmap image must be set to Editable to display the grab handles.
Grab Handle operations on BoxText
When you select an editable BoxText item you get nine grab handles.
A butterfly-shaped handle shows the current alignment point. You can change the alignment by selecting another handle and pressing Enter.
You cannot set "Baseline" alignment using this method as it would require an unwieldy configuration of twelve alignment points.
You can also change the size of the BoxText items by dragging an alignment point.
Whenever you change the size of a BoxText item it will keep its aspect ratio (making it taller will automatically make it wider)
The dragging operation will either work primarily on the width or the height depending on the relationship between the dragged alignment point and the butterfly alignment point.
If you drag the alignment point then you will move the whole BoxText item instead of resizing it.