Edit Pen - Advanced settings - Gradient
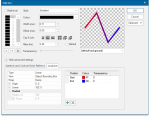
Select Style: Gradient in the Edit Pen dialog to automatically launch the Gradient tab options:
TIP: If you cannot see this tab, simply click the Advanced Settings arrow.
The type of gradient, selectable from the drop-down:

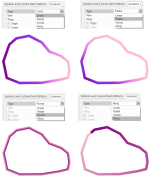
The following diagrams show the effect of each Type:
Linear

The gradient is from the start to the end of the line.
Radial

The gradient is in a radial form across the width of the line.
Across

The gradient is in a linear form across the width of the line.
Along

The gradient is along the length of the line.
Further examples of the effects of selecting different Types are shown below.
The View, selectable from the drop-down:
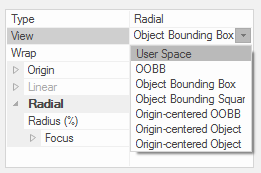
User Space
The colour gradient is fixed to the extent of the map view.
The colour gradient of the chosen item will alter as you change its position within the map window.
As an item is moved towards the left of the screen it will change to be closer to its Start colour value and as it is moved to the right it will become more like its End colour value.
OOBB (Object Orientated Bounding Box)
The extent of the colour gradient is set to the extent of the minimum (smallest area) Object Oriented Bounding Box of the item being coloured.
The box is oriented according to the geometry of the item used and can be generated with Process > Geometry > OOBB (minimum).

Object Bounding Box
The extent of the colour gradient is set to the extent of the items envelope polygon (ie the smallest non-oriented box around the item). The envelope polygon can be generated by going to Process > Geometry > Envelope.

Object Bounding Square
The extent of the colour gradient is set to the extent of the items smallest envelope polygon in which all sides are the same length.
The item is centred along any axis which it does not completely span (ie across the vertical axis in the example image below).
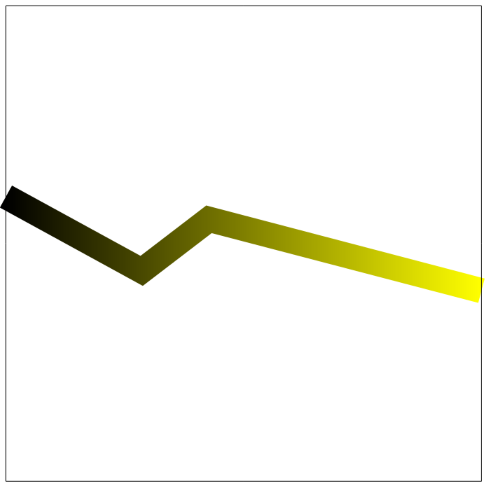
Origin-centered OOBB
This is similar to OOBB as above.
However the bounding box is created using the origin of the item as its centre point.
If the origin is altered when defining the brush, the location of the box will shift and the extents of the gradient will move with it.
In the example below, the top brush keeps the origin at (0, 0), creating the same OOBB as previously. However the bottom example sets the origin to (50,0); shifting the origin point 50% further along the item.
The OOBB location shifts accordingly, keeping the origin at its centre and causing the brush gradient to begin further along the line.
The remainder of the line outside the OOBB will be coloured depending on the Wrap method selected (see below).
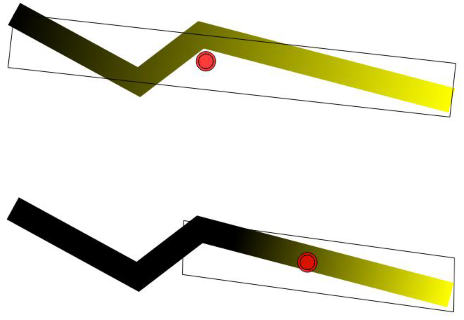
Origin-centered Object Bounding Box
Similar to the previous one, creates a non-aligned OBB keeping the origin at its centre. The rest of the item is coloured according to the Wrap method selected.

Origin-centered Object Bounding Square
Similar to previous, creates a non-aligned OBB keeping the origin at its centre that has sides of the same length.
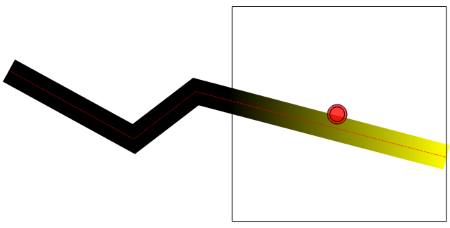
Only available if Type: Linear or Radial are selected.
Defines what to do when the gradient reaches the limit of its extent (ie once it has gotten to its End colour value).
The Wrap is selectable from the drop-down:
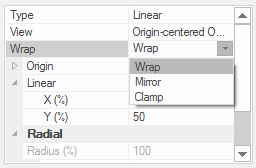
Wrap
Once the gradient hits its End colour value, repeat the gradient again beginning at its Start colour value. In the examples below, the origin of the radial pattern is in the bottom left hand corner (-70, -70).
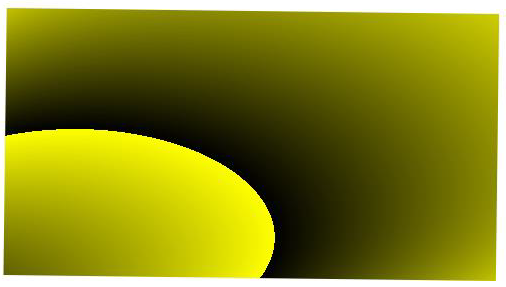
Mirror
Once the gradient has hit its End colour value, repeat the gradient again but reverse the colour scheme to mirror the gradient along this boundary.
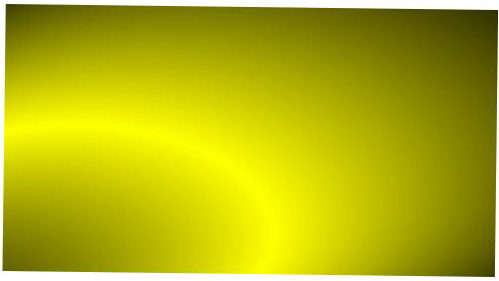
Clamp
Once the gradient has hit its End colour value, colour the rest of the item in this colour.
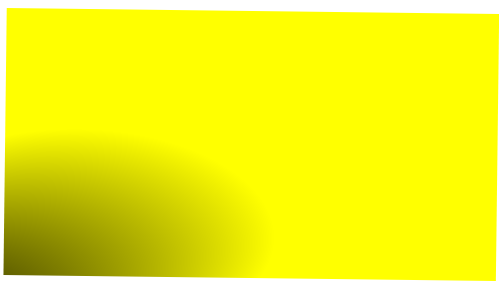
The Origin values can be used to alter the origin (this is where the brush PERCEIVES the origin to be on the chosen item).
Altering the origin value alters the way in which the gradient is applied.
It is initially set to (0, 0), the same as the default origin for the item.
As the origin is considered to be the centre point of the item, its colour value should be the middle value between the Start and End colour values set (unless an origin-centred view is selected).
All values can be between -100 and +100 inclusive.
X (%)
Changing the X value moves the origin horizontally across the X axis, with higher values (>0) moving it to the right and lower values (<0) moving it to the left. At 100% the origin will be at the edge of the item.
Y (%)
Changing the Y value moves the origin vertically along the Y axis, with higher values (>0) moving it to the top and lower values (<0) moving it to the bottom. At 100% the origin will be at the edge of the item.
Only available with a Linear type.
Sets how far along the axis the colour gradient should spread. A value of 100 will spread the gradient across the entire length of the line. A value of <100 means that the rest of the line is subject to the Wrapping method selected to fill the remaining colour.
X (%)
Sets what percentage of the horizontal axis the colour gradient should fill.
The value is calculated from the lowest x value of the selected view. A value of 50 (as below) will cause the gradient to take up the first half of the line at which point the wrapping method will fill the other half (mirror is used in the example).

Y (%)
Sets what percentage of the vertical axis the colour gradient should fill.
The value is calculated from the lowest y value of the selected view. A value of 50 (as below) will cause the gradient to take up the bottom half of the line, at which point the wrapping method will fill the other half (mirror is used in the example).

Only available with a Radial type.
Sets the properties to be applied to create the radial pattern gradient.
Radius (%)
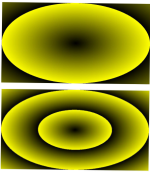
Sets how wide the radial pattern should be within the item. A value of 100 will cause the circle created to span the height and width of the item (below top). Lower values causes a smaller circle to be created, leading to more of the item being affected by the Wrap method (below bottom, with 50% radius)
Focus
Sets a point on the item to have the value of the Start colour. From this point, the gradient can be calculated to all other points on the item using the selected Radius and Origin values.
X (%)
Moves the Focus along the X axis, with higher values (>0) moving it towards the right and lower values (<0) moving it to the left. The example below sets the Focus X value to 80, thereby moving it to the right. Note that as the focus is shifted to the right of the item, the distance of the gradient to the right edge of the item at this end is shorter than to the left edge. This therefore causes the gradient to wrap more frequently at the right-hand corners than at the left.
Y (%)
Moves the Focus along the Y axis, with higher values (>0) moving it towards the top and lower values (<0) moving it to the bottom. The example below has set the Y value to 80.
Adding Colours
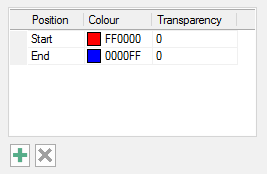
To add a colour between the Start and End positions click on the green plus button.
A colour will be added at position 50.00:
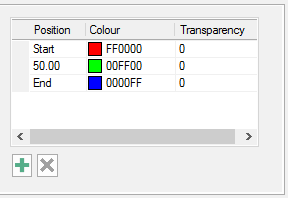
To add a further colour highlight a position and click the green plus button.
The colour will be created mid way between the highlighted position and the next position:
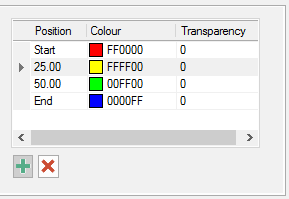
Repeat this to create as many positions as required.
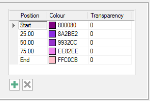
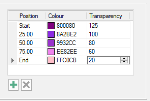
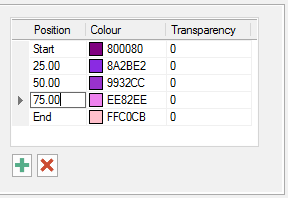
The following shows colours entered at 25.00, 50.00 and 75.00:
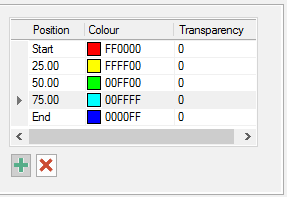
The colour for each position can be changed using the colour drop-down in the Colour column:
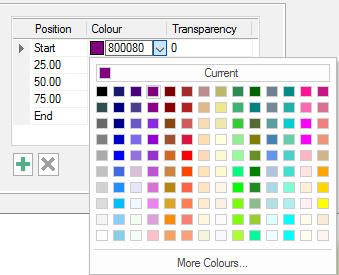
The Positions and Colours shown in the dialog below will display the LineString as shown.
Transparency can be applied to each individual colour using the drop-down in the Transparency column.
Transparency is between 0 (fully opaque) and 255 (fully transparent).
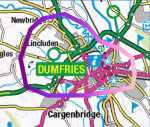
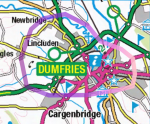
The LineString below will be displayed with the above transparency settings:
Drawing Engines
All gradient patterns work correctly in Advanced and Hardware Accelerated modes.
Note the draw distances for some of the more complex patterns are lower in Hardware Accelerated mode than in Advanced mode.
Running SIS Desktop 9 in Simple drawing mode will only render gradient patterns if they are of the Across or Along types. Any other type will be converted into unformatted lines/polygons.
The following examples show how the above LineString would appear with different Type options selected:
Removing Colours
Highlight the colour to remove and click the red cross button.
