Line (Text)
Line places text along an existing LineString item.
To insert a line of text:
- Select the LineString item.
- Select Create > Text > Line to open the Properties window.
- Start typing your text.
- Click OK when you have finished. The text will be placed along the straight or curved LineString item.

The geometry of the LineText item can be of any type, e.g. straight lines, arcs, circles, beziers etc.
Note: Line Text items can use secondary annotation in the same way as Text items.
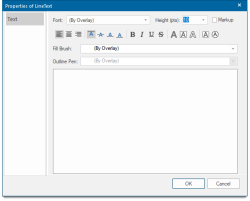
Font
Select the font to apply to the text from the drop-down box.
Height (pts)
The text height is scale dependent and is not editable for BoxText. Text height is specified in point sizes, the same as text in word-processing. There are 72 points to the inch. One point is approximately 0.01389 inches, or 0.353 millimetres.
Markup
The Markup option allows a single text item to have multiple styles, e.g. Bold, Italic, etc., and/or multiple colours; and/or multiple fonts.
These states are:
|
*bold* |
*This is bold text* will display: This is bold text |
|
_italic_ |
_This is italic_ will display: This is italic |
|
^superscript^ |
*Area = 25^2^* will display: Area = 252 (bold and superscript) |
|
~subscript~ |
~This is subscript~ will display: This is subscript |
|
-strikeout- |
-This is strikeout- will display: |
Note: The font size cannot be changed using Markup.
Multiple text colours in a text item:
The code to set text colour is: %{fill:#RGB values} text to be coloured%
This is%{fill:#00AA00} green% and this is%{fill:#0000FF} blue% text
will be displayed as:
This is green and this is blue text
Multiple fonts in a text item:
The code to set a font is: %{font-family:FontName}
This font is %{font-family:Gothic} Gothic% whereas this font is *_%{font-family:Times}Times in bold italic%_*.
will be displayed as:
This font is Castellar whereas this font is Times in bold italic.
Defining Outline text:
The code to set Outline text is: %{fill:Fill Brush colour; outline:Outline Pen colour}required text%
%{fill:#FF0000; outline:#0000FF}red fill blue outline%
will be displayed as:

Escape characters
Characters can be "escaped" (i.e. have their markup meaning ignored) by prefixing with a \
*This text is bold* but \*this text isn't (it has an asterisk before and after it instead)\*
will be displayed as:
This text is bold but *this text isn't (it has an asterisk before and after it instead)*
Justification: Left, Centre or Right

Set the text justification as required.
Vertical alignment:Top, Middle, Baseline or Bottom
Set the text vertical alignment as required.
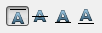
Bold, Italic, Underline, Strikethrough

Any combination of Bold, Italic, Underlined and Strikethrough can be selected.
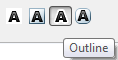
Opaque, Box, Outline, Rounded rectangle

If creating Outline Text use any of these options.
Fill Brush
Select the required brush to set the text colour.
Implicit brushes may also be defined. The facility of copying and pasting the brush specification in JSON is also available.
Outline Pen
This field will become active if the Outline text A button is selected: Not available for simple text
Text window
Type in the required text (if required use the syntax as described in Markup and press Enter for a new line). You can also paste text into this box using the Ctrl+C/Ctrl+V key combination or Paste on the local menu.
Click OK when you have finished entering text.
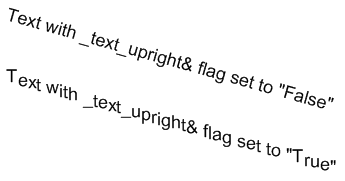
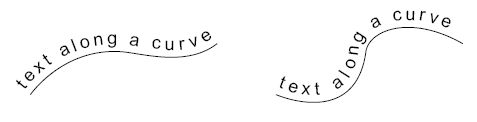
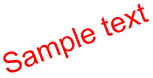
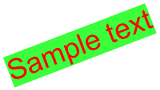
Rendering Line Text characters upright individually
Line text characters can be rendered upright individually by setting the _text_upright& flag to True.
This allows you to rotate the text but keep the characters horizontal, giving a step effect.
To do this, open the text item's local menu (right-click on the item) and choose Properties > All. By default, the _text_upright& flag is set to False.

Examples showing the effect of Upright False and True settings:
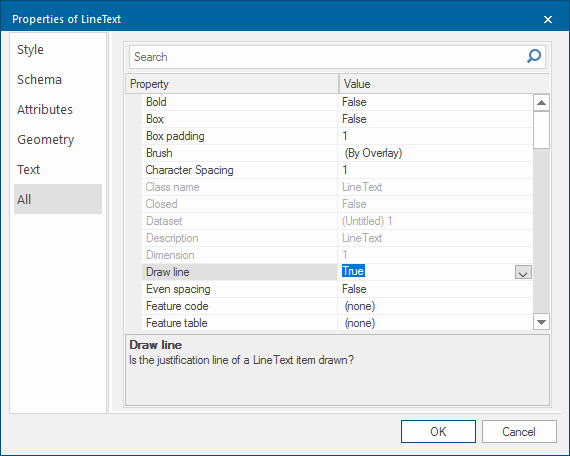
Editing the appearance of Line Text
Use the Draw line property to choose whether or not to display the LineString.
Select the text item and right click to open Properties > All > Draw Line.
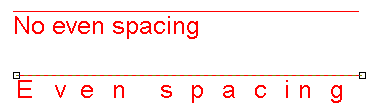
Use the Even spacing property to switch between normal (proportional - "No even spacing") spacing (False), and "E v e n s p a c i n g" (True) along the line.
If you edit the LineString by moving its vertices or joining it to other lines, the text will automatically follow the new path of the LineString:
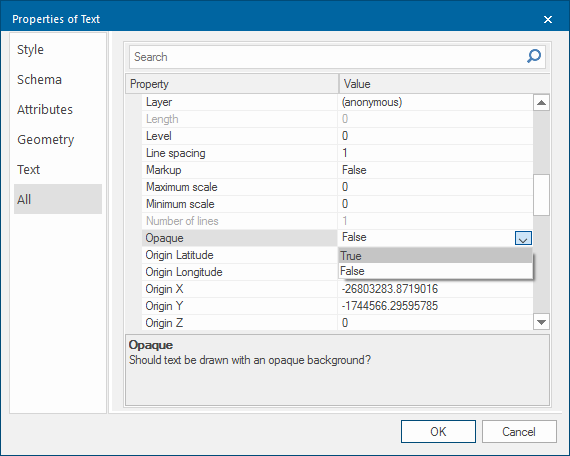
Text background colour
All text items can be displayed against an opaque background of any colour.
Set the text item’s Opaque property to True. Set the colour for the text background by setting the Brush property in the Style tab of the Properties of Text dialog:
Example:
| Opaque set to False |
|
| Opaque set to True |
|
Drawing boxes around text items
You can display Box Text and Label Text items with a box drawn around them, using the Box property in the Properties dialog All tab. The colour for the box is the pen colour.
