Configuring Edit Add-In inside WebMap
You have now installed the Edit Add-In and set up appropriate authentication and permissions. The next step is to configure overlay attributes. To do this:
Select Configure Edit Add-In from the main drop-down menu.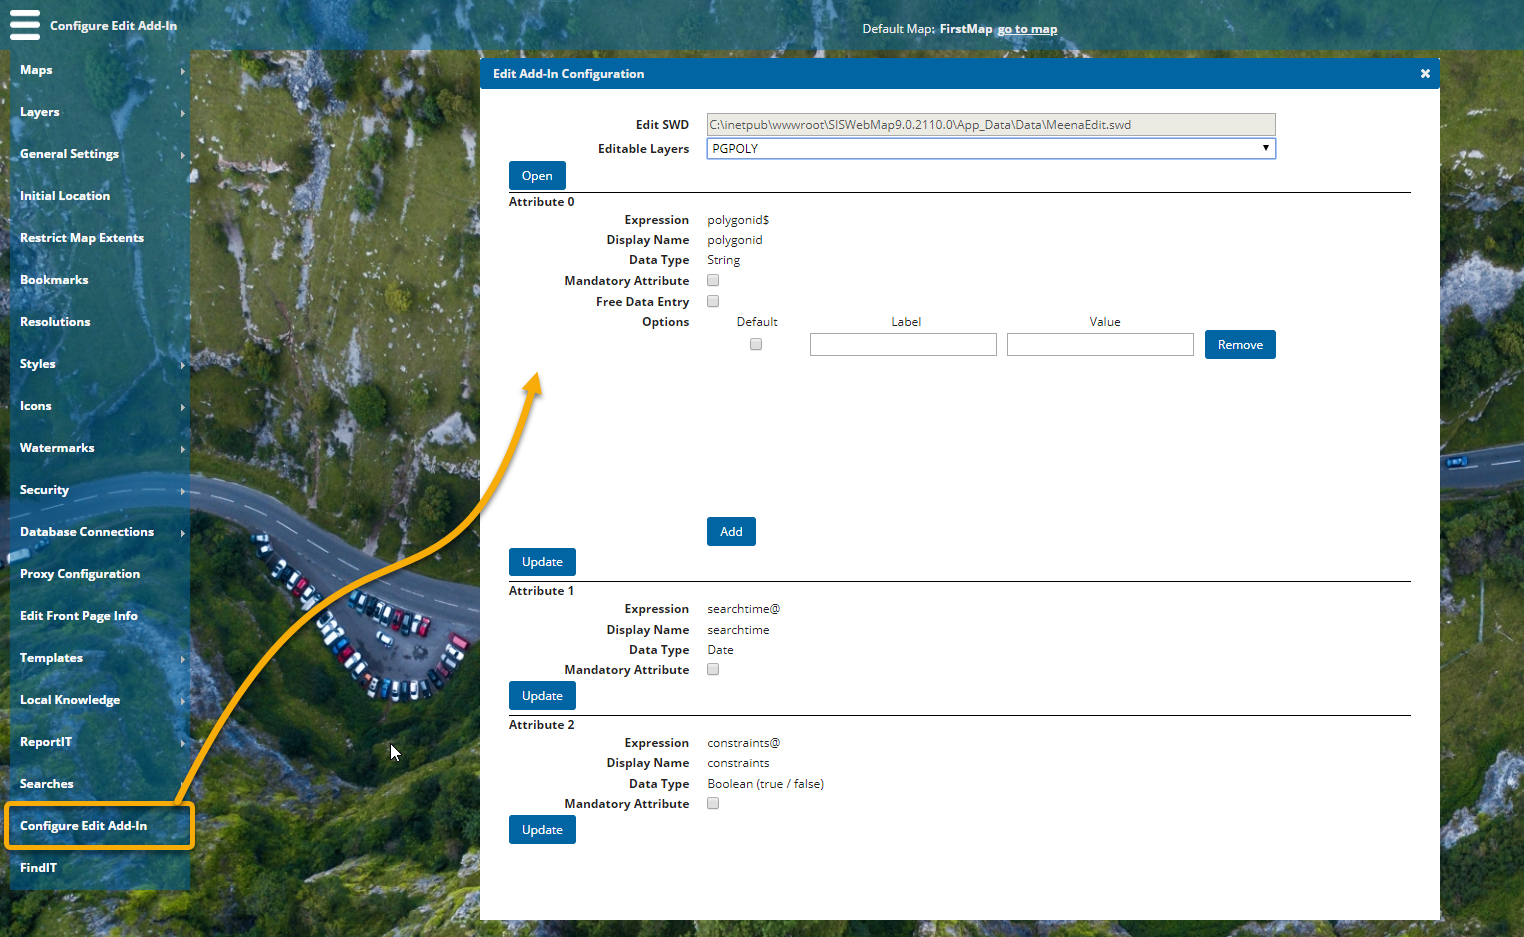
From the drop-down menu, select any editable layer. Click Open to see more options.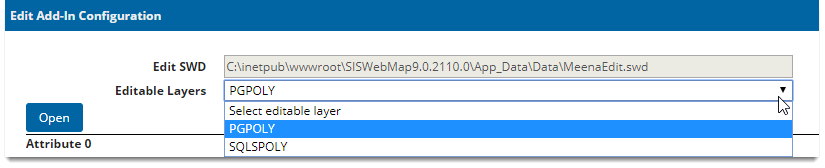
All available attributes are listed separately.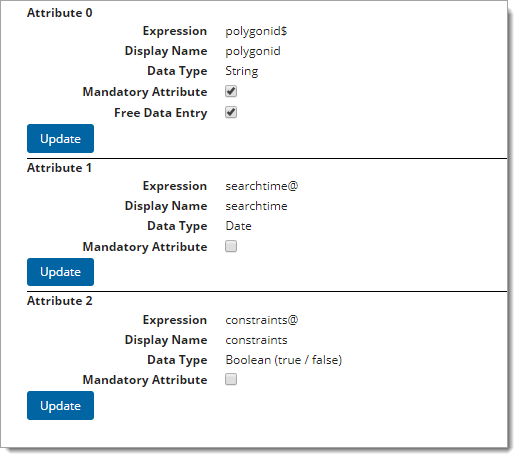
- Enable Mandatory Attribute to force user to fill this field when editing.
- Enable Free Data Entry to allow any information (alphanumeric or special characters) to be entered in the field.
- Untick the check box to restrict the type of information entered. This allows you to specify the exact label and value you would like the user to edit.
In the Label field, enter the label to be displayed on the web page. In the Value field, enter the value tag to be used in the database.
Enable the Default checkbox if you prefer any particular value to be assigned the default value. If you have specified the Default value in the JSON in schema options  , the checkbox will be automatically enabled.
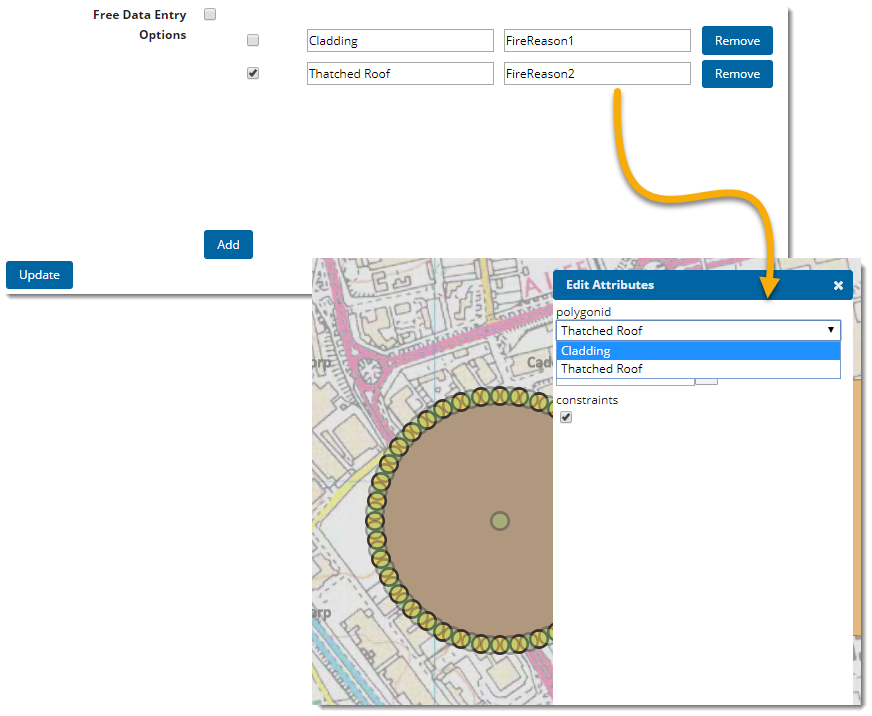
Click Add to create new labels and value fields.
Click Update to finalise all changes.