Add a new File
Use the Files option to work on file records belonging to the selected project. Click Add to add an existing file to the Project.
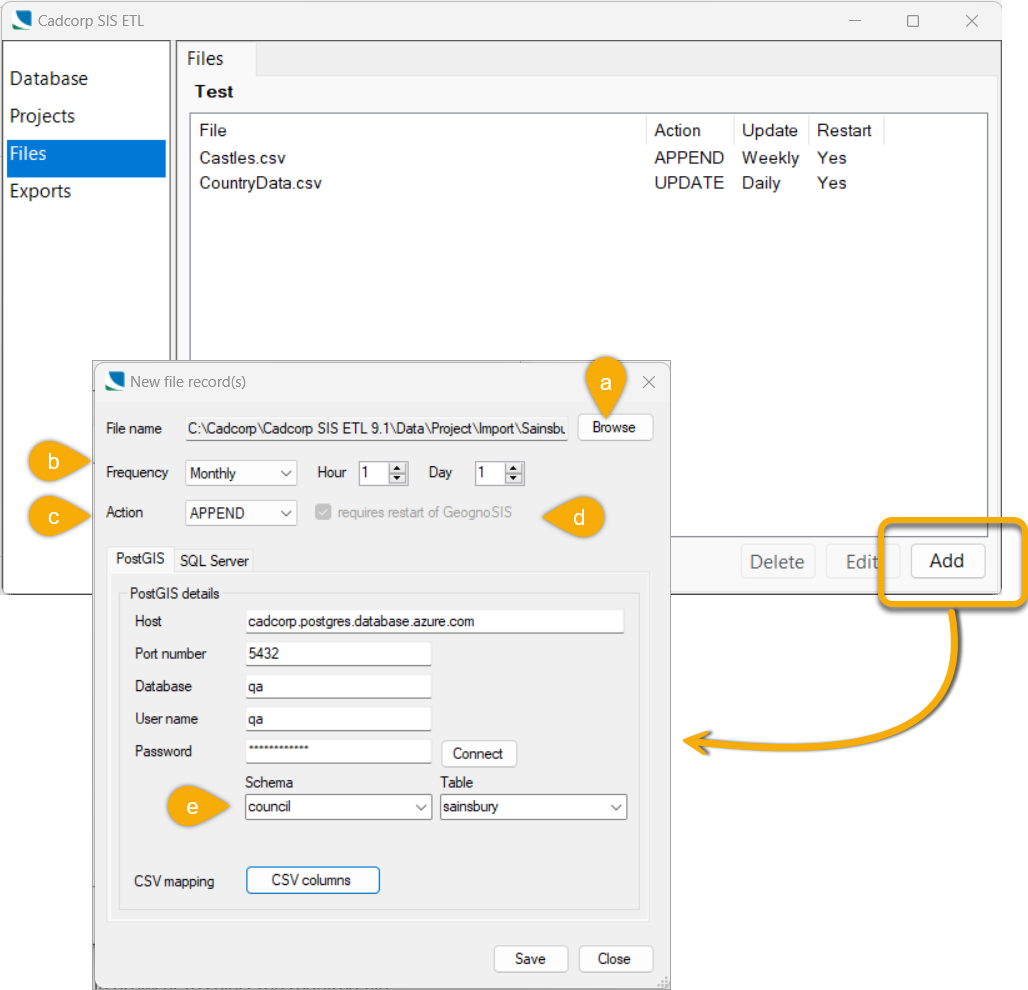
a. Browse
Use the file browser to select the required file. Ensure the file is present in the Import folder.
b. Frequency
Frequency indicates the time interval in which the assigned action (UPLOAD, COPY or APPEND) is performed on the file.
- Hourly Action is attempted every hour.
- Daily Action is attempted every day during a specified hour.
- Weekly Action is attempted on specified week day during specified hour
- Monthly Action is attempted on specified day in month during specified hour
Note: In the Monthly option, actions on day 31 will be attempted on day 30 and day 28 (and day 29) in February. Similarly, actions on day 30 will be attempted on day 28 (and day 29) in February.
c. Action
One of these actions will be available for use based on the file type selected:
- APPEND – Data is appended to an existing table in PostGIS or SQL Server (for CSV files only).
- UPLOAD – Files are uploaded into PostGIS or SQL Server (for spatial files excluding CSV).
- REPLACE – Similar to 'upload' but instead of deleting and recreating the target TABLE, REPLACE deletes all of the rows instead. This allows it to be used with a TABLE that is locked, (eg a table used in a VIEW).
- COPY – Files are copied to the specified location (any file type).
- UPDATE – Existing table is dropped and a new one created (for CSV files only).
Note: If an UPLOAD of a data file fails, the service will ‘Simplify’ the data and try again. (This does not apply to overlay datasets from a SWD upload.)
d. GeognoSIS stops and restarts
Before a file can be uploaded, the relevant table has to be included in PostGIS or SQL Server. However GeognoSIS will have locked the table if data in a SWD is being displayed.
If the actions for the current period include an upload, GeognoSIS will be stopped as part of the first upload. GeognoSIS will then be restarted after all operations for the current ‘period’ have been completed.
Note: Requests for GeognoSIS restarts are bundled; if multiple files require a GeognoSIS restart in any one action ‘period’, there will be only one GeognoSIS restart attempted.
e. Database
Select PostGIS or SQL Server and fill in the relevant details.
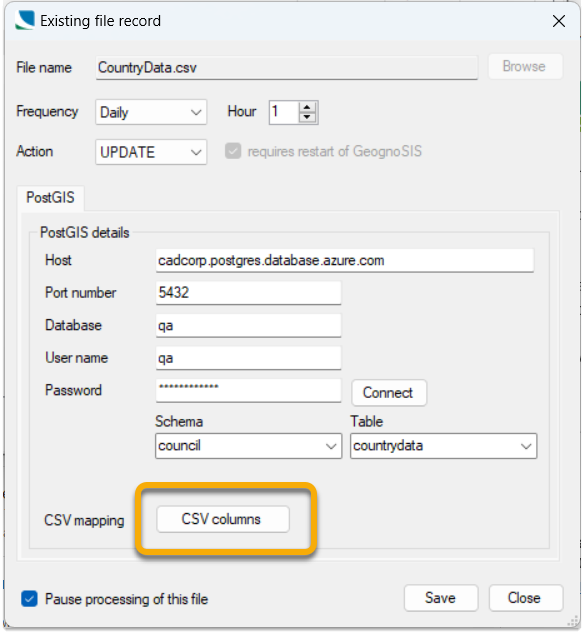
f. CSV Mapping
If a CSV file is selected, you can configure additional settings. Click ‘CSV columns’ to configure how CSV data is loaded into a database.
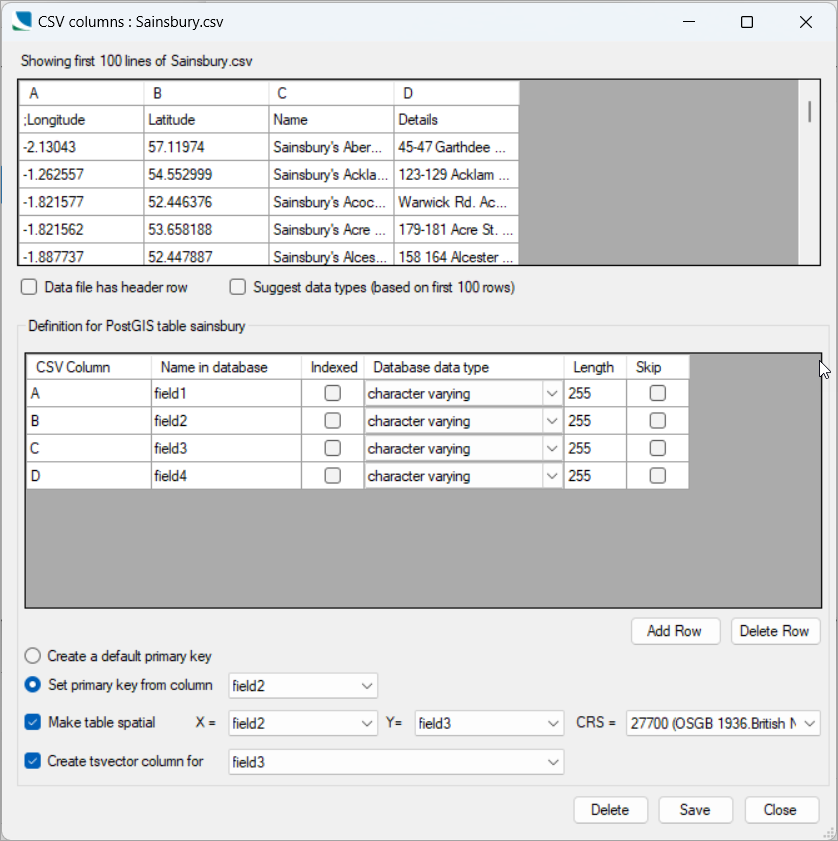
In this form you can set:
- Header rows for the data file.
- Suggestions for database data types (based on the 1st 100 lines of data). If you think the suggestion does not correctly reflect the data, use the data type drop-down menu to select a relevant one.
- A primary key from the csv data or add your own.
- Specific Excel columns to be ignored (Skip) in the import or Indexed.
- Set whether there is a column for which a tsvector
 column will be created and indexed (Note the tsvector column is the same name with “_vector” appended.)
g. Notify result via email
Send results of project activity to a designated email address. Ensure you have set up the target email in Settings.
Adding multiple files
Multiple files can be easily added in a single operation. Simply press CTRL when selecting files in the browser.
NOTE:
- Files must be of the same type, e.g. all TAB.
- Multiple CSV files cannot be added in a single operation due to the column configuration required.
- If multiple files are added for UPLOAD, the table name is auto-generated (if required, this can be changed by editing the records.)