Multi-Point Routing
Multi-Point Routing calculates a ‘time-travel’ matrix, i.e. you define a set of points you want to measure from and a set of points you want to measure to.
Use Multi-Point Routing to calculate the least cost route between every FROM point and every TO point.
Remember Route tracing is computationally intensive (e.g. calculating the distance of each of 40 nationwide depots from the centre of 500 local areas will generate a request to calculate 20,000 routes!)
Select Applications > Routes > Multi-Point Routing.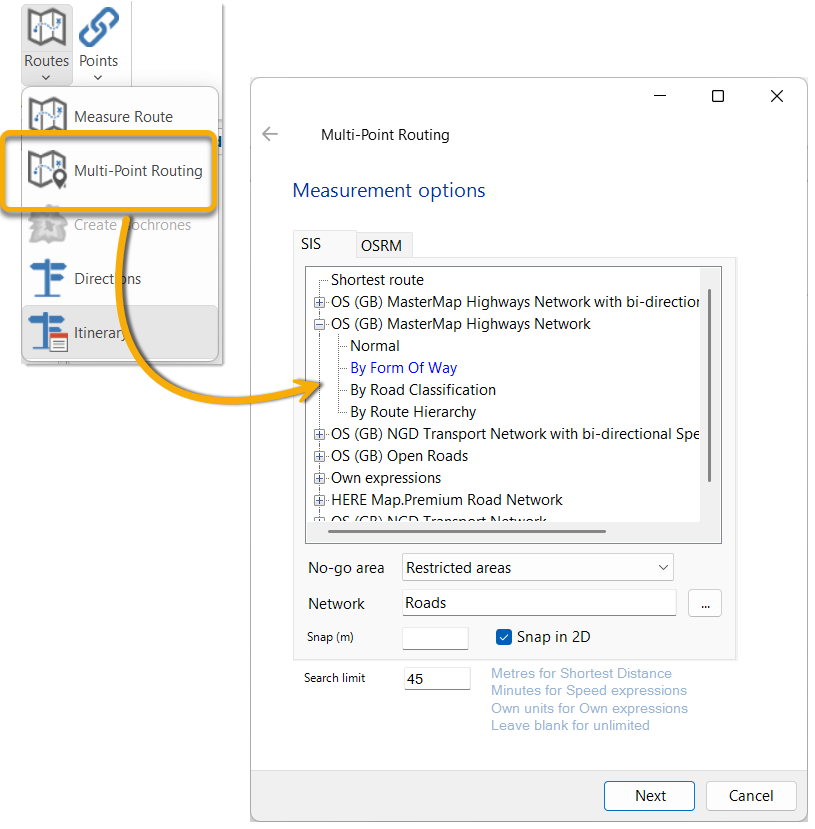
Every route-finding command in this tool set provides a choice of measurement options- SIS or OSRM.
1. SIS
- Shortest Route : Sets the expression for routing to _length# _length# is a system-maintained attribute on every link; it evaluates to the length of the link. Use this to find the shortest path between the nominated start and end points of a route.
- OS (GB) Networks: Creates an expression for routing based on available OS )GB) Network tools.
2. OSRM
OSRM stands for Open Source Routing Machine; it uses modern coding mechanisms to map the shortest paths in road networks. See here for more information.
As part of Cadcorp SIS Desktop installation, we provide routing databases for both OSRM and Valhalla engines covering Greater London and Hertfordshire. You can also create custom databases using the OS Network Manager 
All custom databases are stored in the OSRM folder of the SIS Desktop 9.1 installation.
3. No-go Area
A ‘No go area’ is a user-defined area of the map which routes cannot pass through (for eg: an area of flooding or avoiding roads within x metres of an incident). From the drop-down menu, select a no-go area if it needs to be specified. ![]() Related Topics
Related Topics
4. Snap Radius
Routes are calculated using the links in the network. If the selected points are not on the links, their positions will be ‘snapped’ to the nearest link.
Snap Radius (metres) defines the maximum amount by which a point can be snapped.
The Snap Radius value has no upper limit but if using a large number, consider adjusting the points being used so they are closer to the network. If the value is very large, it can be difficult to ascertain if the snap is to the ‘correct’ location.
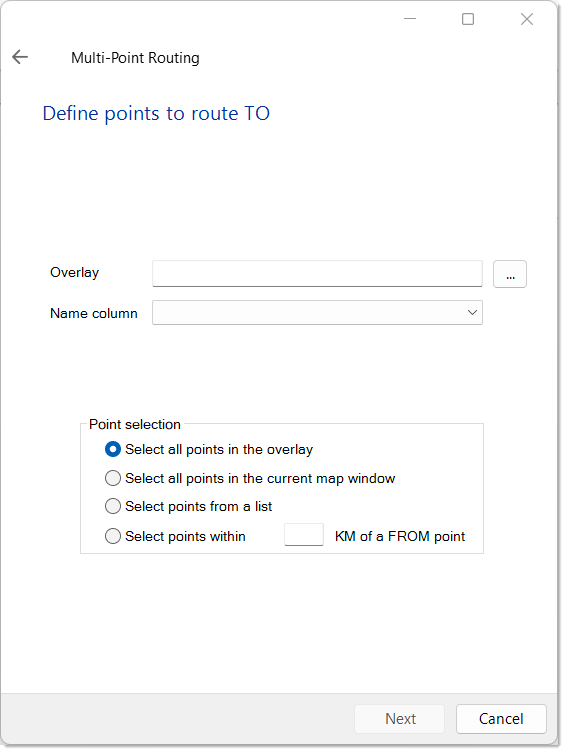
- Click Next to open the Define points to route FROMoptions.
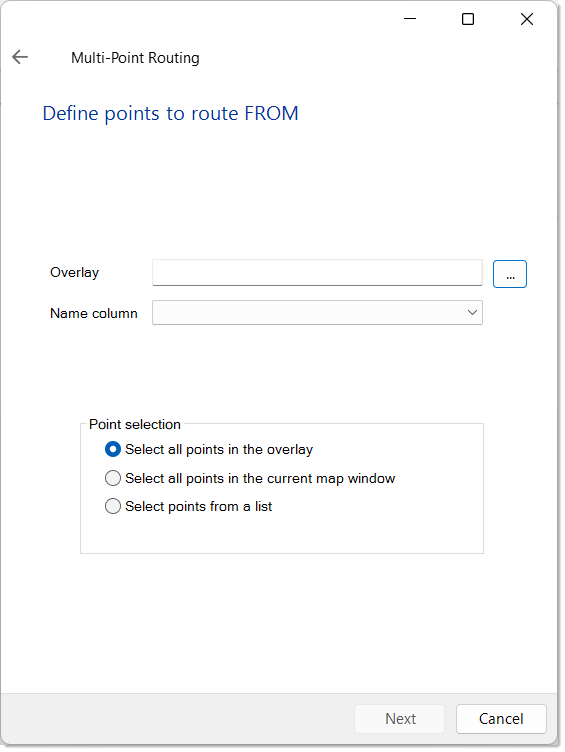
- Select the Overlay and the Name column for the FROM points.
- Choose one from the Point Selection options.
- If you select individual points from a list, you will see this window. (Else continue on to Step 9 to select the TO points)
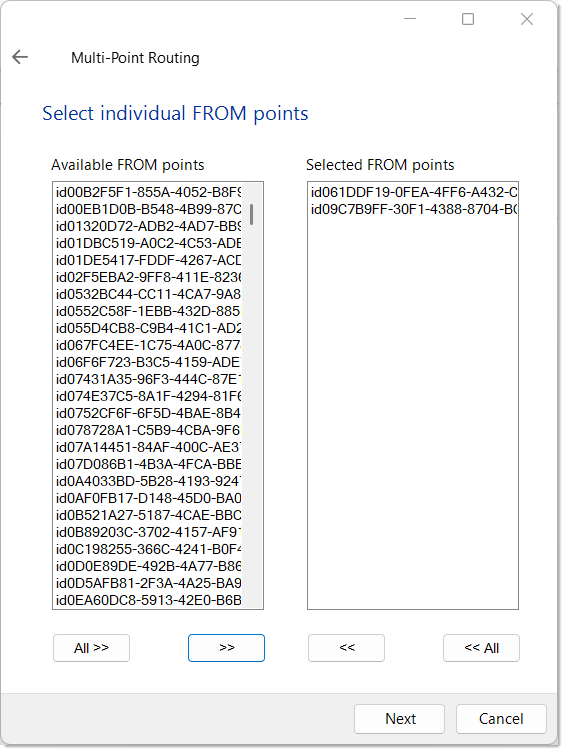
- Select individual FROM points and click the >> button or click the All >> button to select all.
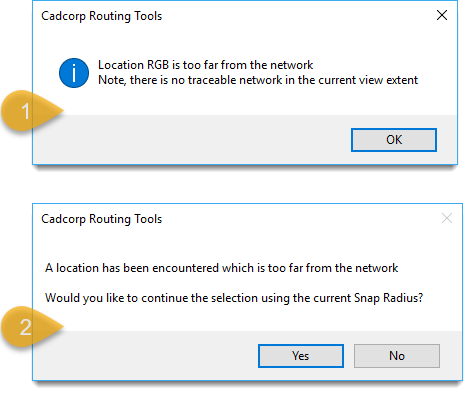
- You may see these error messages. (1) when an individual item is too far from the network and (2) if All have been selected.
- To bypass these messages, ensure the roads network is visible in the map window. More commonly these are seen if the Snap radius setting is too small.
- You can still continue with the current selection(s) and ignore those that are excluded by distance or go back and adjust the Snap radius.
- This opens the Define TO points criteria.
- Choose one from the Point Selection options.
- If you select individual points from a list you will see this window. (Else continue to Step 13).
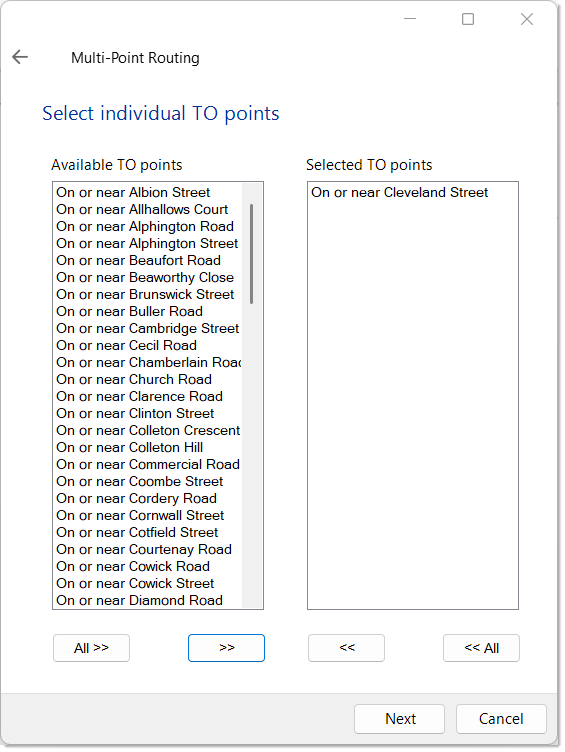
- The Select TO points dialog is similar to the Select FROM points dialog described above. The TO point selections are made in the same manner as the FROM points and similar messages may be displayed if the Snap radius setting in the Select bulk calculation measurement options dialog is too small.
- Click Next.
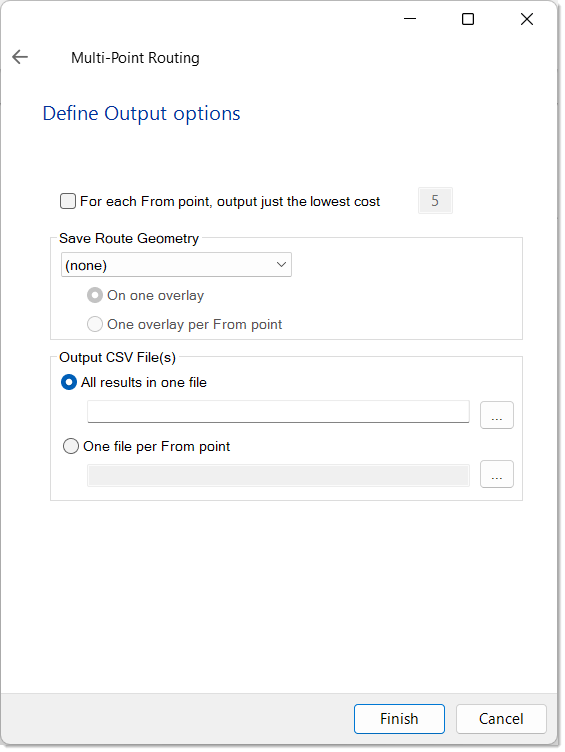
- Select the required output from the Output Options window:
-
Output Option Description For each From point, output just the lowest cost X
Check this tickbox to show just the specified number of the lowest cost routes.
Save Route Geometry Check this tickbox to create an overlay showing the routes. This can be either spokes (aka spider diagram) or the actual routes. You have a choice of creating the geometry on one single overlay or on individual overlays per point.
All results in one file Creates the route data as a single CSV file. Click Browse to locate the target file.
One file per From point
Creates the route data as a number of CSV files, one per FROM point. Click Browse to create or locate the target folder. - Click Finish.
- The new Routes overlay and the CSV file(s) will be created as selected in the Perform route calculations dialog.
- The following map window display is the possible result of a Shortest Distance setting (Select overlays for multi-point routing dialog) using the FROM and TO locations in the Select Route Points dialog above.
| Option | Description | |
| Select all points in the overlay | All points in the selected overlay. | |
| Select all points in the current map window | All points in the area of the selected overlay displayed in the current map window. | |
| Select points from a list | If this option is selected clicking Next will display the Select FROM points dialog: | |
| Option | Description | |
|
Select all points in the overlay |
All points in the selected overlay. |
|
|
Select all points in the current map window |
All points in the area of the selected overlay displayed in the current map window. |
|
|
Select points from a list |
If this option is selected clicking Next will display the Select TO points dialog: |
|
|
Select points within X km of a FROM point |
Allows you to select points that are within the entered distance in kilometres from FROM points. |
|