Create new features through snapping
Use this option to create a new feature and snap it to a feature with identical geometry on the underlying base layer (Usually OS MasterMap).
To do this, begin by adding two new processing operations:
- One to snap the dropped vertex onto existing geometry and
- One to snap the dropped vertex onto an existing vertex in Mastermap.
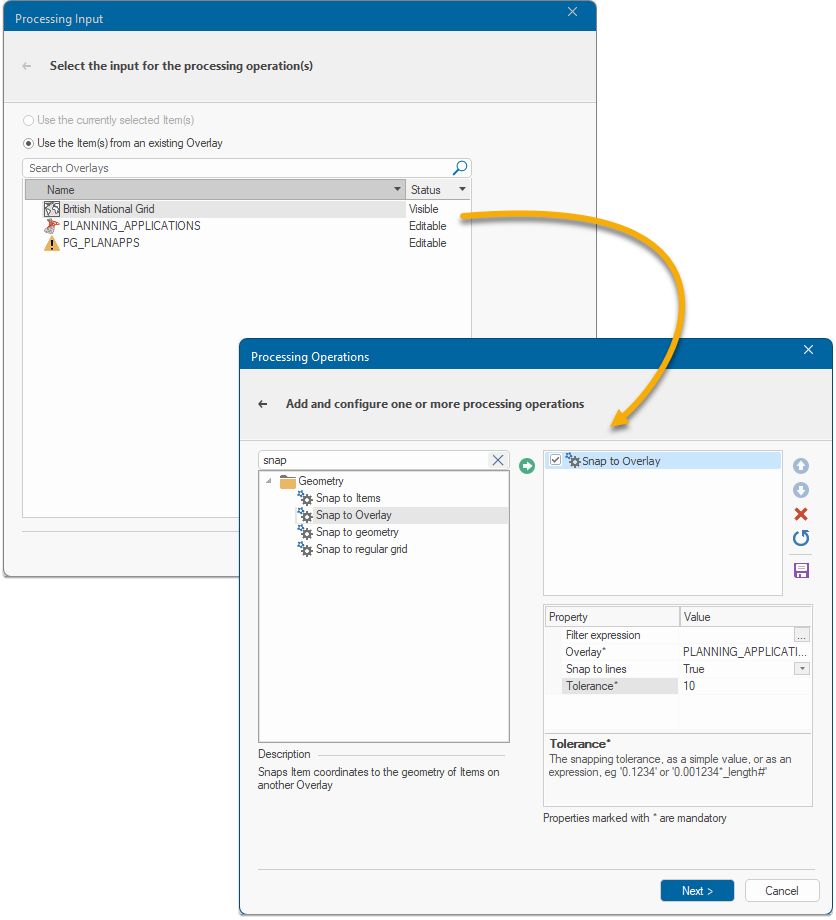
- In SIS Desktop 9.1 , click Create > Process.
- Select an overlay on which features can be created and click Next.
- Select and add “Snap to Overlay” (simply search for it in “search process operations” bar)
- Set the Overlay as the desired background layer, set “Snap to lines” as “true” and set the tolerance to 10.
- Add a second process selecting the background layer again with a tolerance of 10 but this time set Snap to lines to be false. This process will then move any dropped points (on or off the line) to the nearest vertex if they are within the defined tolerance of 10.
Map users can now draw a feature, using points close to the base layer geometry. The newly created digitised geometry will be automatically snapped to the underlying OS MasterMap.
To see how snapping options are used on maps, click here 