Manage Groups
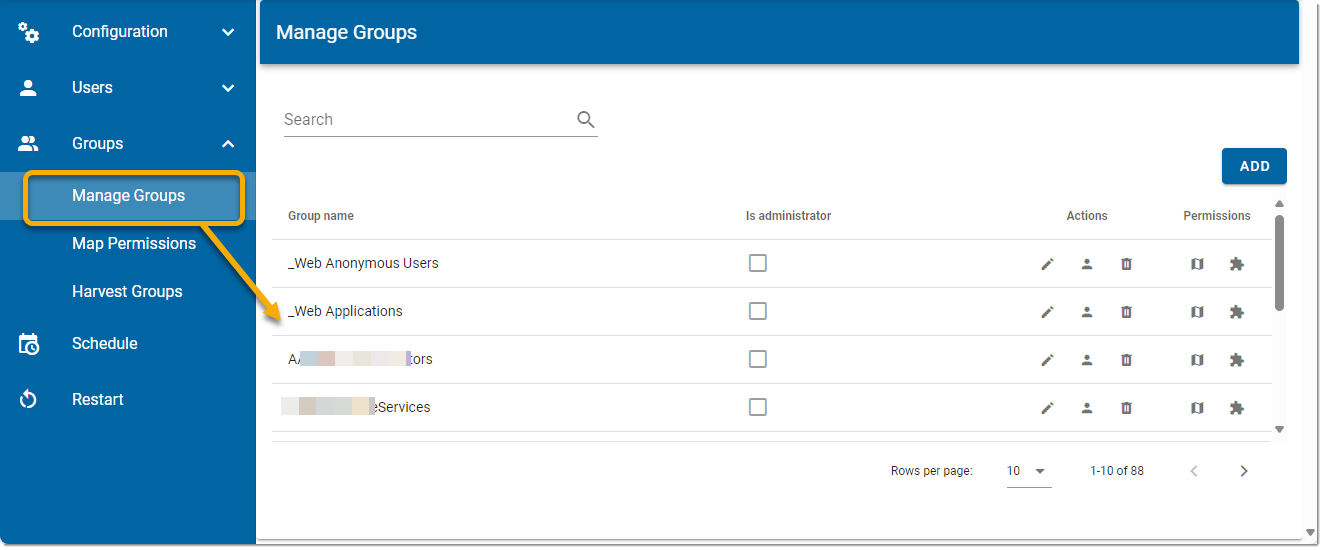
Use the Manage Groups option to edit a group's profile. You can change the group’s name, add or remove members to the group, or assign access to maps or extensions. This option helps you to handle groups at a site level.
TIP: To manage group profiles at map level, see Maps > Configuration > Security > Groups.
Under Quick Access, select Security.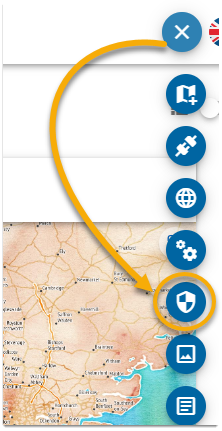
Now select Groups > Manage Groups. If you know the group name, start typing it into the search box. WebMap searches the database and displays a list of groups that match your search text.
Add Group
Depending on your authentication model, groups may have already been pre-defined by your system administrator. You just need to harvest these existing groups to work with them inside WebMap.
Alternatively you can also click Addto create a new group from scratch. 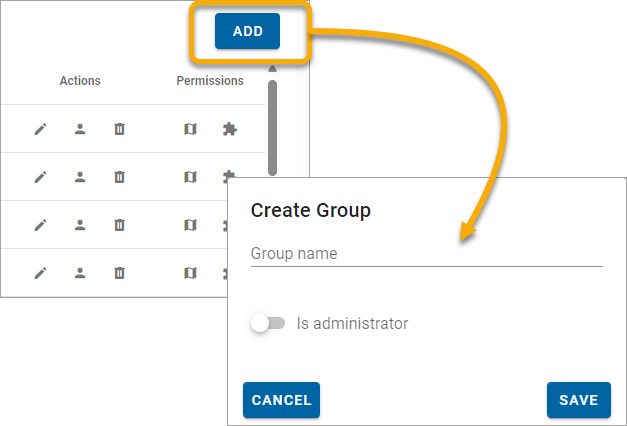
Follow the steps below to customise the group.
Edit Group
Select Edit Group to update group name and Administrator access. Click Save.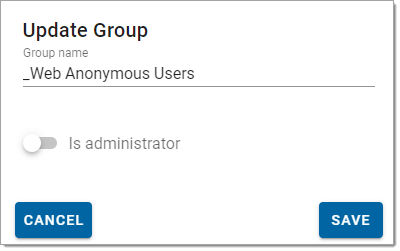
Edit Group Membership 
Select Group Membership to grant or remove user access to Groups. Click Add Content to see a list of available groups. 
Delete Group 
Select Delete Group to remove groups from the harvested list.
Map Permissions 
Select Map Permissions to grant group access to individual maps. Toggle permissions on or off and click Save.
Select Delete Content to remove the map from the displayed list. This can be handy when WebMap contains numerous maps and not all of them need permissions to be set. 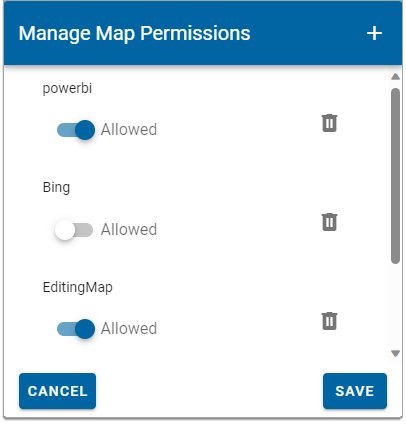
Extension Permissions 
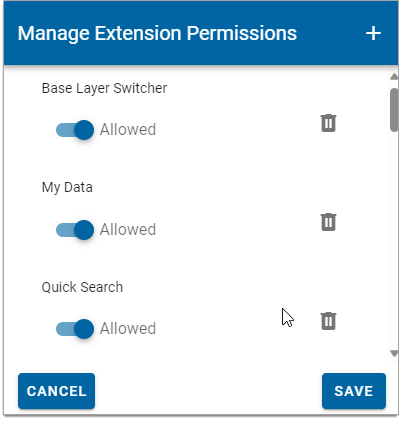
Select Extension Permissions to grant group access to standard WebMap extensions like Local Knowledge, Measuring, My Data and more. Toggle permissions on or off and click Save.
Select Delete Content to remove the extension from the displayed list. This can be handy when WebMap contains numerous extensions and not all of them need permissions to be set.
