Fire Query
Fire Query allows simple, intuitive spatial searching on incident datasets. This query tool is tailored for use by emergency assistance providers like fire services.
Note: To use this search option, ensure your GIS administrator has configured and enabled Fire Query. See here for more information 
- Select Fire Query from the drop-down menu.
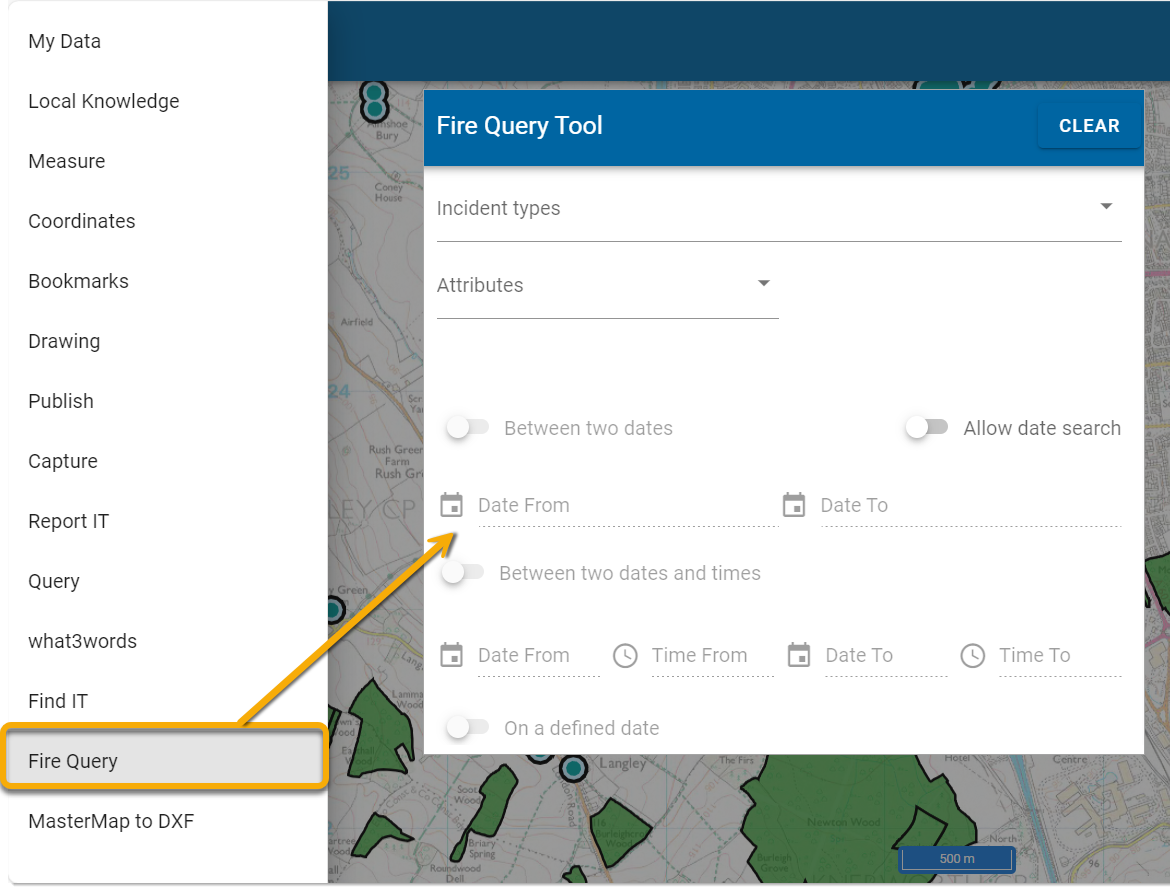
- Select the Incident Type on which to run the query.
- Select as many attributes as needed related to the incident type. This field is optional.
- You can also drill-down to specific values for each attribute. To do this, click the Edit icon and select the value using the + sign.
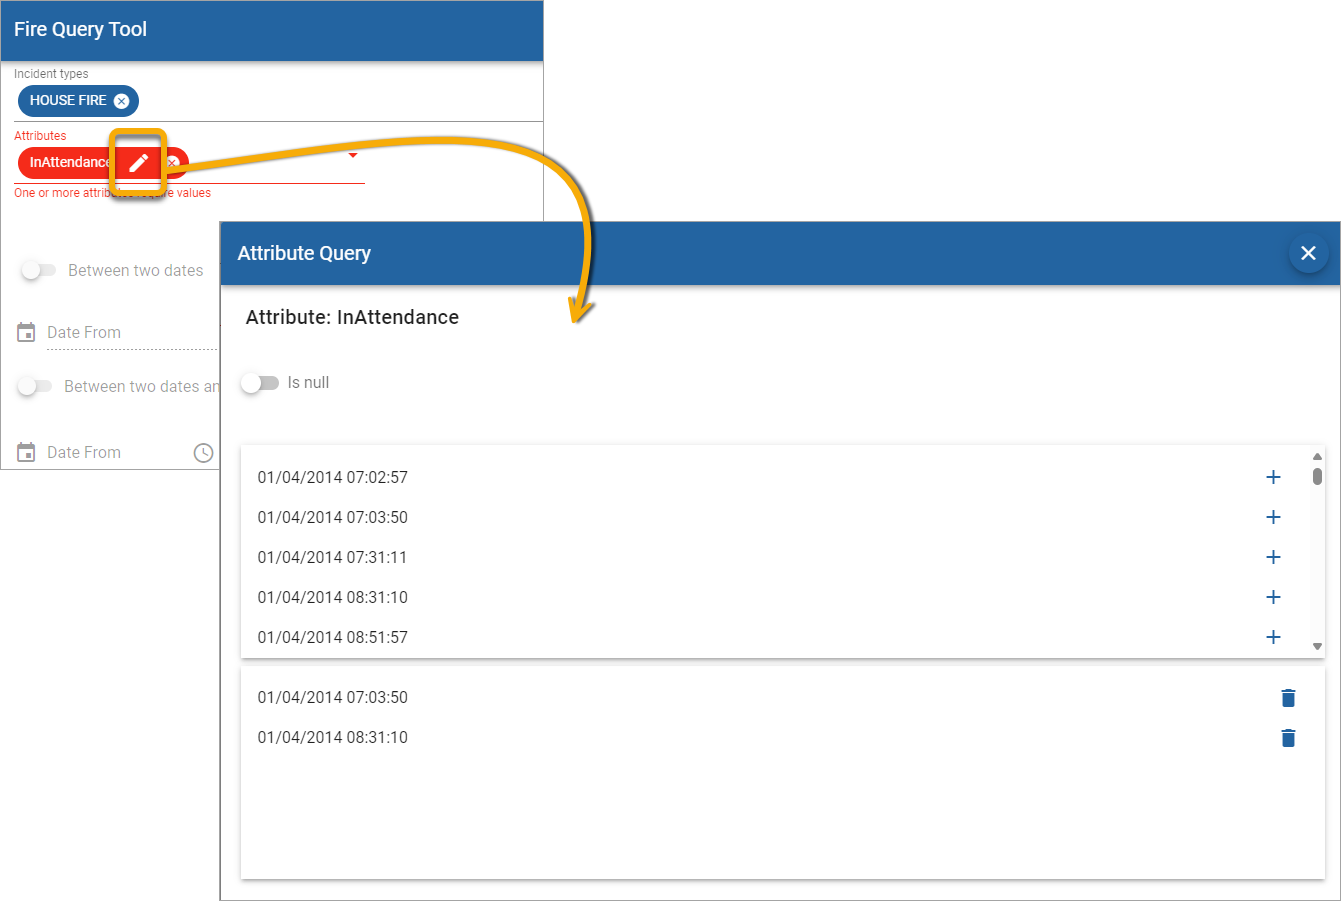
- Enable "Is Null" to allow null values to be included in the search. Null values are handy when you work with multiple attributes. An attribute may have no associated values but to include it in your query results nonetheless, you can enable NULL values.
- Select a Search Area from the drop-down menu. This is usually the Station name or code and is an optional field.
- Feature Displayed Using – select a marker pin from the drop-down list. This icon will be used to display the results.
Note: The maximum number of attributes that can be returned is 200.
Working with the Results
The query is run against a database and the results are shown on the map using the selected icon. You can also see the results in a dynamic table where it is easy to sort, re-arrange and toggle attribute visibility or even export the results to an Excel-friendly CSV file.
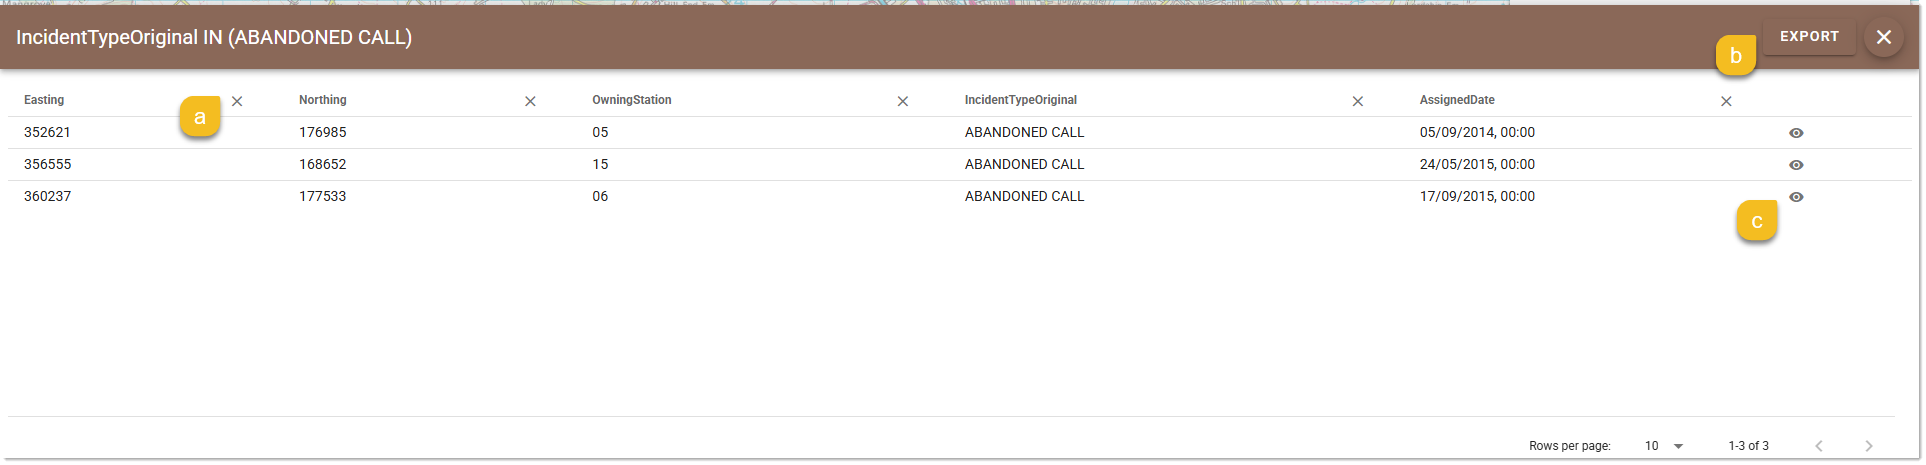
- Arranging Columns: Click on the x next to each attribute in the column header. Removed columns are not shown in downloaded CSV files. Click on the up or down arrows
 to sort columns alphabetically or in ascending order.
 - Export: Select Export to save displayed results as a .CSV file. If a filter has been applied to the results, this will be applied in the saved file as well. (Option available only if granted access).
- View feature: Click
 to zoom to the selected item in the search results. The map will now be centered on the item location.