 Itinerary Itinerary
Itinerary calculates the route between a series of points in the specified order.
This command differs from the other Routing Tool commands, in that SIS is active whilst the command is open.
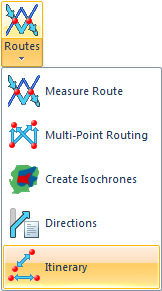
Select Itinerary.
The Itinerary dialog will be displayed:
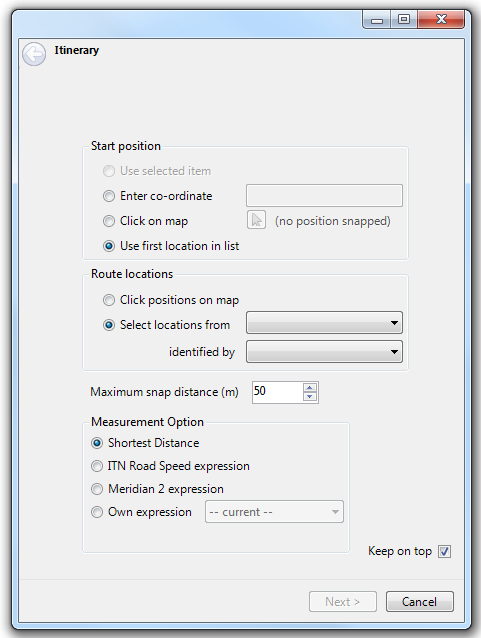
Start position
There are four methods of selecting the start of the itinerary:
Use selected item
This option will be active if a single item is selected prior to starting the Itinerary command.
Enter co-ordinate
A co-ordinate can be typed or pasted in the text box.
Note: Because SIS is active you will need to use the right-click Paste function if you want to paste co-ordinates in to this box. This applies to all controls in this wizard.
Click on map
Click the cursor/arrow button and then click on the map. The position will be shown next to the cursor button, i.e.:

If the No network found error message is shown:
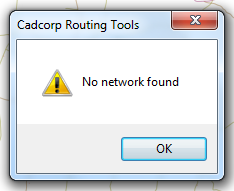
You have clicked too far from the topological network. The allowable click distance from an element in the network is set in Maximum snap distance (m) below.
Use first location in list
The second page of the Itinerary command, the Select route positions by clicking on the map dialog, will list the locations to be visited. This option allows you to specify the start point to be the first location on that list.
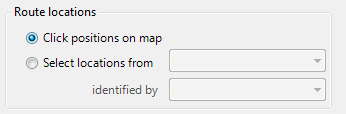
Route locations
There are two methods of specifying how the list of locations is selected:
Click positions on map
This allows the free input of any clicks in the map window.
Select locations from
This allows locations to be selected from a single overlay.
Select the overlay to be searched from the first drop-down box.
Select the property containing the name of the location from the second drop-down box.
Maximum snap distance (m)
This controls the maximum snap distance to the topological network. Any snaps further from the network than this distance will be rejected.
Measurement Option
Select the required Measurement Option. These options are described in the Measurement Options topic.
Tick the Keep on top box if you want to keep the Itinerary dialog on top all other windows.
On completion of this dialog click Next.
There are two possible versions of the Select route positions by clicking on the map dialog. If the Click positions on map option in the Itinerary dialog was selected:
The Select route positions by clicking on the map dialog will be displayed as below:
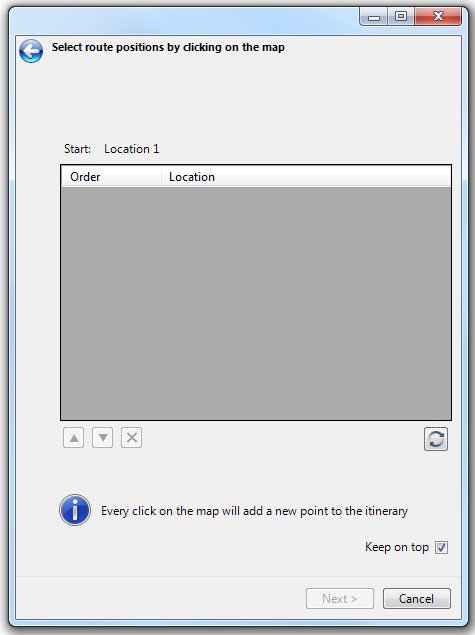
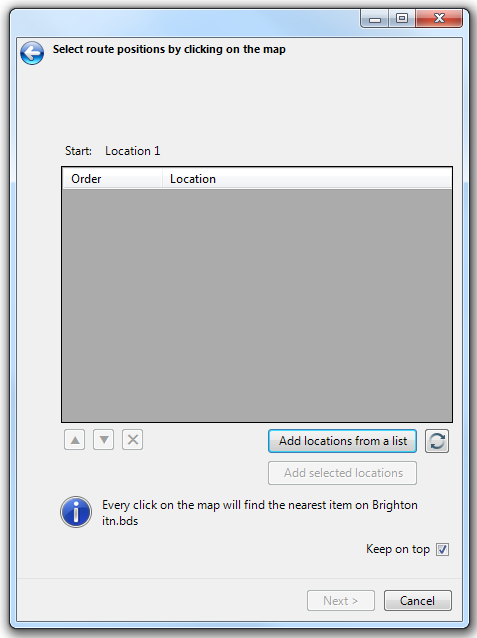
If Use first location in list was selected as a Start position in the Itinerary dialog then Start: followed by "Location 1" will be shown as above.
If Use selected item, Enter co-ordinate or Click on map was selected as a Start position in the Itinerary dialog then Start: followed by the entered co-ordinate will be shown, i.e.:

If the Select locations from option in the Itinerary dialog was selected:

Then the Select route positions by clicking on the map dialog will be displayed with additional parameters as below:
Click Add locations from a list to generate a list of Locations, i.e.:
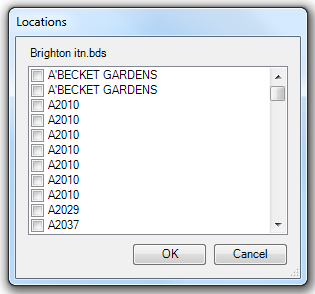
Check the tickbox for any location(s) to be added to the itinerary and click OK. These will then be added to the Select route positions by clicking on the map dialog Location list
Note: This list is based on the entire overlay so it should not be generated on large database tables.
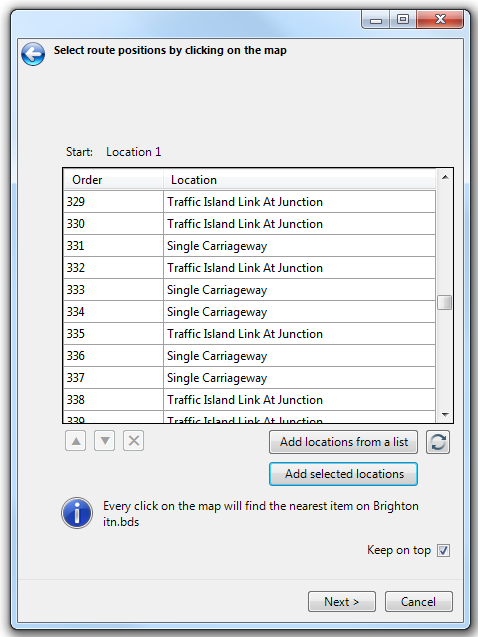
Added selected locations will only be active if more than one item was selected when the Itinerary command was started. This will add all of the selected items on the locations overlay to the itinerary. The Select route positions by clicking on the map dialog will be loaded with these locations, i.e.:
Click Next.
The Calculate itinerary dialog will be displayed in one of two forms:
 Calculate optimum route and details will be displayed Calculate optimum route and details will be displayed if 21 positions or less are selected. |
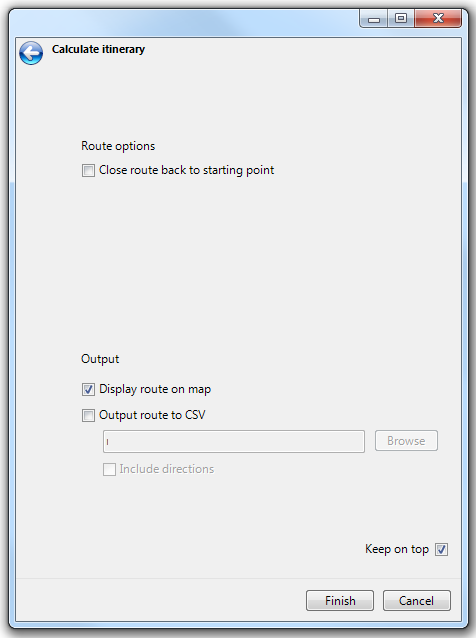 Calculate optimum route will not be displayed Calculate optimum route will not be displayed if more than 21 positions are selected. |
Route options
Close route back to starting point
Check this tickbox to create a route that returns to the start point.
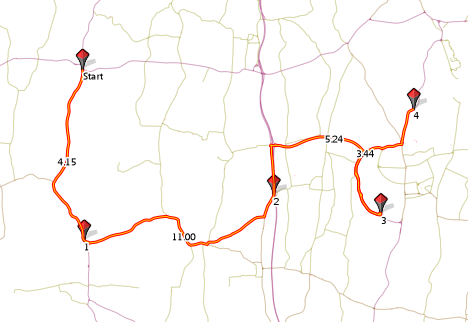
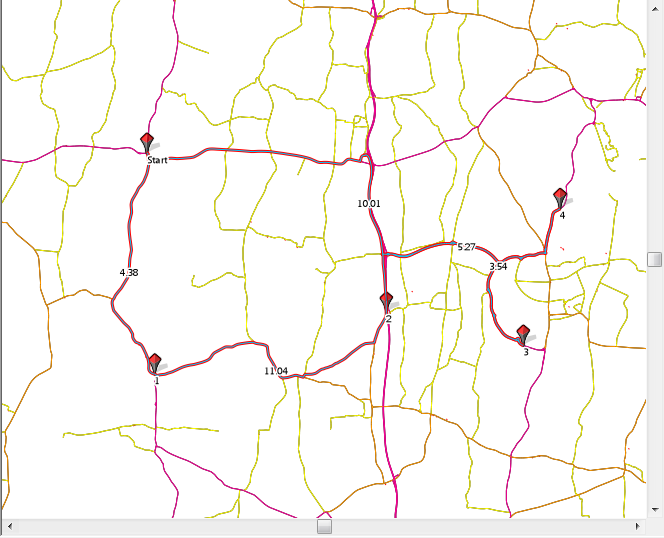
The above shows a route with Close route back to starting point tickbox unchecked
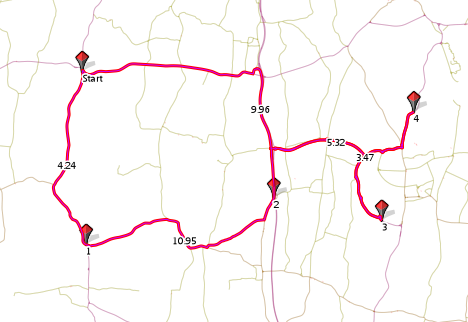
The above shows the same route with Close route back to starting point tickbox checked
Calculate optimum route
If 21 positions or less are selected:
The Calculate optimum route area of the Calculate itinerary dialog informs you of the number of potential routes:
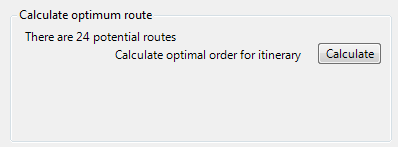
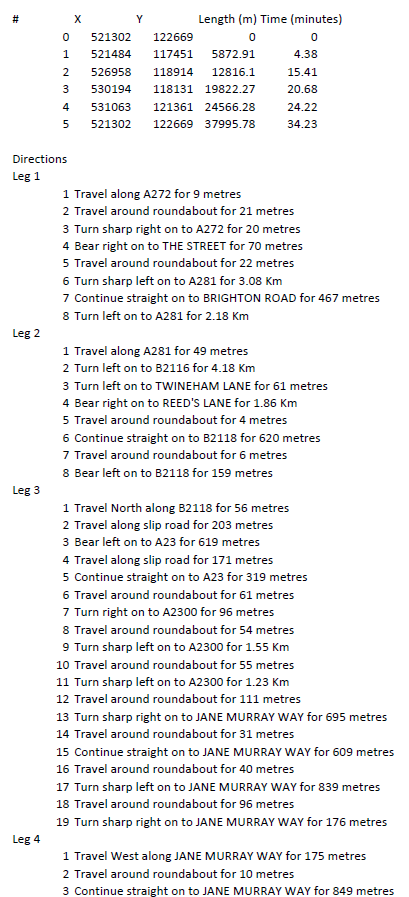
Click the Calculate button to calculate the optimal route for the itinerary:
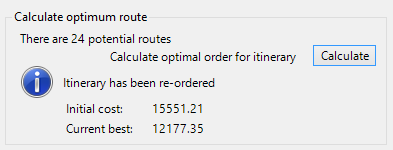
The itinerary list will be re-ordered and the route created accordingly. The original start point will not be changed.
If more than 21 positions are selected:
The Calculate itinerary dialog will not show the "Calculate optimum route" area:
If you wish to use Calculate optimum route with less specified positions you can click the back arrow button (top left) to return to the Select route positions by clicking on the map dialog and remove one (or more) of the route positions from the list. Again click Next, the Calculate itinerary dialog will now be displayed with the Calculate optimum route details and Calculate button shown.
If an error message is shown, similar to:
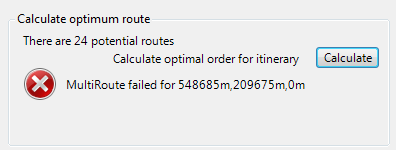
This indicates that the links in the topological network have not been set. Later versions of the ITN manager will do this automatically but older versions will require you to make this setting manually. Settings are fully covered in the Settings topic but the Make Links 'Automatic setting, which is required here, is shown below.
- Select the Routing Tools Settings button.
- Go to the General tab of the Routing tools settings dialog.
- Click Make Links 'Automatic'.
- Select the overlay from the Make Links Automatic dialog Select Overlay drop-down box and click OK.
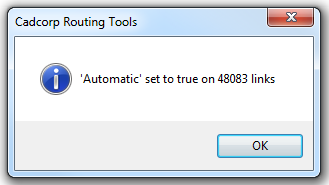
- The links will be set and a confirmation will be shown:
Click OK.- Click the Calculate button again.
The dialog should now appear similar to:
Output
Display route on map
Check this tickbox to display the route on a map in the map window,i.e.:
Output route to CSV
Check this tickbox to output the route to CSV file. When this tickbox is checked the Browse button will become avtive to enter the path and file name.
The Include directions tickbox will also become active with this option, check this tickbox if you want to include directions in the CSV file.
The directions option is configured in the same way as the Directions command. See Directions.
Styling is carried out using Themes stored in RouteDirectionTemplate.nol which is included as part of the Routing Tools installation.
The Themes and Schema are as shown below:

Send comments on this topic.
Click to return to www.cadcorp.com
© Copyright 2000-2017 Computer Aided Development Corporation Limited (Cadcorp).