.png)
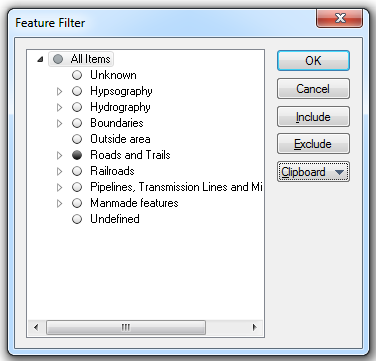
To view all the items, click on the horizontal arrow next to each item. The arrow will rotate 45 degress, become solid, and the structure of the filter will be shown.
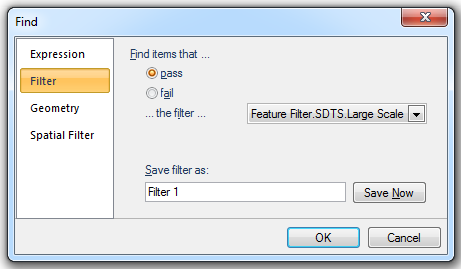
You can create your own editable filters, based on the read-only filters in the (standard) library. You can either make an editable copy of an existing filter on which to base your new one, or you can use Find [Home-Selection]. Both methods are described on this page.
Some examples of creating filters are given in Filter examples.
Using the local commands on the Libraries Control Bar, copy a filter from the (standard) library and paste it into an editable library. It is best to copy a filter which is as similar as possible to the one you want to create, because this will require the least editing.
Once you have an editable copy, you can rename it and use the Properties... local command to edit it.
The procedure for creating a filter using Find [Home-Selection] is as follows:
To include items, click the circular button so that it becomes dark grey, or select them, then click Include. To exclude items, click the circular button so that it becomes white or select them, then click Exclude.
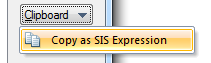
Click the Clipboard button and select Copy as SIS Expression to copy the Filter selections as a SIS expression.
As an example, if only the Road and Trails item is selected and all other items excluded:the copied SIS expression would be:
(_FC& between 17004 and 17007 or _FC& between 17201 and 17224 or _FC& in (0,17,17001,17002,17100))
An overlay filter remains in force until you clear it.
The Reset command on the overlay’s local menu on the Maps Control Bar removes the filter from use. In doing so, it makes all items on the overlay visible, and re-sets the filter tree.

Alternatively, on the Overlays dialog General tab, click on the cross adjacent to the filter to be cleared.
Send comments on this topic.
Click to return to www.cadcorp.com
© Copyright 2000-2017 Computer Aided Development Corporation Limited (Cadcorp).