PostGIS PostGIS
Location: Overlay Types dialog > Databases > PostGIS
PostGIS Pre-requisites
Before attempting to open a spatial table from PostGIS ensure that the table has one of the following:
The PostgreSQL Connection dialog will be displayed:

Host
The PostgreSQL database server host.
Port number
The PostgreSQL database server port.
Database:
Specify the database name to connect to.
User name:
The PostgreSQL database user name.
Password
The password for the specified PostgreSQL user name.
Save connection details in Options database (with encrypted password)
Check this tickbox if SIS should store these connection details in the Options database. The password will be stored in encrypted form for security.
Saved connection name
This text box will become active if the Save connection details in Options database (with encrypted password) tickbox is checked. Enter a meaningful name for this connection. This text box cannot be left blank and the same name cannot be used twice.
If the PostGIS connection has been made previously, and the connection details saved, the PostgreSQL Connection dialog will be displayed in the form shown below:
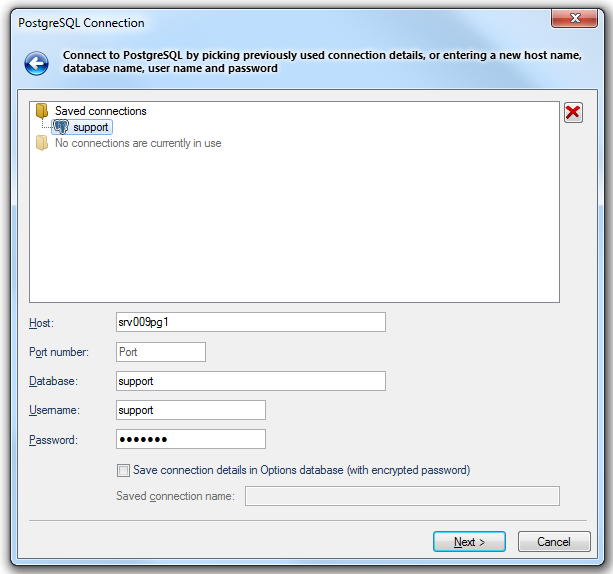
In this case click one of the Saved connections to complete the connection details.
If there are any connections currently in use these will be shown as follows:
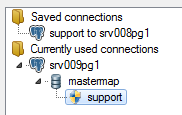
in this case one of these currently used connections can be selected to complete the connection details.
Click Next.
The Database connection type dialog will be displayed:

Simple
Opens one or more spatial database tables, with default configuration options.
Advanced
Opens a single spatial database table, with advanced configuration options.
Create
Creates a new, empty spatial database table.
Select the required database connection type and click Next.
If Simple is selected the following PostGIS Layers dialog will be displayed:
.gif)
Check the tickbox(es) of the PostGIS layers to be loaded into SIS and click Finish.
The layer(s) will be loaded using the configuration as set when the layers were loaded into the PostGIS database.
If Advanced is selected the following PostGIS Layers dialog is displayed:
.gif)
Select the PostGIS Layer to load into SIS and click Next.
The configuration of this layer can be set in the following PostGIS Connection dialog:

Connection Type
Dynamic
This option maintains an active connection to the PostGIS database, with all redraws returning to the server.
The dataset will be editable, subject to PostGIS user privileges.
Note: Dynamic connection does not require spatial index on the table and column, but it is recommended for efficient access.
Local cache
Makes a local copy of the entire table. The dataset will be read-only.
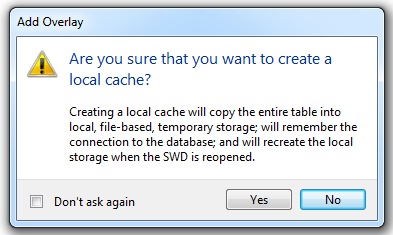
If this option is chosen the following warning will be displayed when you click Finish:
This is to inform you that the entire table will be loaded into local, file-based, temporary storage. The connection to the database will be remembered and the local storage will be recreated when the SWD is opened.
Check the Don't ask again tickbox if you do not want to see this warning again during this session.
One-off import
Copies the entire table into an Internal Overlay.
If this option is chosen the following warning will be displayed when you click Finish:
This is to inform you that the entire table will be loaded into an Internal Overlay. The connection to the database will be not be remembered.
Check the Don't ask again tickbox if you do not want to see this warning again during this session.
Note: SIS does not remember the Connection Type settings between uses of a database connection and will always default to Dynamic.
Only load data overlapping the current map view extents
This option is available for Local cache and One-off import connection types only.
Optional Feature Coding
Feature Code Column
If you intend to use a feature table with your overlay, you must ensure that the PostGIS table contains the appropriate feature code attribute as well as the SDO_GEOMETRY type containing the spatial data.
If your data was loaded using the Cadcorp OS MasterMap Manager, the feature code is exported for you. If you created your dataset using the export utility in SIS, you must ensure that the feature code column is listed in the overlay schema before exporting the overlay.
Alternatively if there is no feature code attribute, you can generate one manually using one of the PostGIS database interfaces such as SQL Plus.
Feature Table:
To apply a feature table select the feature code attribute from the Feature Code Column drop-down list. The feature code attribute must be in the PostGIS table in a column of a number type.
The Feature Table to use for feature-coded items in this dataset. Feature-coded items get information about their feature code either from this feature table, or, if set, their own Feature Table property.
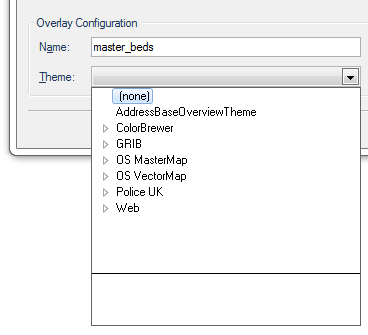
Overlay Configuration
Name
This is the full name of the selected overlay which can be edited.
Theme
This drop-down shows any Themes associated with the overlay:
Choose the required theme from the drop-down.
If you do not want to modify the dataset's Coordinate Reference System, scale, etc. click Finish.
If you do want to make changes click the More Properties button.
The APostGisCursorDTS dialog will be displayed:

Coordinates:
Displays the coordinate reference system that the dataset items are defined in.
Scale:
The default viewing scale for this dataset. This will affect how Text items convert their point heights into world sizes.
Click the Properties... button to display the resizeable PostGIS dialog:
This dialog enables columns from the PostGIS spatial table to be mapped to SIS properties which in the case of Angle column (_angleColumn$) allows symbols to be rotated by the angle specified for that row in the table. For example, if your symbol rotation value is stored in COLUMN_X, enter COLUMN_X.
In the case of the URI column (_uriColumn$) the Open Link command can be used to link to a given feature by entering the name of the PostGIS table column that contains the data. The column name must "exactly" match the case of the column in the database. For example, if you have a series of photographs stored in COLUMN_X, enter COLUMN_X.
Click Close in the PostGIS dialog and click OK in the APostGisCursorDts dialog to return to the PostGIS Connection dialog and click Finish.
.png)
Schema
Select the schema from the drop-down list.
Table Name
The name of the PostGIS spatial layer. You can enter any PostGIS compliant table name.
Geometry Column Name
The name for the column in the PostGIS table is GEOMETRY, and is type geometry. The name of the column can be changed.
Feature ID column
The name of the Feature ID column.
Coordinate Reference System
The Coordinate Reference System associated with the spatial layer defaults to the Coordinate Reference System for the overlay.
Advanced configuration
Geometry Dimension
Select the 2D or 3D radio button.
Default Schema Columns
Use the drop-down to select the required default schema column:
Overlay Configuration
Name
This is the full name of the selected overlay which can be edited.
Theme
This drop-down shows any Themes associated with the overlay:
Choose the required theme from the drop-down.
Click Next.
The Cursor Dataset Details dialog will be displayed:
.png)
Transactions
Click on Begin to start a transaction. Click Finish. Begin editing the data.
After the edits are finished redisplay the Cursor Dataset Details dialog and you will two active options:

Rollback
This will release the transaction and allow other users to obtain editable access to the data. The changes you made will not be applied to the dataset.
Note: Regenerating an overlay whilst in the middle of a transaction causes the transaction to rollback. In addition all undo information for the overlay will be cleared.
Commit
This will commit the changes permanently to the database and release the transaction. All users will now be able to view the data.
Alternatively, the three Transaction commands; Begin, Commit and Rollback may also be accessed locally as shown below:
Only allow editing inside a Transaction
Check this tickbox to ensure no edits can be made outside of the current transaction.
Send comments on this topic.
Click to return to www.cadcorp.com
© Copyright 2000-2017 Computer Aided Development Corporation Limited (Cadcorp).