Print Templates
A Print Template is a pre-formatted page layout which can include map view and other "furniture" (e.g. page borders, logos, Scale Bar, North Point, Graticule items).
Cadcorp SIS Desktop has a number of default Print Templates: Landscape or Portrait A0, A1, A2, A3 and A4 sizes.
These are stored in the read-only (standard) library. They show the Cadcorp logo and address and the Ordnance Survey logo and copyright notice.
Cadcorp SIS Desktop uses these two commands to help you create and use print templates:
- Print Template (File > Print Template)
- Quick Print Template [File > Print Template]
Creating a new print template from an existing print template
- Select Recall Print Template (File > Print Template).
- Select the template which closely resembles your desired size and style.
- The Print Template graphics will be copied into a new SIS Workspace Definition (SWD) named according to the template name.
- Edit the copied graphics (e.g. changing text or logos, adding "furniture")
- Select Store Print Template (File > Print Template), choose a folder and rename the template.
Note: Before you store a Print Template ensure that you have zoomed to a suitable extent to contain the template graphics. For example before storing an A4 Portrait template, create a 210mm x 297mm rectangle around the template graphics. Zoom to the extent of this, then remove the rectangle, or change its Pen and Brush to Blank. The extent of the template is used when printing or when exporting to PDF.
Creating a new print template from scratch
- Select New (File > New) and select Blank Map Document from the File Types dialog to create a blank SWD.
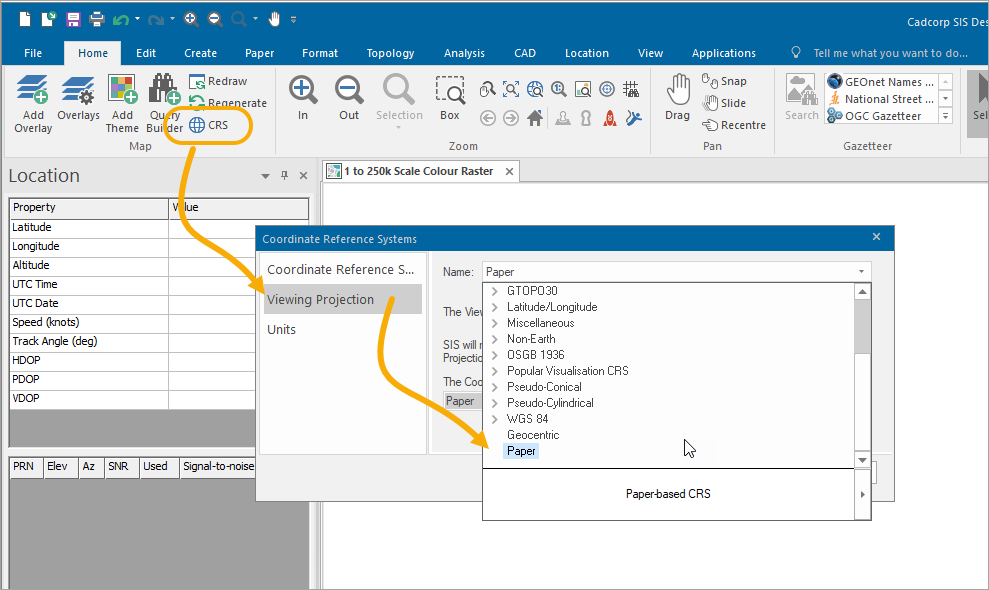
- Select CRS (Home > Map > CRS) and set the Viewing Projection to Paper.

- Open an existing SWD or create a new SWD which is typical of the maps for which you will use the Print Template.
- Right click on either of the SWD tabs and create a new tab group (either horizontal or vertical).
- Make the map window containing the new Print Template graphics current.
- Select Map Frame (Create > Miscellaneous) and click in the map base window. A rectangle the shape of the view in the map base window (NOT the shape of the map window) will be placed on the cursor in the Print Template window.
- After placing the Map Frame item, close the map base window. Notice how the Map Frame item still draws its contents properly even though the original window has been closed.
- Resize the Map Frame as required and add any Map Frame "furniture", an other graphics, e.g. text, logos, etc.
- If satisfied with the new Print Template, select the Map Frame item and choose Properties [Home > Selection].
- Press the Overlays button and remove all of the Map Frame overlays.
Note: Before you store a Print Template ensure you have zoomed to a suitable extent to contain the template graphics. For example, before storing an A4 Portrait template, create a 210mm x 297mm rectangle around the template graphics. Zoom to the extent of this, then remove the rectangle or change its Pen and Brush to Blank. The extent of the template is used when printing or when exporting to PDF.
- Select Store Print Template [File > Print Template], choose a folder and give the Print Template a name.
TIP: This rectangle may not be visible because it can be too large or too small; this is normal. Try zooming in or out until you see the rectangle on the cursor. If it is too large or too small, press Escape to exit the command and choose a more appropriate scale before starting Map Frame (Create > Miscellaneous) again.