Outlining Line Text
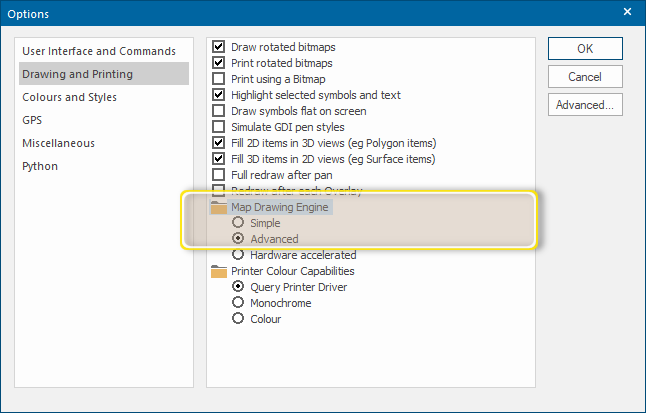
To enable Outline Text, navigate to File > Options > Drawing and Printing. Under the Map Drawing Engine folder tick the Advanced checkbox.
Line text is constructed to follow a single or multi-segment straight LineString item or a curved LineString.
- Select the LineString item along which you intend to construct the text.
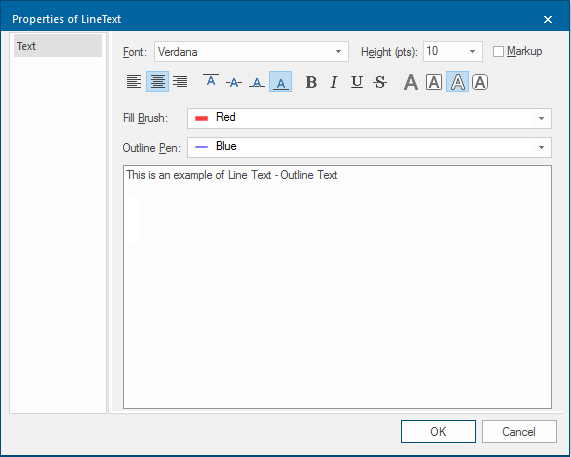
- Select Line [Create-Text], the Properties of LineText dialog will be displayed:
- Enter the required properties (similar to LineText).
- In the Fill Brush drop-down box select the required brush. Brush colour, fill, pattern, transparency and the normal advanced settings are available. User-defined brushes may also be defined. The facility of copying and pasting the brush specification in JSON is also available.
- In the Outline Pen drop-down box select the required pen. Pen colour, dash style, width, offset, transparency and the normal advanced settings are available. User-defined and Multi-level pens may also be defined. The facility of copying and pasting the pen specification in JSON is also available.
- The text is displayed in the preview box in simplified form, but it will use the selected properties when the completed text item is placed in the map window.
- Type in the required text, press the Enter key for a new line. You can also paste text into this box using the Ctrl+C/Ctrl+V key combination or Paste on the local menu.
- Click OK when you have finished entering text.
- The text is placed along the selected line using the current alignment setting.

- Even spacing of the letters along the length of the line can be toggled on/off. To do this select the line and select Properties from the local menu.
Even spacing can then be set to True or False in the Properties of LineText dialog All tab.