Outlining Point Text
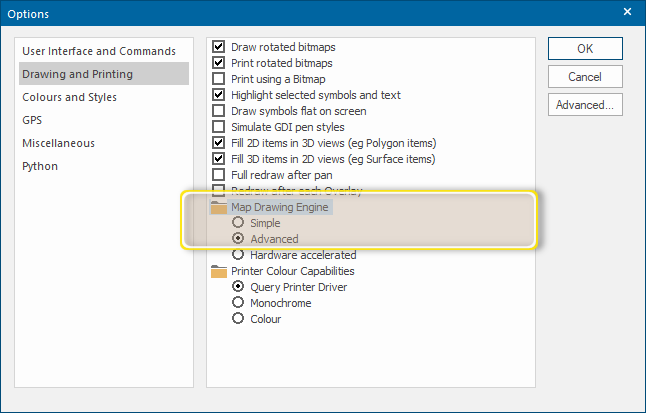
To enable Outline Text, navigate to File > Options > Drawing and Printing. Under the Map Drawing Engine folder tick the Advanced checkbox.
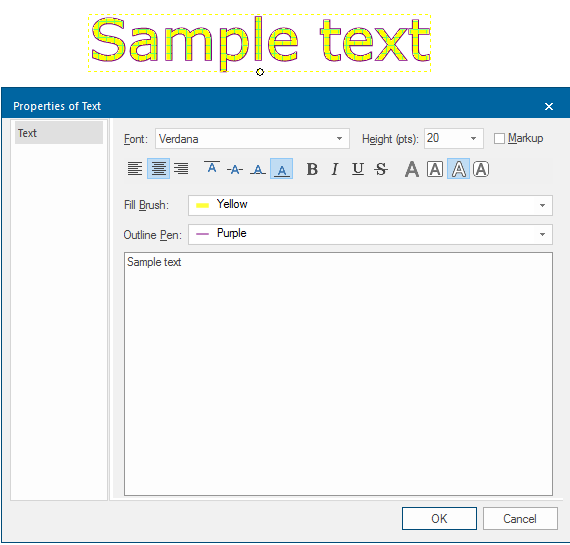
Applying Outline to Point Text
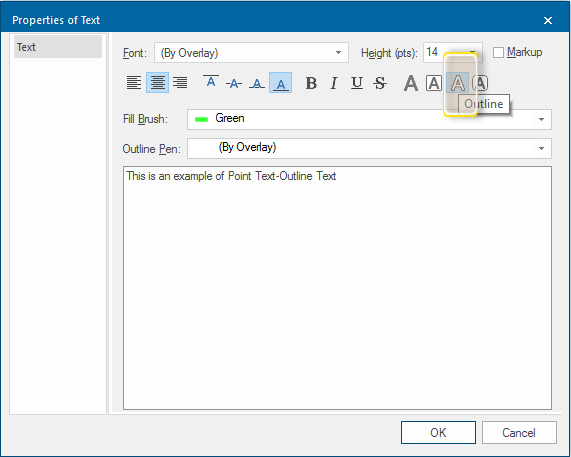
- Select Create > Text > Point to open Properties of Text
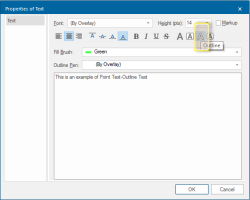
- Select the Outline Text button (highlighted above):
- Set the following properties as required (any of these can be changed later):
- font
- height in points
- left, centre or right justified
- vertical alignment: top, middle, baseline or bottom
- style: any combination of bold, italic, underlined, opaque, box (and outline if creating Outline Text).
- The text is displayed in the preview box in simplified form but it will use the selected properties when the completed outline text item is placed in the map window.
- In the Fill Brush drop-down box select the required brush. Brush colour, fill, pattern, transparency and the normal advanced settings are available. User-defined brushes may also be defined. The facility of copying and pasting the brush specification in JSON is also available.
- In the Outline Pen drop-down box select the required pen. Pen colour, dash style, width, offset, transparency and the normal advanced settings are available. User-defined and Multi-level pens may also be defined. The facility of copying and pasting the pen specification in JSON is also available.
- Type in the required text (Press Enter for a new line). You can also paste text into this box using the Ctrl+C/Ctrl+V key combination or Paste on the local menu.
- Click OK when you have finished entering text. The text item is attached to your cursor. If the display scale allows it, you will see a box indicating the size the text item will be.
- Click the screen position where you want to place the alignment point of the text item.
- Either:
- press Enter to place the text string horizontally.
- click a second point, which defines the angle of rotation of the text.
- press Enter to place the text string horizontally.
- If you cannot see the text item on the screen, it may be too small or too large for the current display scal
- Edit this via Home > View > Zoom Selection. You may have to redraw your screen (View >Window > Redraw All Windows or F5) before the text appears.
Height of point text
Point text height is set in point sizes similar to text in word-processing.
There are 72 points to the inch. One point is approximately 0.01389 inches, or 0.353 millimetres.
Note: the outline of the text will increase the text height by the amount of the specified width.
Height of point text and dataset scale
Point text always appears at the same size (its point size). If you change the dataset scale, the size of the point text will change. Dataset scale does not affect other text types, such as Box Text, Box Label and Line Text.
To give point text a fixed screen height
Point text with a fixed screen height remains the same height (in pixels) on the screen, no matter how much you zoom in or out. Fixed height text (or “zoom independent text”) is useful in such circumstances as labelling a KeyMap, or labelling symbols.
Note: To make your point text fixed height, use a negative value in the Height (pts) box. For example, a value of -10 would produce text at point height 10, irrespective of dataset scale.
Example
The following is an example of Point Text outline text:
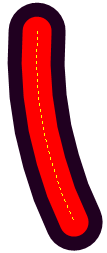
Note: If a multi-level pen is used the brush will overlay the pen along its centre-line. Therefore the entire pen line width will not be shown:
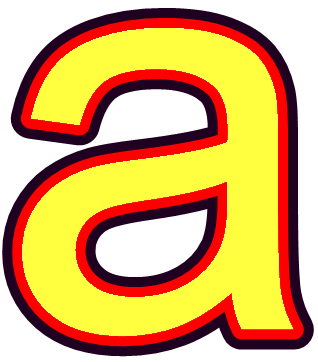
the outline of this character is defined as wide black overlaid with narrow red:
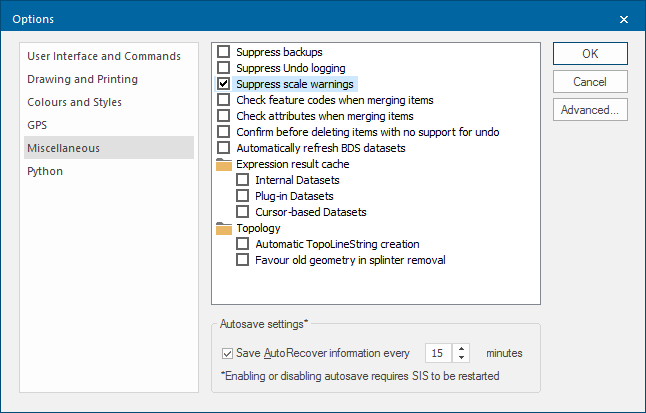
Cadcorp SIS Desktop normally warns you if the dataset scale is inappropriate and gives you the opportunity to change it.
This is most likely to happen when you are constructing point text in an internal dataset (these take an initial dataset scale of 1 when they are created.)
If you do not wish to see the scale warning, see Options > Miscellaneous tab and check the - Suppress scale warnings tickbox: