Setup and Configure WebMap
- Ensure WebMap 9.1.2340 (or later) is installed and running.
- Ensure WebMap is licensed specifically to display the Power BI visual. To check this, confirm if your licence file contains this parameter- GeognoSIS|Webmap|Add|PBI.
- To add this parameter manually, open the WebMap licence file (found in C:\Cadcorp\Services\Cadcorp.Licence.Service\LicenceFiles) in a suitable editor and type in the above string. Click Save.
- WebMap will check and validate this feature through Licenced Features

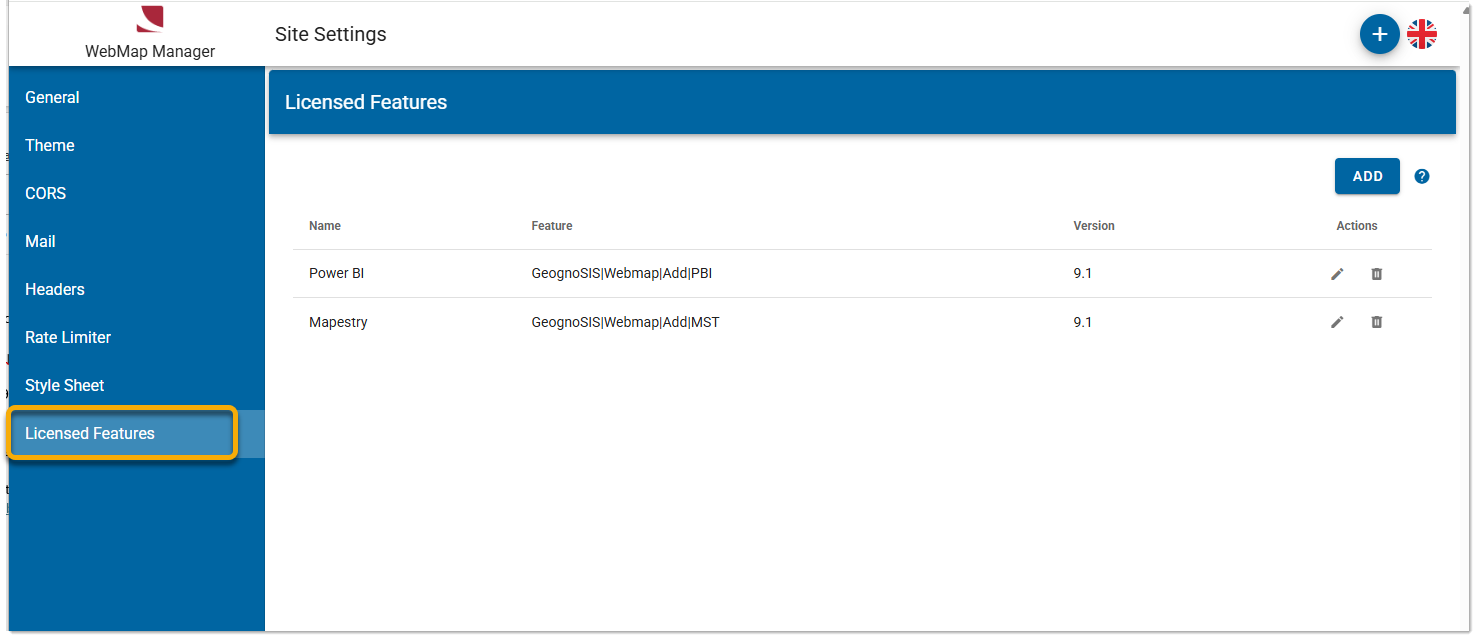
- The PowerBI licence parameter is already included by default (WebMap 9.1.2385 onwards). To manually include it for validation, click Add.
- Restart the Cadcorp Licence Service.
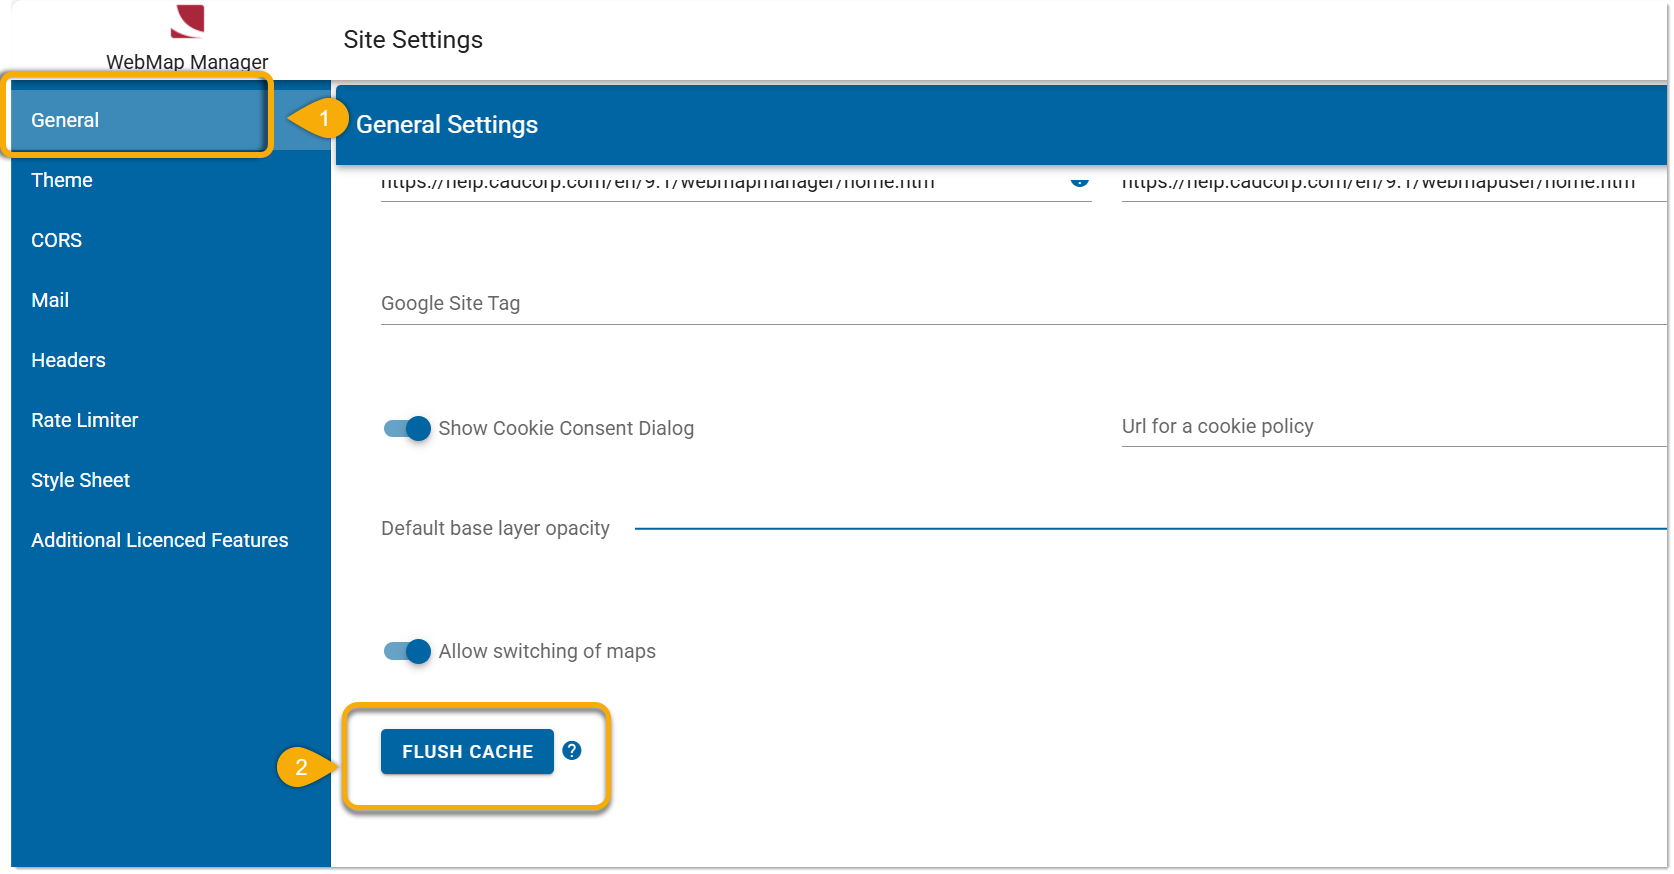
- Remember to flush the WebMap Manager cache.
- Reload the Power BI project or refresh the visual.
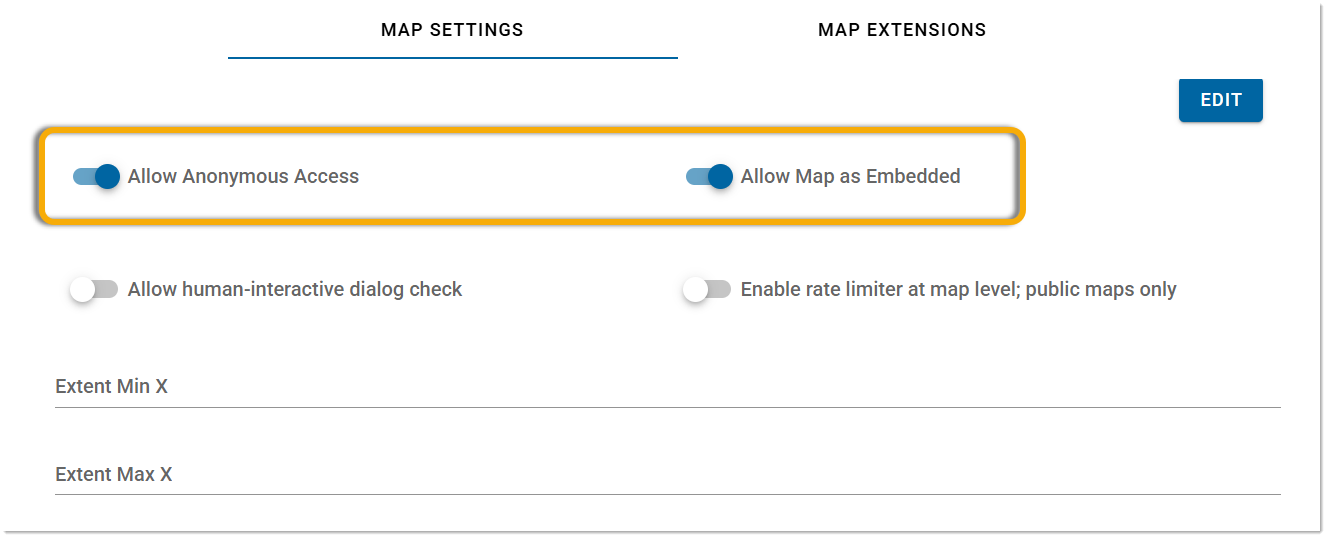
- Ensure the map you need has security disabled and is accessible to Power BI users. To do this, in WebMap > Map Settings, enable both Allow Anonymous Access *and* Allow Map as Embedded.
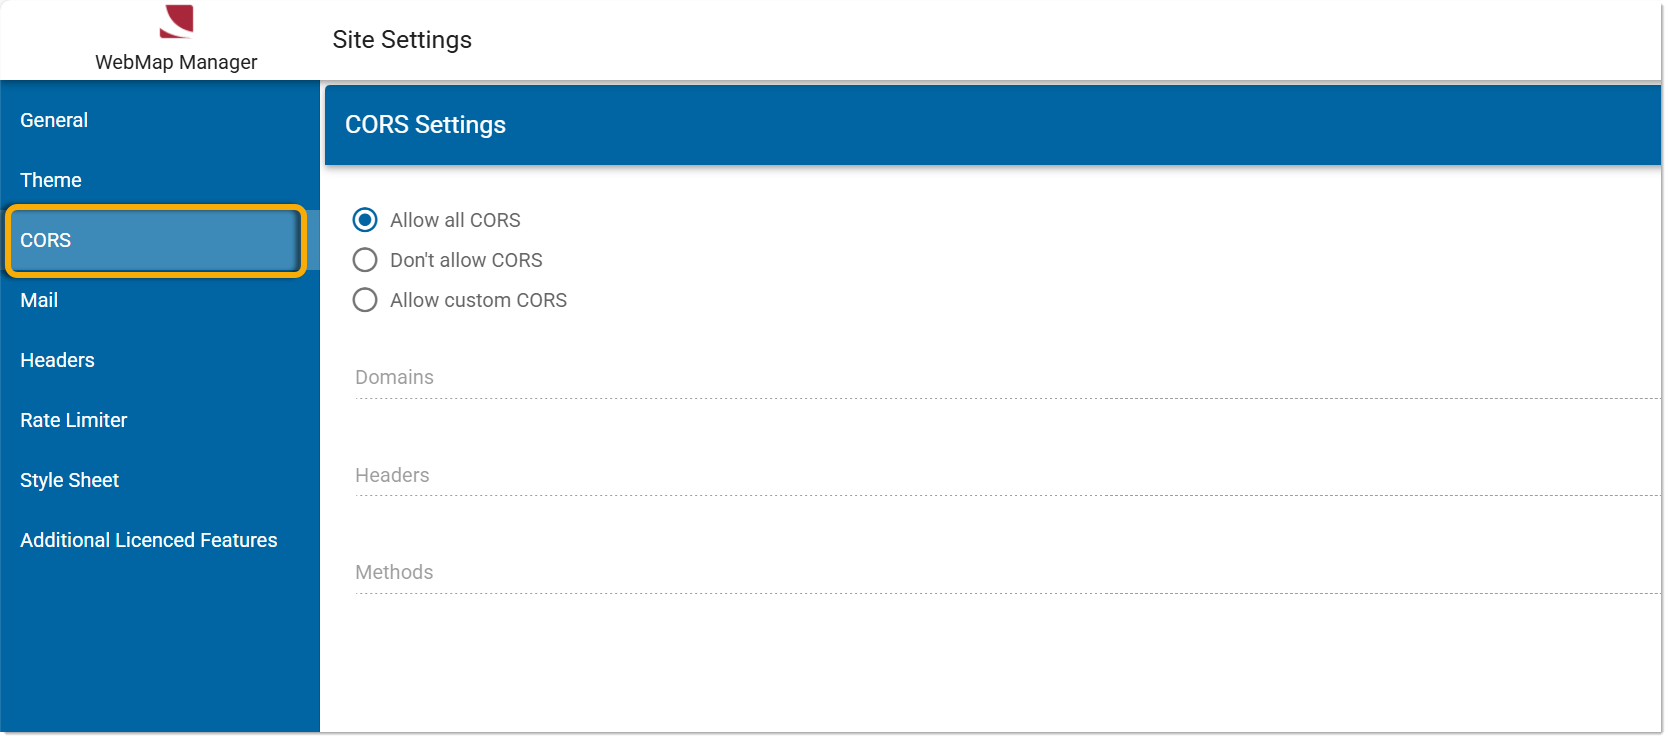
- Ensure the correct CORS settings are defined. If in doubt, use the Allow all CORS option for testing purposes.
- Ensure the Coordinate Reference System (CRS) used in the map matches the coordinates contained within your data source.
- The Service URL for WebMap is the root URL of the WebMap site - e.g. https://mapping/SISWebMap9.1. If you intend to publish your report publicly, ensure the WebMap instance you are using is also publicly accessible.
- Enable HTTPS on the WebMap server.
- Configure the Map Name using the WebMap Manager Interface; this can include base mapping and business layers. Use different maps to provide user-defined cartographic content.