Configure SWD to use Search By Area
Search By Area allows simple, intuitive spatial searching on multiple overlays.
TIP: See this in action on WebMap User Help 
To configure Search By Area:
- Use CadcorpSIS Desktop to open the SWD containing your WebMap data.
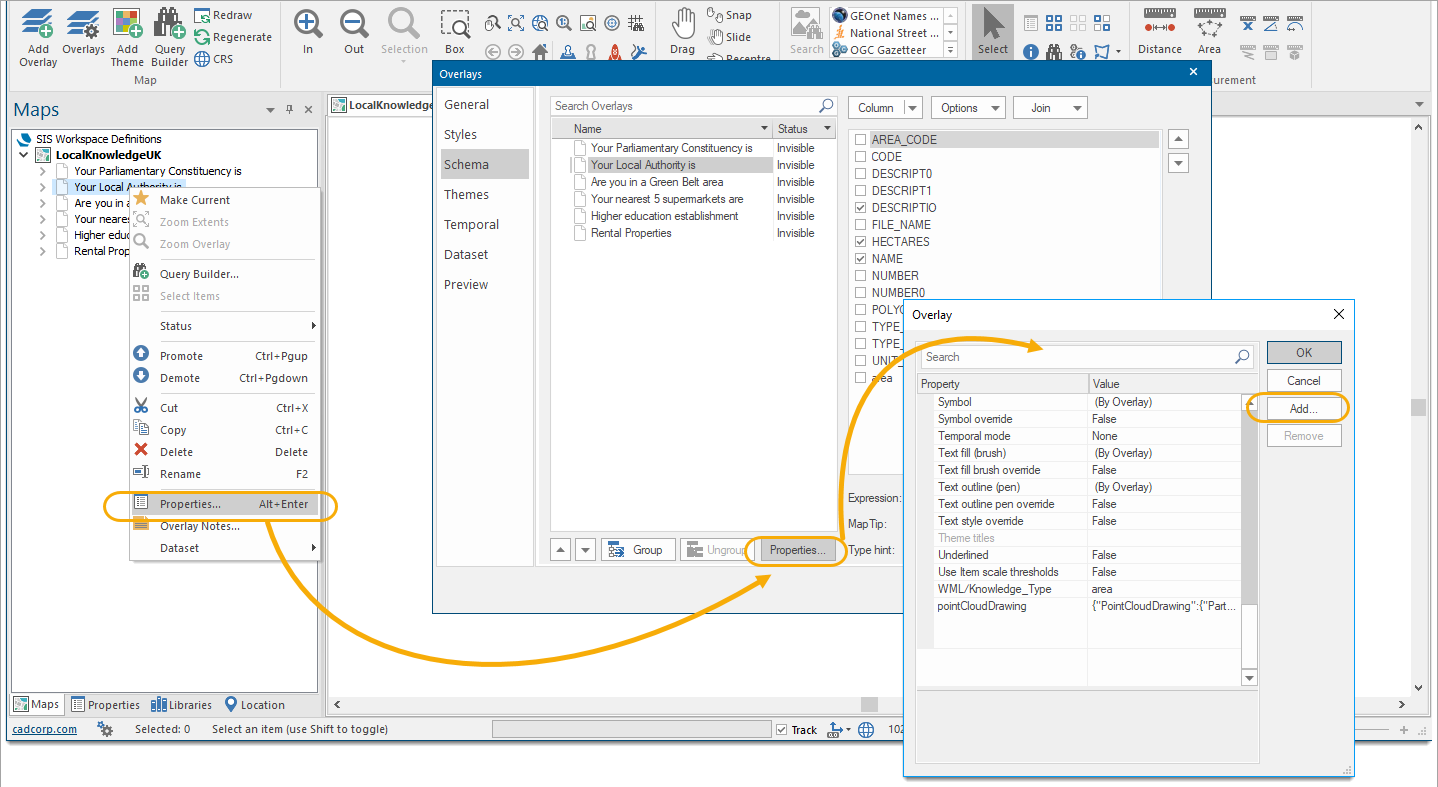
- Select the layer to be used in the Search by Area service, right click and select Properties and Properties again.
- Click Add to add a new attribute for Search by Area.
Enabling a layer to be used in the Search by Area Query
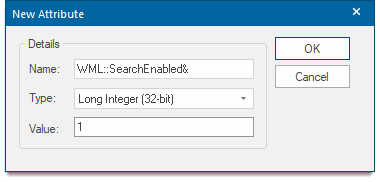
Add details of the Search by Area attribute as seen in the image. If the WML::SearchEnabled& attribute set to any value other than 0, the layer will be turned on area search.
Enabling a layer to be downloaded to a CSV file
If the layer has its WML::DownloadEnabled& set to any value other than 0 then the CSV can be downloaded.

Once the appropriate properties have been added to your SWD layers, add it as a GeognoSIS SWD in the C:\inetpub\wwwroot\SISWebMap9.0\map.aspx.
TIP: for more information, see also Add Layers > GeognoSIS SWD.
Using Search by Area
- In WebMap user interface, select Search by Area.
- Select one or more overlays to search for.
- Define the search area on the map using a freehand search, a feature or a point.
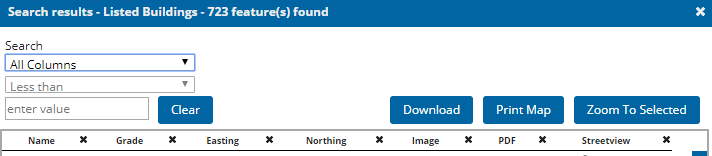
Results are saved and can be re-displayed after closing by clicking in the blue box containing the overlay name at the bottom of the Map Window:
Allow invisible layers to be included in a Search by Area query
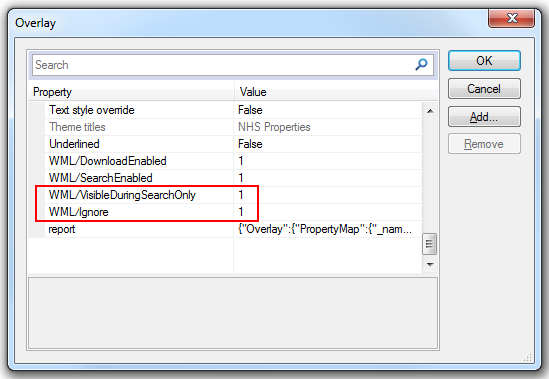
An overlay property can be added to allow invisible layers to be included in a Search By Area query; WML::VisibleDuringSearchOnly&.
Note: WML::Ignore& property must also be set on the overlay:
The overlay is turned off when the search dialog is closed or the search results are deleted by closing the result set (blue box) at the bottom of the Map Window.
Note: The WML::VisibleDuringSearchOnly& and WML::Ignore& properties are in addition to the WML::DownloadEnabled& and WML::SearchEnabled& properties.
Setting the image to mark found results
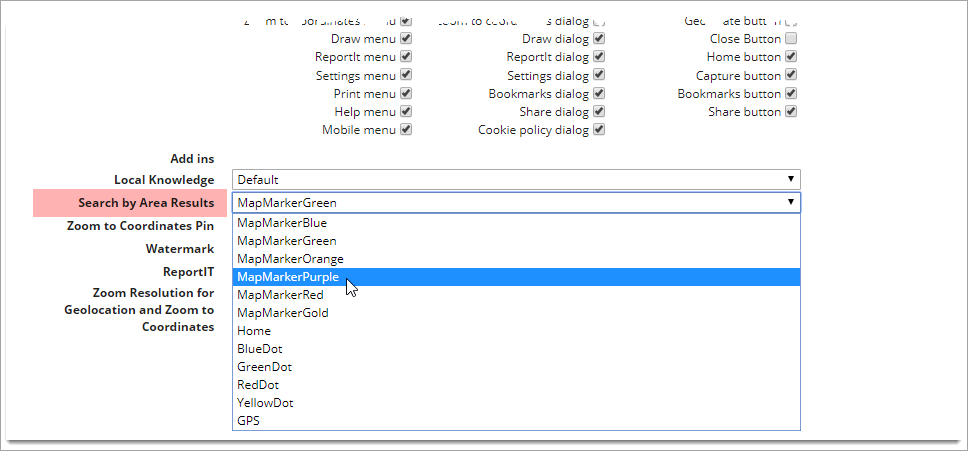
You can easily specify custom search result icons for each overlay included in the Search by Area service.
To do this:
- Select General Settings > mapSettings from the drop-down menu.
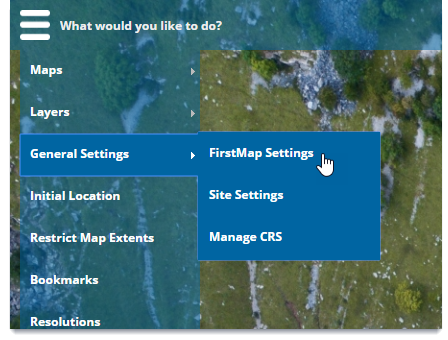
- Select your icon from the Search by Area Results drop-down menu.
TIP: To add a custom icon, see Icon Settings.
Changing the colour of the Search Area
To change the colour of the polygon created when you digitise the search area, edit Default Drawing Styles.
Search by Area - Advanced filter
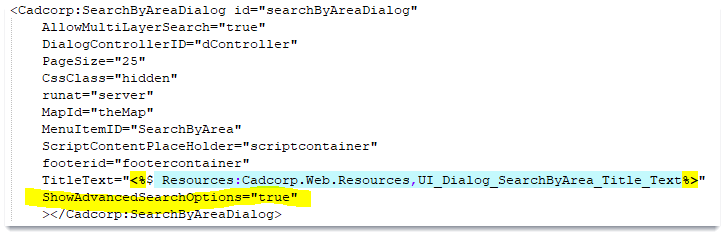
To enable advanced search filters, make these changes in the map.aspx file (this file is located in C:\inetpub\wwwroot\SISWebMap9.0)
- Navigate to the SearchByAreaDialog section.
- Set the ShowAdvancedSearchOptions to TRUE.
- These advanced flters are now visible on the Search By Area options window.