Map Settings
Once the data has been specified, you can start using maps from WebMap.
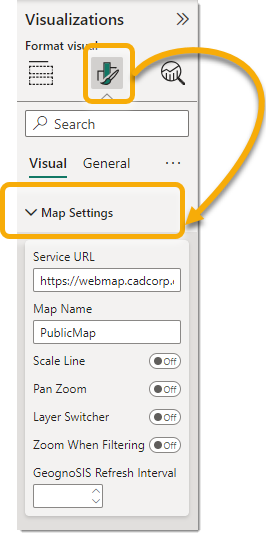
Select Visualizations > Format Visual > Visual > Map Settings.

Service URL for WebMap: This is the root URL of the WebMap site - e.g. https://webmap.cadcorp.com/siswebmap9.1
TIP: Do not include “/” or “en-gb/” in the URL.
Map Name: Enter the Map Name you want to use - e.g. FirstMap. This should match the map name used in WebMap 
Note that any Map used in Power BI must have the following settings enabled in WebMap Manager. Under Map Settings:
- Allow Anonymous Access.
- Allow Map as Embedded U
- Allows all CORS or Allow Custom CORS with configuration.
Scale Line: Enable to display the Scale Legend on the map.
Pan Zoom: Enable to add a zoom button to the visual. Without this, users can zoom by scrolling or gestures.
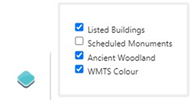
Layer Switcher: Adds a control for turning data layers in the map on and off. When the user hovers over this, all layers used from WebMap are listed and can be toggled on and off.
Zoom When Filtering: Enable to allow users to click on a point or polygon and zoom to the feature. Clicking on the feature a second time will zoom back to the previous extent.
GeognoSIS Refresh Interval: Refresh underlying mapping served by GeognoSIS. A timely refresh provides accurate and recent versions of data.
This is particularly useful when working with dynamic layers. Typically mapping data is loaded when the Power BI report is accessed. Some dynamic layers in the SWD are updated by default during the session- for e.g., a live display of vehicles accessed using a spatial database table.
Unless the GeognoSIS Refresh Interval has been explicitly set, the vehicles' most recent location during the session will not be displayed. If the GeognoSIS Refresh Interval is left blank or set to zero, the underlying mapping will not refresh.
Set a value (in seconds) for the refresh interval of the SWD data. This updates the mapping data in the background without forcing a redraw of the Power BI data overlaid on the map.
Reset to default: Returns settings to their default from the point when the map was added.
Click Save to save the settings.
NEXT: Map Tip Settings 