Non-spatial data from a database table, spread sheet, or text file can be loaded in a Cadcorp SIS Overlay Table Join. A Table Join allows one-to-many connections and requires therefore a unique schema column on the SIS spatial overlay. Table Joins are created on an overlay not a dataset and are therefore stored in the SWD. The dataset read elsewhere will have no information on any join within the SIS Workspace Definition (SWD). Only a single Table Join is permitted for each overlay. Joined columns retrieve values from a table via the Join expression.
SIS is able to read following non-spatial database and file formats:
Note: File based datasets can be read via a direct to file connection, as ActiveX Objects, or ODBC Data Source. Cadcorp SIS (64 bit) will use ADO (via the Microsoft Access Database Engine) to read Microsoft Excel *.xlsx files, Cadcorp SIS (32 bit) uses DAO to read spread sheets. Cadcorp SIS (64 bit) can only read .xlsx files and not .xls spread sheets.
Linking tables allows you to query data from external non-spatial data sources. Spatial data which is represented as overlays in SIS can be linked to non-spatial items via a unique identifier. Furthermore, the Overlay Table Join allows you to create one-to-many connections between the spatial items and non-spatial data.
Linking data allows you to minimize the size of geographic datasets and facilitate the benefits of relational database technologies. The same data source can be referenced by several SIS overlays. Linking data will help to reduce the amount of duplicate data and maintain the actuality of data sources.
It is possible to facilitate spatial queries based on the item geometry in SIS in order to derive values from a linked non-spatial data source.
Note: Due to limitations with the current implementation of sorting, the Table Window no longer allows sorting operations on Overlays with a Joined Table which has many-to-one joins enabled.
Also see the API method: SetOverlayJoinTable.
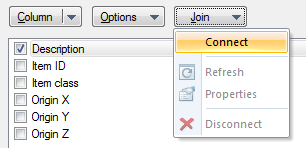
A Table Join can be initiated via the Connect command from the Join drop-down list of the Overlays dialog Schema tab:
The Connect wizard allows you to select and setup the appropriate data connection to access the data table.
The Database Types dialog will be displayed to allow you to select one of the available Database or File Types:
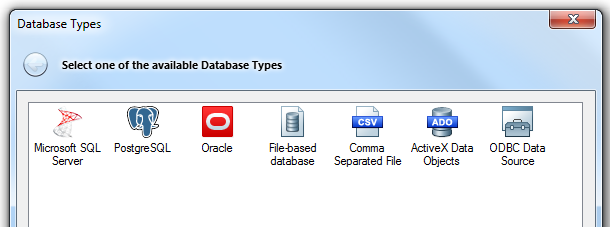
Microsoft SQL Server
Connects to a Microsoft SQL Server database
PostgreSQL
Connects to a PostgreSQL database
Oracle 8
Connects to an Oracle 8i, or later, database
File-based database
Reads one of the supported database formats directly from a file, e.g. Microsoft Access .mdb/accdb, or SQLite .db/.sqlite
Comma Separated File
Reads delimited data, e.g. comma- or tab-separated, from a file.
ActiveX Data Objects
Connects to a OLE-DB Data Source using Microsoft ActiveX Data Objects.
ODBC Data Source
Connects to an ODBC Data Source.
Select the location of the database or file and then click Next
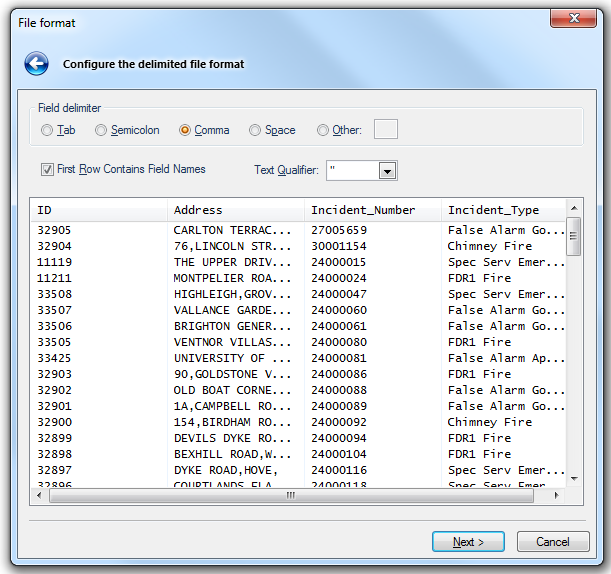
The next display depends on the option chosen in the above Database Types dialog. Each option will display dialogs to eanable the required dataset to be chosen.
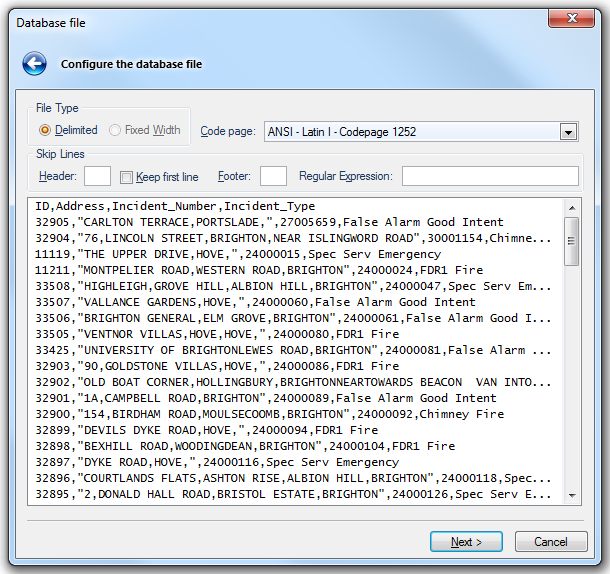
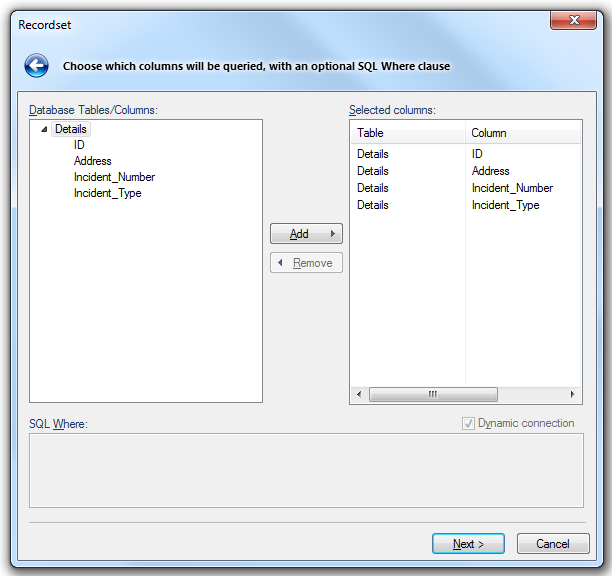
When the file has been selected the Recordset dialog will be displayed:
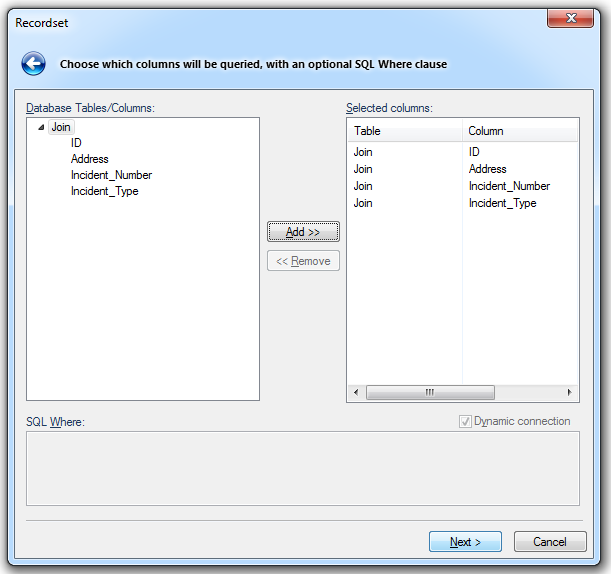
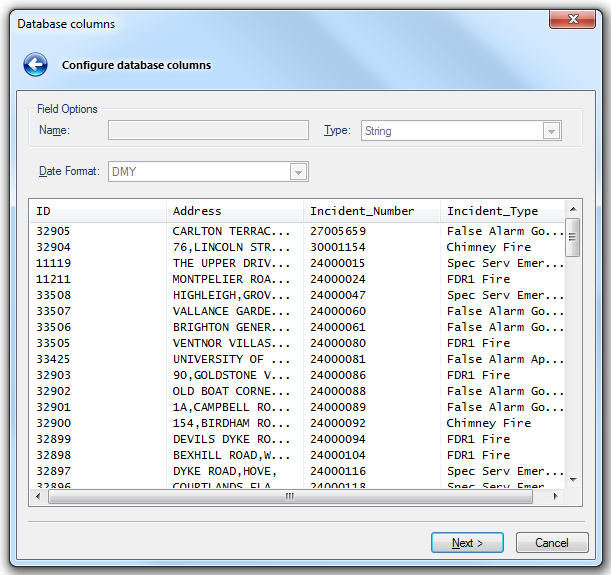
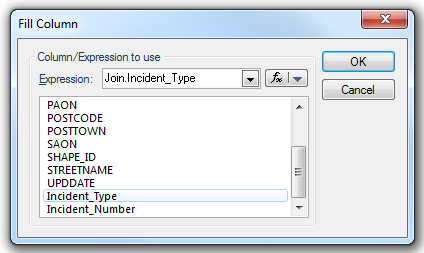
Once a table connection has been established the table column for the Overlay Table Join can be selected.
The Database Tables/Columns pane shows the tables and columns available in the connected database.
The Selected columns pane shows the selected database table columns. Use the Alias column in this list (move the slider to the right to reveal) to map the database column name onto a SIS property/attribute name:
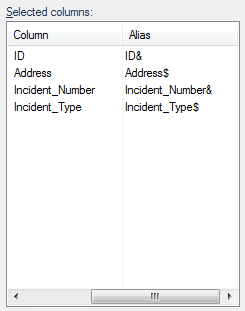
If the recordset is being used as part of a database-based dataset, then you can enter existing property names (e.g. _shape$) to redefine the created items' properties.
Select the entire table or expand the list to display individual fields. Click Add>> to move the required item(s) to the Selected columns pane.
SQL Where: the SQL WHERE clause can be used to join several different tables, or restrict which rows are imported. Do not include the WHERE SQL keyword. A Dynamic connection updates recordsets when the source dataset is changed.
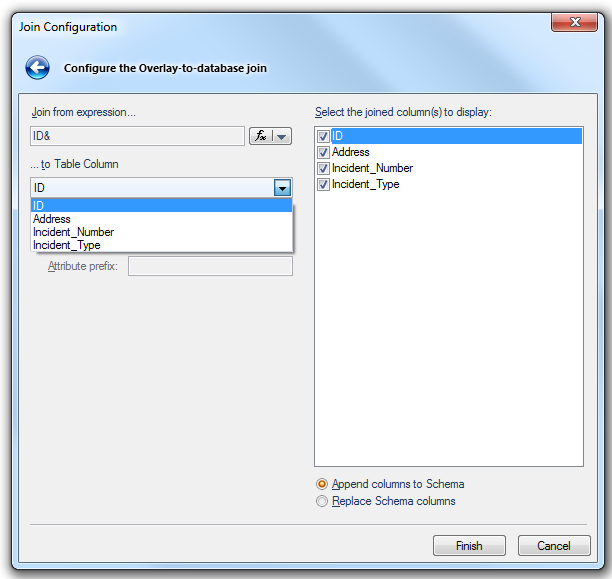
The final step of the connection wizard allows you to configure the join. The join expression must be defined from a unique schema expression to a connected table column. A one-to-many connection can be allowed for the table join. It is not necessary to display the column which is used for the join. By definition this column will be identical with an existing column in the Overlay Data Schema. Joined table columns can be added to the dataset schema or replace the existing dataset schema.
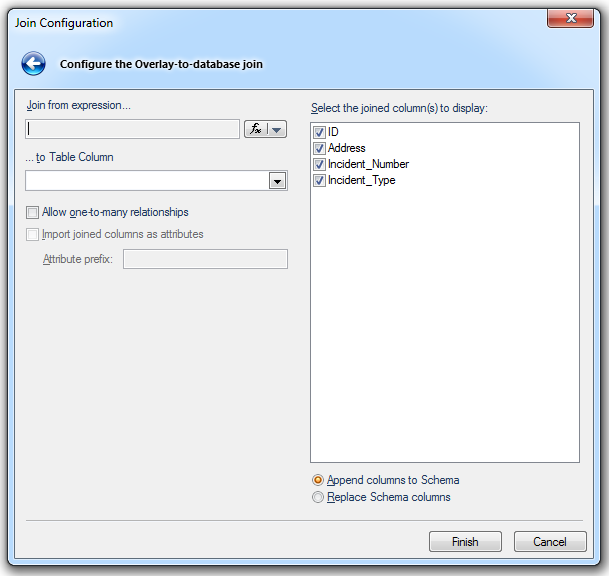
Untick any of the boxes for any of the joined columns not to be displayed.
The Allow one-to-many relationships will allow multiple rows in the joined table to be added to single items in the overlay.
Select Import joined columns as attributes if required and enter the Attribute prefix.
Select Append columns to Schema or Replace Schema columns as appropriate.
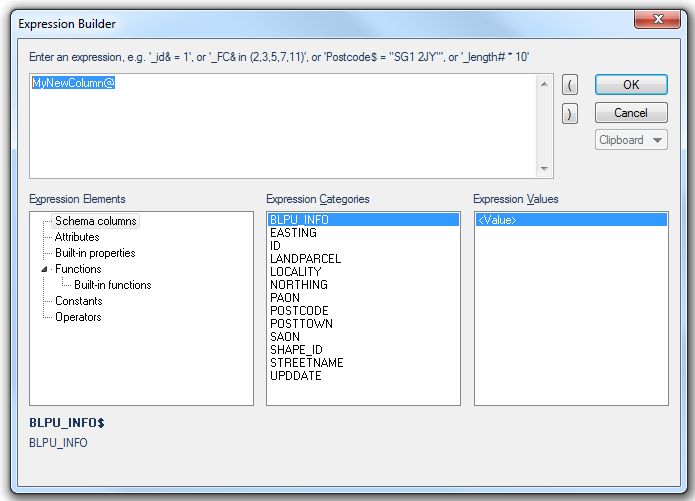
Click on the Join from expression... fx button to display the Expression Builder dialog:
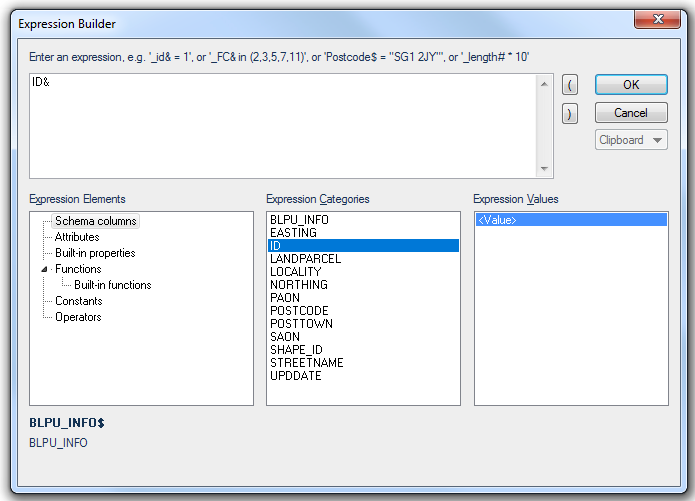
In the above example the Schema column "ID" is selected. Click OK.
Select the ... to Table Column from the drop-down list and click Finish.
The connect wizard will close and complete the table join. At the Overlays dialog Join tab click OK.
The Refresh, Properties and Disconnect options are only enabled for overlays with an active Table Join:

Example
This example includes the steps to create a joined table. If you only wish to see details of filling a joined table column go to step 10.
Taking "TableJoinEx1.bds" as the base dataset file and "Details.csv" as the file to be joined.

 , and choose ID from the Expression Builder dialog Schema drop-down list:
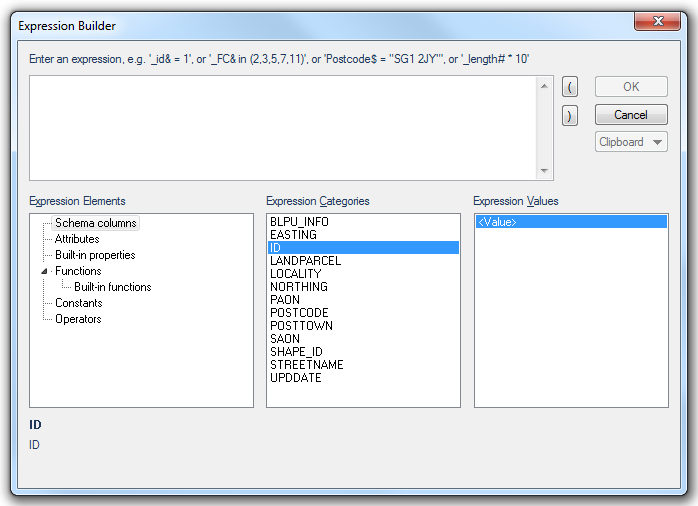
Send comments on this topic.
Click to return to www.cadcorp.com
© Copyright 2000-2017 Computer Aided Development Corporation Limited (Cadcorp).