.png) Facet
Facet.png) Facet
Facet
Facet replaces curved geometry segments with shorter straight segments, this is called faceting.
You may wish to facet curved geometry before exporting to a format which cannot handle curves (such as NTF). When you export curves to such formats, they are faceted as part of the export process. If you facet them first yourself, you retain control over how they will appear in the new format.
The Facet dialog provides a preview of how the LineString items will be altered, this allows you to see the effects of different tolerance values before making the changes. You are also given the option of creating new LineString items and keeping the existing LineString items unchanged.

Tolerance
Approximate
Select this option and use the slider to choose an approximate tolerance.
Move the slider to change the tolerance value, or type in an Exact value and click Apply. The tolerance value is the maximum distance allowed between the original curve and the new facet. The smaller the tolerance, the greater the number of LineString item segments used in the faceting.
Exact
Select this option if you wish to enter the exact tolerance. Enter the value, if the preview screen shows the desired result, click Apply.
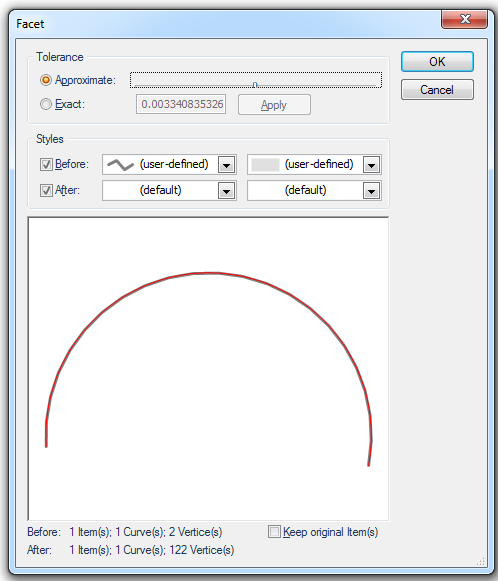
The following Facet dialog preview screen shows the effect of a "small" tolerance setting:

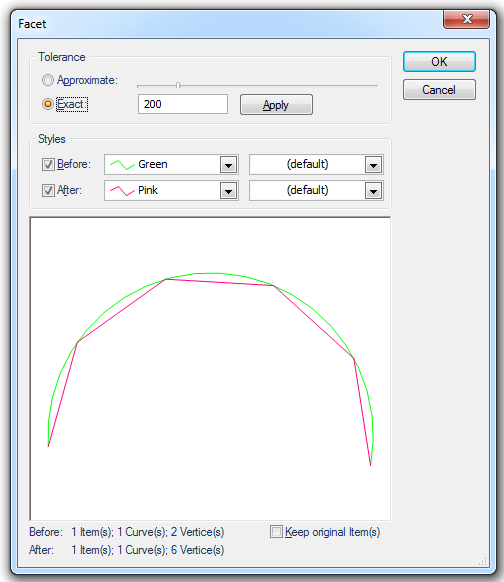
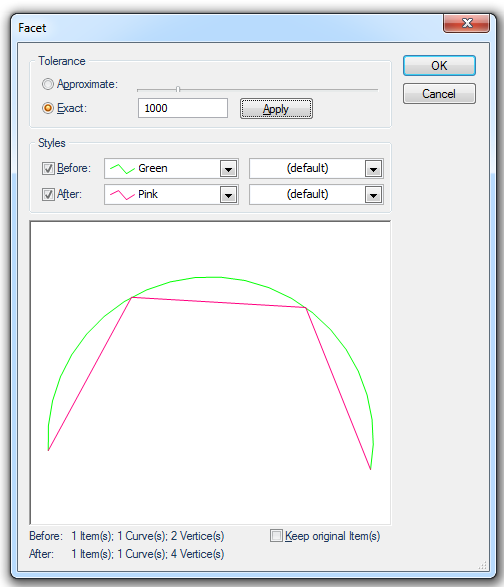
The following Facet dialog preview screen shows the effect of a "large" tolerance setting:

Style
Before
Check the Before tickbox to see the pre-operation condition.
The Before first drop-down box allows you to change the pen to draw the pre-operation LineString items in the preview screen.
The Before second drop-down box is not used for this command.
After
Check the After tickbox to see the post-operation condition.
The After first drop-down box allows you to change the pen to draw the post-operation LineString item(s) in the preview screen.
Note: This setting affects the preview only and has no effect on the final output.
The After second drop-down box is not used for this command.
Preview screen
The preview screen shows the output that would be achieved with the current settings.
Before / After
This displays the number of Items, Curves and Vertices for pre-operation (Before) followed by the number of Items, Curves and Vertices that will be output (After).
Keep original Item(s)
Check the Keep original Item(s) tickbox if you want to keep the original item and create a new LineString item.
Top of page
Click to return to www.cadcorp.com
© Copyright 2000-2017 Computer Aided Development Corporation Limited (Cadcorp).