Attribute data is non-graphical information assigned to editable graphical items, SIS Workspace Definitions (SWDs), overlays and datasets. An attribute is a type of property which gives extra information about the graphical item, SWD, dataset or overlay. It is different from a system property which is an integral part of the item, SWD, dataset or overlay. Once an attribute has been attached to an Item it is shown in the Properties Control Bar along with the system properties for that Item. You can expand the Attributes option at the top of the Properties Control Bar to view only attribute data.
Microsoft Visual Basic customisations can be used to add, modify, and remove attribute data with all SIS products.
Once you have created attribute data on an Item the Item will keep this data even if the Item is edited. The attribute data is stored inside the Item (and not in a separate table). This means that attribute data is never "lost" by the system due to individual files being deleted - wherever an Item goes, its attribute data goes with it.
To add attribute data to a single selected Item, use Properties [Home-Selection], or select Properties... from the Map Window menu.
The Properties of..... dialog will be displayed:
Select the Attributes tab.
Click the Add... button, the New Attribute dialog will be displayed:
![]()
Enter the attribute Name (this is what will appear in the properties Description column). The name may consist of any alphabetic or numeric characters (without spaces), but the first character must not be a number or an underscore.
Select the attribute Type.
Click OK.
If you want to add attribute data to many items, add the attribute name (e.g. "Street$") to the overlay Schema, and then add the street name for each item in the Table Window as follows:
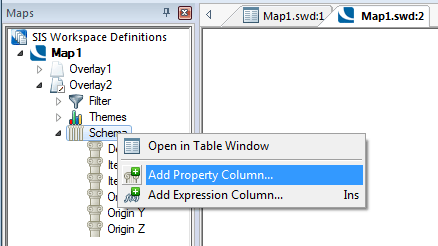
The Pick Property dialog will be displayed:
Select the New user attribute radio button.
Enter Street in the Name box and select String from the datatypes in the Type drop-down box.
Note: You can add the datatype symbol to the name you entered in the Name box, (see next paragraph) in this example it is a $ symbol for String (making the Name entry Street$), this will force the correct datatype to be displayed in the Type box.
An attribute name may consist of any alphabetic or numeric characters, but the first character must not be a number. The first character should not be the "underscore" character to avoid confusion with system properties. The last character of the attribute name must be one of "$" (string property), "#" (floating point property), "&" (integer property) or "@" (date, Boolean, byte, short integer, long long integer, unsigned and currency properties).
Click OK.
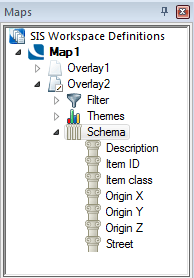
The property column called Street will be added to the Schema:
The default schema columns may be deleted if they are not required. To do this click the right-button on the first schema column that is not required and select Delete from the local menu, repeat for other columns if required.
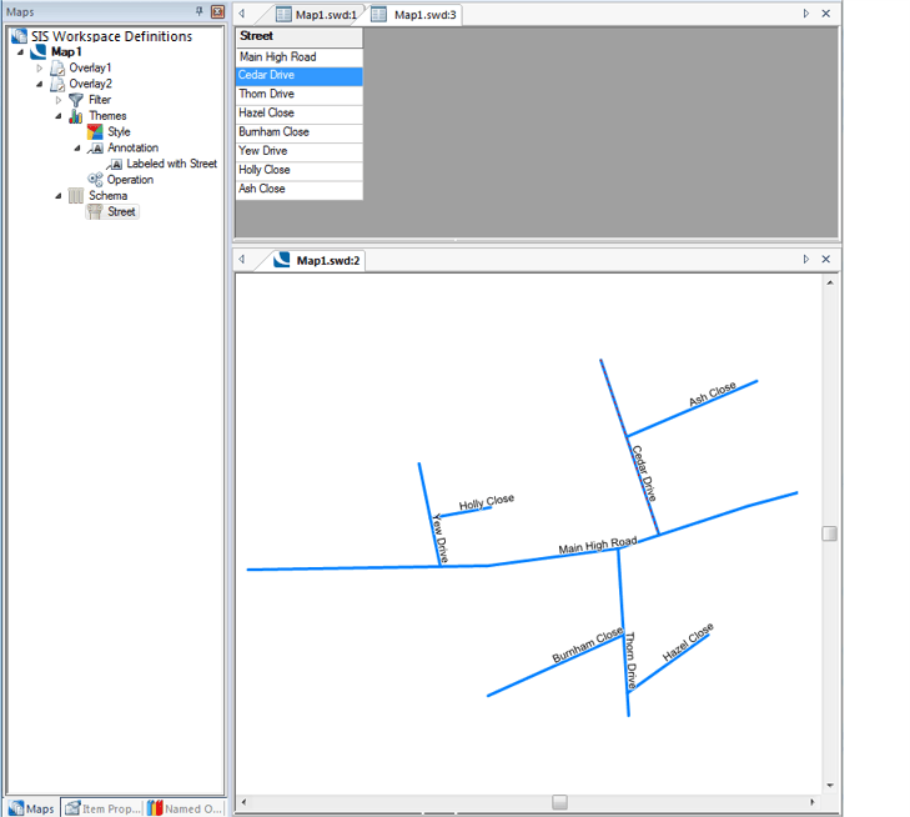
The following screen shows an example of Street entries in a Map Window and the associated Table Window:
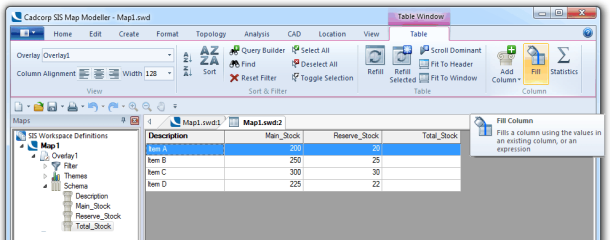
If a table column entry is to be derived from other table values use Fill Column [Table-Column] to display the Fill Column menu and input an expression to define the values.
For example if Main stock is to be added to Reserve stock to create totals in the Total stock column.
In the Table Window tab click on the Fill Column button:
The Fill Column dialog will be displayed:
![]()
Click the fx drop-down button and select Edit an Expression.
The Expression Builder dialog will be displayed:
Click on Attributes in the Expression Elements pane.
The Main_Stock, Reserve_Stock and Total_Stock will be shown in the Expression Categories pane.
Select Main_Stock to display in the main pane of the dialog, enter a '+' sign, select Reserve_Stock and click OK.
The populated Fill Column dialog will be displayed:

Click OK.
The table will now be updated as shown with the Total_Stock column completed.
Column entries created this way will not be updated if any of the entries in the columns used in the expression are altered. To update the values the process must be repeated.
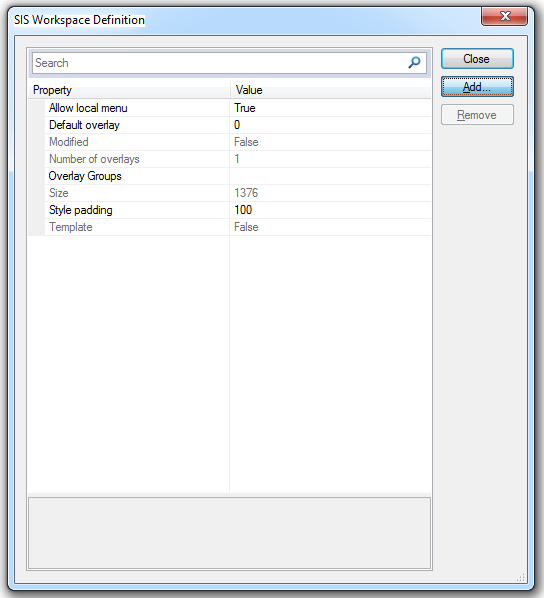
Select the SWD's local command Properties... in the Maps Control Bar.
In the SIS Workspace Definition dialog click on the Add... button:
Add the attribute in the New Attribute dialog:
In the Overlays dialog, select the required overlay, then click on Properties...
The Overlay dialog will be displayed:
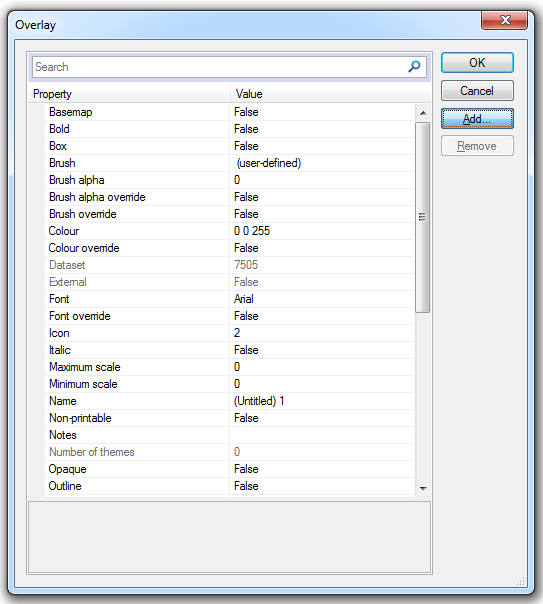
Click the Add... button.
Add the attribute in the New Attribute dialog:
This is typically carried out after a Boolean Union or Boolean Dissolve command is used and attributes need to be removed as they are no longer correct.
Select the items from which to remove the attributes and display the Properties dialog:

Select the Attributes tab to show the list of attributes.
Select the first attribute to be removed and click Remove.
Repeat for all attributes to be removed and click OK when complete.
Once you have added attributes to an item, SWD, overlay or dataset, they are shown as properties in the Properties dialog. To see this dialog:
For an item, its properties are also shown on the Properties Control Bar when the item is selected. In both locations, attributes appear in both the Attributes category and the All category. You can also view and edit user-defined attributes in the table window.
You can modify the attributes of an item, SWD, overlay or dataset in the Properties Control Bar. You can delete the value to leave it blank, or type in a new value.
For items, the attribute can be removed completely using the Remove button on the Attributes tab on the item’s Properties of ..... dialog.
Item attributes can also be modified in the Properties Control Bar. If you intend to modify the properties of several different items one after the other, it is more convenient to do so here.
When an item is edited, SIS generally tries to retain its user-defined attribute data where possible. Some guidelines are given below:
.GIF) , both resulting LineString items will hold identical data.
, both resulting LineString items will hold identical data.However, some operations can result in the loss of attributes. Examples are converting LineString and Polygon items to topology, converting text items to Polygon items and creating symbols.
Send comments on this topic.
Click to return to www.cadcorp.com
© Copyright 2000-2017 Computer Aided Development Corporation Limited (Cadcorp).