-General tab.png)
All the Overlay dialog tabs, except for Preview, display the overlay names and their status in the centre pane.
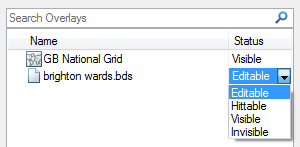
The Search Overlays box is used to find an overlay in a list of overlays. Enter consecutive alphanumeric characters within an overlay name to show all overlays that have that string of characters within their name. This is useful where a large number of overlays are in use, making it difficult to find a particular overlay within the list.
The functions of the Overlay, Edit and Status buttons are detailed below.
The parameters shown on the right-hand side of the Overlays dialog are:
Current (tickbox)
Check this tickbox to make the selected overlay the current overlay.
Name:
This is the overlay name. If several overlays reference the same dataset, then you can enter different names here to distinguish them.
Notes:
Enter any notes to be stored with the overlay.
Text entered here will automatically line wrap so that each line fits in the viewable window, allowing the text to be read from top to bottom without any horizontal scrolling.
Filtering
Property Filter:
This is a drop down box to enable a filter to be selected. A filter restricts the dataset items to be included in the overlay. A filter normally uses non-geometric tests on items. For example, a filter could be used to only draw items with a certain feature code.
If a geometrical test is required use the Spatial Filter option.
Spatial Filter:
A spatial filter will only include dataset items within a specified spatial filter.
The corresponding red cross button
will become active if a Property Filter or a Spatial Filter is set, clicking
Scale Thresholds
Minimum
The smallest scale at which to draw graphics.
Maximum
The largest scale at which to draw graphics.
The corresponding red cross button
The Overlay, Edit and Status buttons at the top of the Overlays dialog function as follows:
Click Add Overlay [Home-Map] to display the Overlay Types dialog:
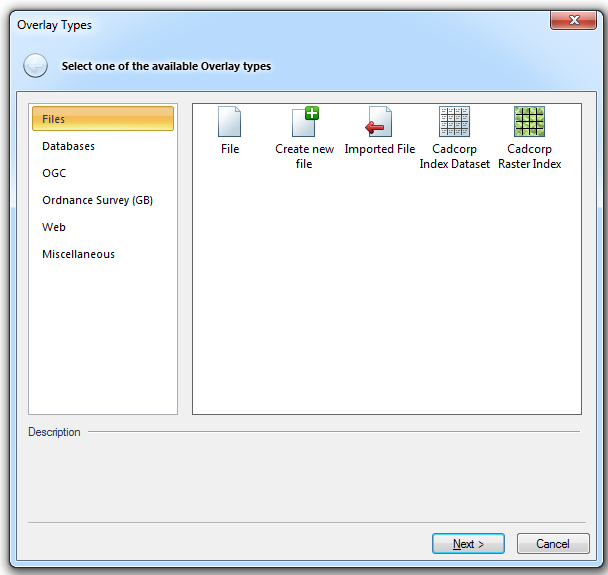
See Overlay Types for a description of the overlays available from the Overlay Types dialog.
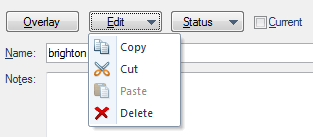
Copy
Select the overlay and use the Cut or Copy button.
Cut
Select the overlay and use the Cut or Copy button.
Paste
After cutting or copying, select the destination SWD, display its Overlays dialog and use the Paste button. Alternatively the copied overlay can be pasted into the destination SWD in the Maps Control Bar using the local menu.
Delete
Removes the selected overlay or overlays from the SWD.
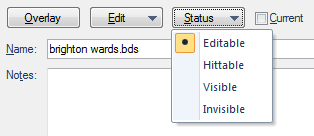
Enables the status of the selected overlay to be set:
Editable
Full access to add, modify and delete information. This option applies only to user datasets (SDS and BDS files, internal datasets and editable geometry overlays).
In the case of BDS files (which can be shared via a network), only one user at a time can have Editable access to them.
In the case of editable geometry overlays (which can be shared via a network), individual item locking is used.
Hittable
The ability to snap the cursor onto graphics to measure, query, trace and copy data.
You cannot move, delete or add data.
Visible
Graphics appear on screen but cannot be queried (snapped to).
The image is purely a backdrop.
Invisible
No graphics appear on screen. This is useful for temporarily excluding information from the view
Basemap
This option sets the overlay to Basemap status, see Basemap (Overlay Status) for an explanation of this setting.
Note: The overlay status of Editable, Hittable, Visible or Invisible can also be set by selecting the overlay in the centre pane and choosing the required status from the Status drop-down list.

These buttons are displayed on all tabs except Preview.

Click up/down arrows to move the selected overlay up and down the list. As overlays are drawn in the order they appear in the list, graphics in earlier drawn overlays are obscured by later drawn ones.

Click Group/Ungroup to group or ungroup selected overlays, for example:
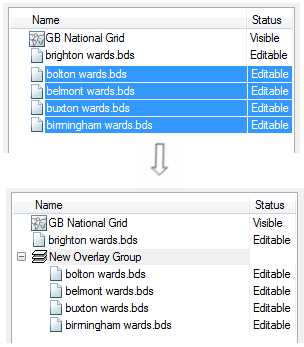
See Grouping overlays for a full explanation of overlay grouping.

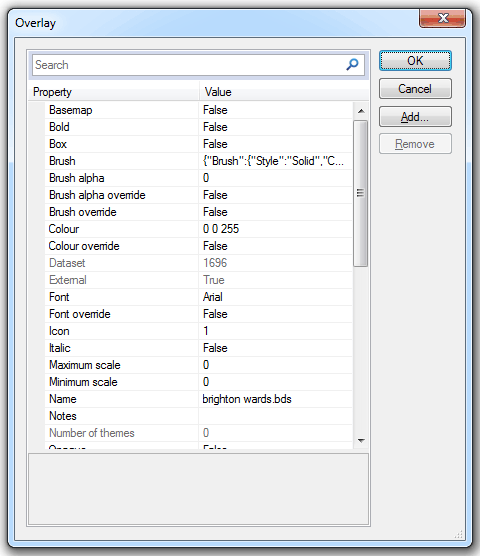
Click Properties to display the Overlay dialog which shows the properties and their values.
To remove an attribute highlight it and click Remove.
To add an attribute click Add to display the New Attribute dialog:
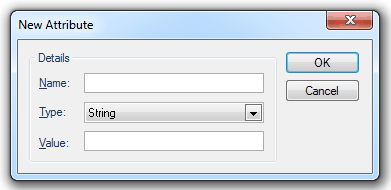
Enter the attribute Name, select the Type from the drop-down box and enter the attribute Value.
Click OK on the New Attribute dialog to return to the Overlay dialog and click OK.
See Attribute Data for details of adding attributes to overlays and Attribute Data Type-Overview for an explanation of the different attribute types.
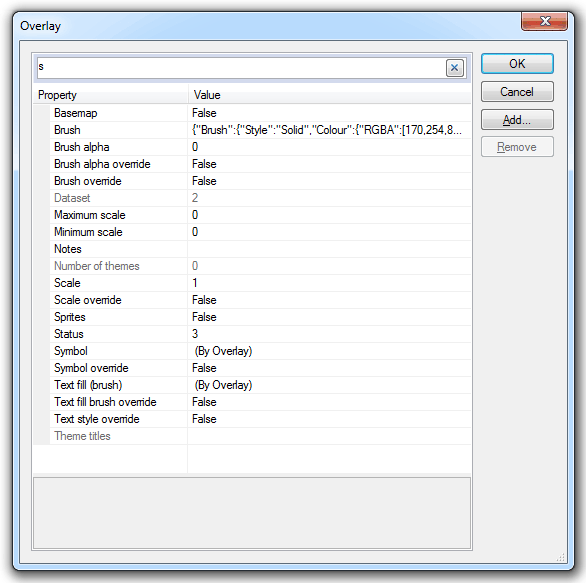
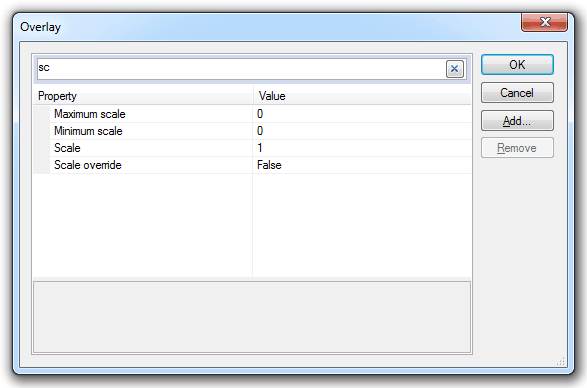
Using Search in the Overlay dialog:
Enter a letter in the search bar to display all properties containing that letter or letters, for example:
Send comments on this topic.
Click to return to www.cadcorp.com
© Copyright 2000-2017 Computer Aided Development Corporation Limited (Cadcorp).