Outline Text (Advanced text)
Outline Text can be applied to all categories of SIS Text Items:
Point Text
Box Text
Box Label
Line Text
An important difference between SIS Simple text and Outline Text is that, with simple text, the characters are drawn using the set Pen whereas Outline Text uses a selected Brush to draw the characters and a selected Pen to draw the outline.
The Outline Text function allows you to set the Brush (Colour, Transparency, Fill, Pattern and Background), Pen (Colour, Dash Style, Width, Offset and End Caps). Multi-level pens can also be used for the Outline of the text.
Outline Text can also be defined within the Feature Table editing dialog.
To enable the Outline Text function check the Options [File] dialog - Miscellaneous tab Map Drawing Engine folder - Advanced tickbox.
Details of Outline text for each category of text item are as follows:
Point Text - Outline Text
As with simple text when you are constructing Point Text as Outline Text, SIS normally warns you if the dataset scale is inappropriate and gives you the opportunity to change it. (This is most likely to happen when you are constructing point text in an internal dataset, because these take an initial dataset scale of 1 when they are created.)
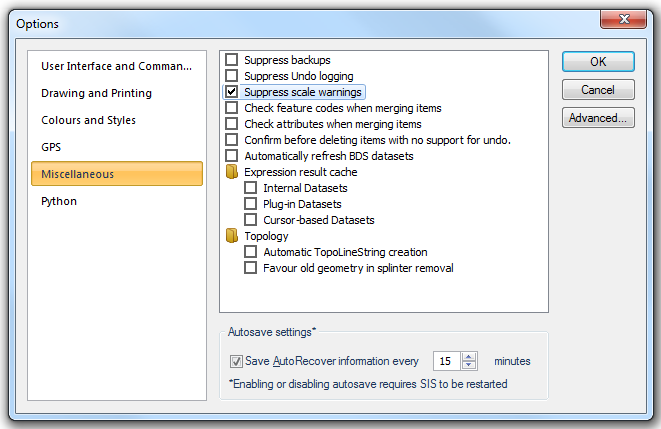
If you do not wish to see the scale warning go to the Options dialog, Miscellaneous tab, and check the - Suppress scale warnings tickbox:
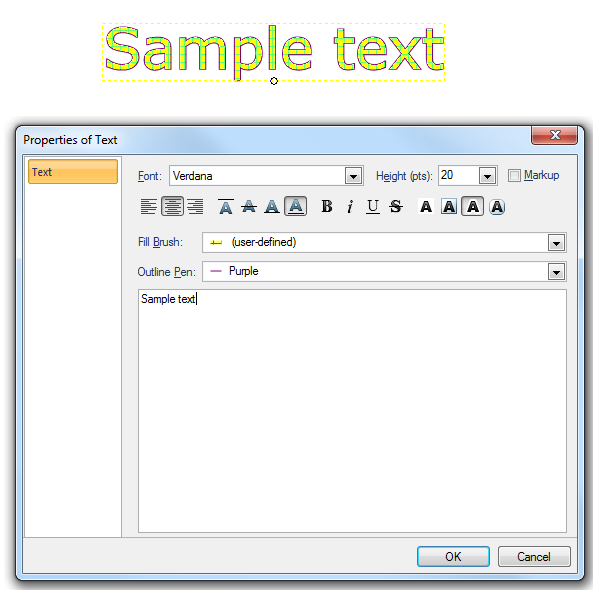
- Select Point [Create-Text], the Properties of Text dialog will be displayed:

- Select the Outline Text button (red ringed above):
- Set the following properties as required (any of these can be changed later):
- font
- height in points
- left, centre or right justified
- vertical alignment: top, middle, baseline or bottom
- style: any combination of bold, italic, underlined, opaque, box (and outline if creating Outline Text).
- The text is displayed in the preview box in simplified form, but it will use the selected properties when the completed outline text item is placed in the map window.
- In the Fill Brush drop-down box select the required brush. Brush colour, fill, pattern, transparency and the normal advanced settings are available. User-defined brushes may also be defined. The facility of copying and pasting the brush specification in JSON is also available.
- In the Outline Pen drop-down box select the required pen. Pen colour, dash style, width, offset, transparency and the normal advanced settings are available. User-defined and Multi-level pens may also be defined. The facility of copying and pasting the pen specification in JSON is also available.
Note: it is recommended that where the Width (mm), in the Edit Pen dialog, is set to a value other than 0 that the round Line Caps radio button is selected as square end caps will cause the text to have a jagged appearance.
- Type in the required text, press the Enter key for a new line. You can also paste text into this box using the Ctrl+C/Ctrl+V key combination, or Paste on the local menu.
- Click OK when you have finished entering text. The text item is attached to your cursor. If the display scale allows it, you will see a box indicating the size the text item will be.
- Click the screen position where you want to place the alignment point of the text item.
- Either:
- press Enter to place the text string horizontally.
- click a second point, which defines the angle of rotation of the text.
- If you cannot see the text item on the screen, it is because it is too small or too large for the current display scale, Zoom Selection [Home-View] will display it. You may have to redraw your screen (Redraw All Windows [View-Window] or F5) before the text appears.
Height of point text
Point text height is set in point sizes, same as text in word-processing. There are 72 points to the inch. One point is approximately 0.01389 inches, or 0.353 millimetres.
Note: the outline of the text will increase the text height by the amount of the specified width.
Height of point text and dataset scale
Point text always appears at the same size (its point size). If you change the dataset scale, the size of the point text will change. Dataset scale does not affect other text types, such as Box Text, Box Label and Line Text.
To give point text a fixed screen height
Point text with a fixed screen height remains the same height (in pixels) on the screen, no matter how much you zoom in or out. Fixed height text (or “zoom independent text”) is useful in such circumstances as labelling a KeyMap, or labelling symbols.
Note: To make your point text fixed height, use a negative value in the Height (pts) box. For example, a value of -10 would produce text at point height 10, irrespective of dataset scale.
Example
The following is an example of Point Text outline text:
Note: If a multi-level pen is used the brush will overlay the pen along its centre-line. Therefore the entire pen line width will not be shown:
the outline of this character is defined as wide black overlaid with narrow red:
Back to top of Page
Box Text - Outline Text
- Select Box [Create-Text], the Properties of Box Text dialog will be displayed:
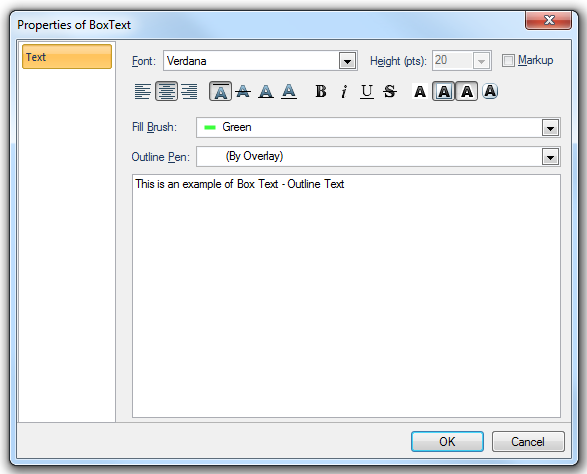
- Choose the properties, these are as for point text, except for the height, which is not available.
- In the Fill Brush drop-down box select the required brush. Brush colour, fill, pattern, transparency and the normal advanced settings are available. User-defined brushes may also be defined. The facility of copying and pasting the brush specification in JSON or XML is also available.
- In the Outline Pen drop-down box select the required pen. Pen colour, dash style, width, offset, transparency and the normal advanced settings are available. User-defined and Multi-level pens may also be defined. The facility of copying and pasting the pen specification in JSON or XML is also available.
Note: it is recommended that round end caps are selected in the Edit Pen dialog as square end caps will cause the text to have a jagged appearance.
- The text is displayed in the preview box in simplified form, but it will use the selected properties when the completed text item is placed in the map window.
- Type in the required text, press the Enter key for a new line. You can also paste text into this box using the Ctrl+C/Ctrl+V key combination, or Paste on the local menu.
- Click OK when you have finished entering text. The box text item is now attached to the cursor. If the zoom factor allows it, you will see a rectangular box on the cursor which is of a size sufficient to encompass the text item.
- Click the screen position where you want to place the text. The Box Text’s alignment point will be placed here.
The alignment point is indicated by a butterfly shape.
Box text height
The height of box text is set in real world units. For example, box text set to a height of 2.5 metres will appear the same size as a graphical item which measures 2.5 metres.
After selecting box text, you can change its size in one of two ways:
- you can change the Character Height property (using Properties [Home-Selection]). The height can be set to any value (in metres).
- you can visually re-size the box text item by holding the Ctrl key down while dragging any of the handles
Back to top of Page
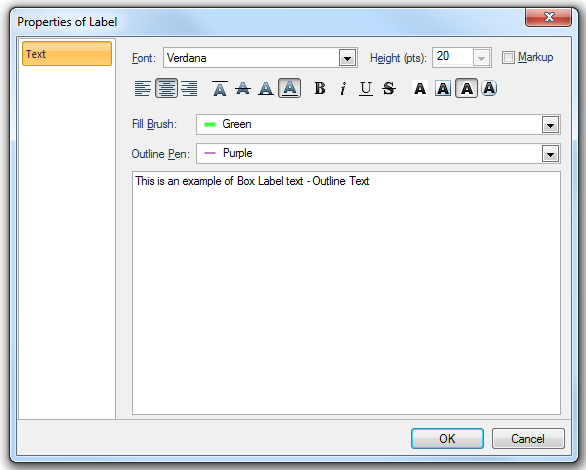
Box Label - Outline Text
-
- Enter the required properties (these are the same as for Box Text).
- In the Fill Brush drop-down box select the required brush. Brush colour, fill, pattern, transparency and the normal advanced settings are available. User-defined brushes may also be defined. The facility of copying and pasting the brush specification in JSON or XML is also available.
- In the Outline Pen drop-down box select the required pen. Pen colour, dash style, width, offset, transparency and the normal advanced settings are available. User-defined and Multi-level pens may also be defined. The facility of copying and pasting the pen specification in JSON or XML is also available.
Note: it is recommended that round end caps are selected in the Edit Pen dialog as square end caps will cause the text to have a jagged appearance.
- The text is displayed in the preview box in simplified form, but it will use the selected properties when the completed text item is placed in the map window.
- Type in the required text, press the Enter key for a new line. You can also paste text into this box using the Ctrl+C/Ctrl+V key combination, or Paste on the local menu.
- Click OK when you have finished entering text.
- You will now see a box attached to the cursor. Click where you want the label line to start (P1 in the following diagram).
- You will now see a label line rubberbanding from this point, connected to a box. Click the position for the alignment point of the text (P2):

The label line is drawn using the Styles toolbar pen.
When selected, label text is displayed with a box around it (like box text), with handles at the corners, mid-points and centre. A butterfly shape is displayed at the current alignment point.
Label text height
The height of label text is set in real world units (same as box text). For example, label text set to a height of 2.5 metres will appear in proportion to the surrounding graphics.
After selecting label text, you can change its size in one of two ways:
- you can change the Character Height property (using Properties [Home-Selection]). The height can be set to any value (in metres).
- you can visually re-size the label text item by holding the Ctrl key down while dragging any of the handles.
Back to top of Page
Line Text - Outline Text
Line text is constructed to follow a single or multi-segment straight LineString item or a curved LineString.
- Select the LineString item along which you intend to construct the text.
- Select Line [Create-Text], the Properties of LineText dialog will be displayed:
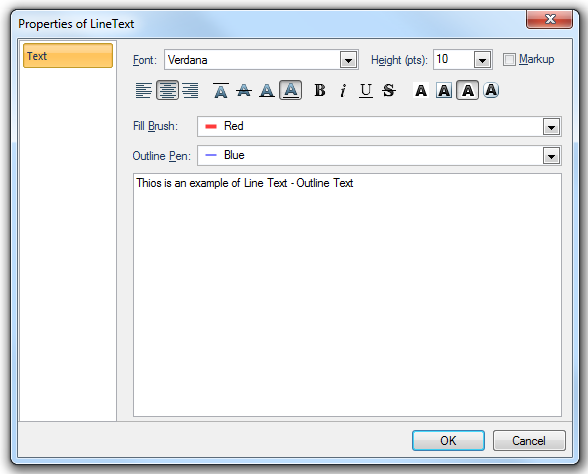
- In the Properties of LineText dialog, enter the same properties as for Point text.
- In the Fill Brush drop-down box select the required brush. Brush colour, fill, pattern, transparency and the normal advanced settings are available. User-defined brushes may also be defined. The facility of copying and pasting the brush specification in JSON is also available.
- In the Outline Pen drop-down box select the required pen. Pen colour, dash style, width, offset, transparency and the normal advanced settings are available. User-defined and Multi-level pens may also be defined. The facility of copying and pasting the pen specification in JSON is also available.
Note: It is recommended that round end caps are selected in the Edit Pen dialog as square end caps will cause the text to have a jagged appearance.
- The text is displayed in the preview box in simplified form, but it will use the selected properties when the completed text item is placed in the map window.
- Type in the required text, press the Enter key for a new line. You can also paste text into this box using the Ctrl+C/Ctrl+V key combination, or Paste on the local menu.
- Click OK when you have finished entering text.
- The text is placed along the selected line, using the current alignment setting.
- Even spacing of the letters along the length of the line can be toggled on/off.
To do this select the line and select Properties from the local menu.
Even spacing can then be set to True or False in the Properties of LineText dialog All tab.

Top of Page
Send comments on this topic.
Click to return to www.cadcorp.com
© Copyright 2000-2017 Computer Aided Development Corporation Limited (Cadcorp).